
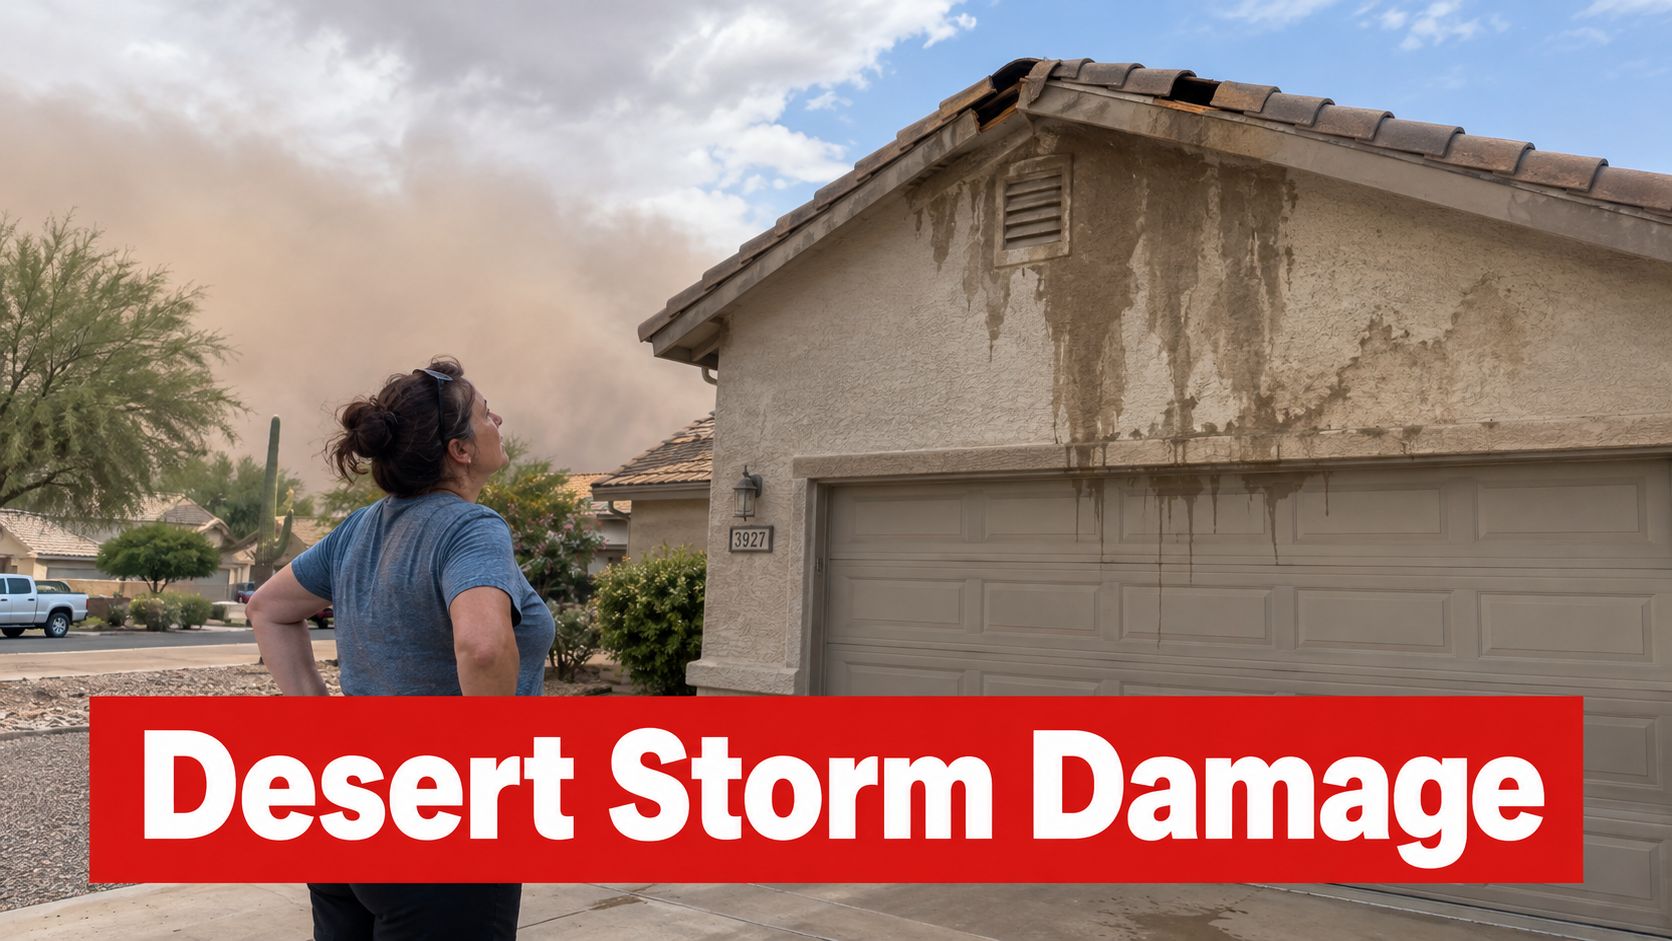
A Chandler homeowner steps outside after a July dust storm and finds two ridge caps in the driveway. Inside, a dark stain is spreading down the drywall below the roof peak. The damage looks small from the ground, but the ridge is where the roof's highest exposed seam, weather barrier, and ventilation path meet.
That combination makes roof ridge repair especially important across Phoenix, Scottsdale, Tucson, Mesa, and surrounding Arizona communities. Extreme sun, heat cycling, and monsoon winds can turn a loose cap into a leak, a ventilation failure, or evidence of movement in the roof structure. The right repair starts by identifying which of those problems is present.
Table of Contents
- Why Roof Ridge Repair Hits Arizona Homes Harder
- How to Inspect a Roof Ridge Safely
- Common Ridge Types on Arizona Roofs
- Step-by-Step Repair Procedures by Ridge Type
- Roof Ridge Repair Costs in Arizona for 2026
- When the Ridge Itself Is the Problem
- Hiring a Pro, Warranties, and Arizona-Specific Tips
Why Roof Ridge Repair Hits Arizona Homes Harder
After a desert storm, ridge damage often appears dramatic because the highest parts of the roof take the first direct wind exposure. Mortar-set tile can loosen, asphalt ridge shingles can crack or lift, and metal caps can pull away around fasteners. A homeowner may see only displaced material, while water has already reached the underlayment or roof decking.
Arizona's ultraviolet exposure gradually dries and weakens asphalt materials. Shingles can crack along the bend line where they conform to the ridge, especially when repeated heating and cooling make the material less flexible. Metal caps face a different problem. Thermal movement can enlarge fastener holes and loosen the connection between the cap, flashing, and roof surface.
Practical rule: A ridge cap that looks cosmetic from the street can still be protecting the roof's most exposed weather barrier.
The ridge also controls how attic air leaves the building when the roof uses a ridge vent. A damaged or blocked vent can allow moisture and heat to remain trapped, while a sealed cap installed over a vented system can eliminate the intended exhaust path. The result may show up as a leak, uncomfortable rooms, or higher cooling demand rather than an obvious missing cap.
Why local conditions change the repair
Arizona's monsoon wind events expose weak fastening, poor edge detailing, and deteriorated mortar. Tile repair guidance recommends calculating connection-specific uplift loads instead of relying on generic assumptions. In general roof areas, tabulated uplift requirements for tile connections can rise from 0.23 kN at specified rafter and batten spacing to 0.50 kN near edges, while roof-framing uplift forces can reach 5.0 kN in the largest load-width band. Those figures come from storm-damaged tile roof repair guidance, and they illustrate why ridge work must account for the complete load path.
Wind research also identifies ridge tiles as high-risk components. Ridge tiles reached a peak net negative pressure coefficient of -1.70 at a 60° wind direction, compared with -1.45 for hip tiles, while measured uplift resistance averaged 283 lb for concrete tile and 397 lb for clay tile in the cited experiments. The findings support mechanical restraint rather than mortar alone, as documented in the tiled-roof wind-loading research.
A mild-climate roof may experience gradual aging at the ridge. An Arizona roof often faces heat fatigue and sudden wind loading together. That's why a small-looking ridge defect deserves a structural and ventilation check, not just a bead of sealant.
How to Inspect a Roof Ridge Safely
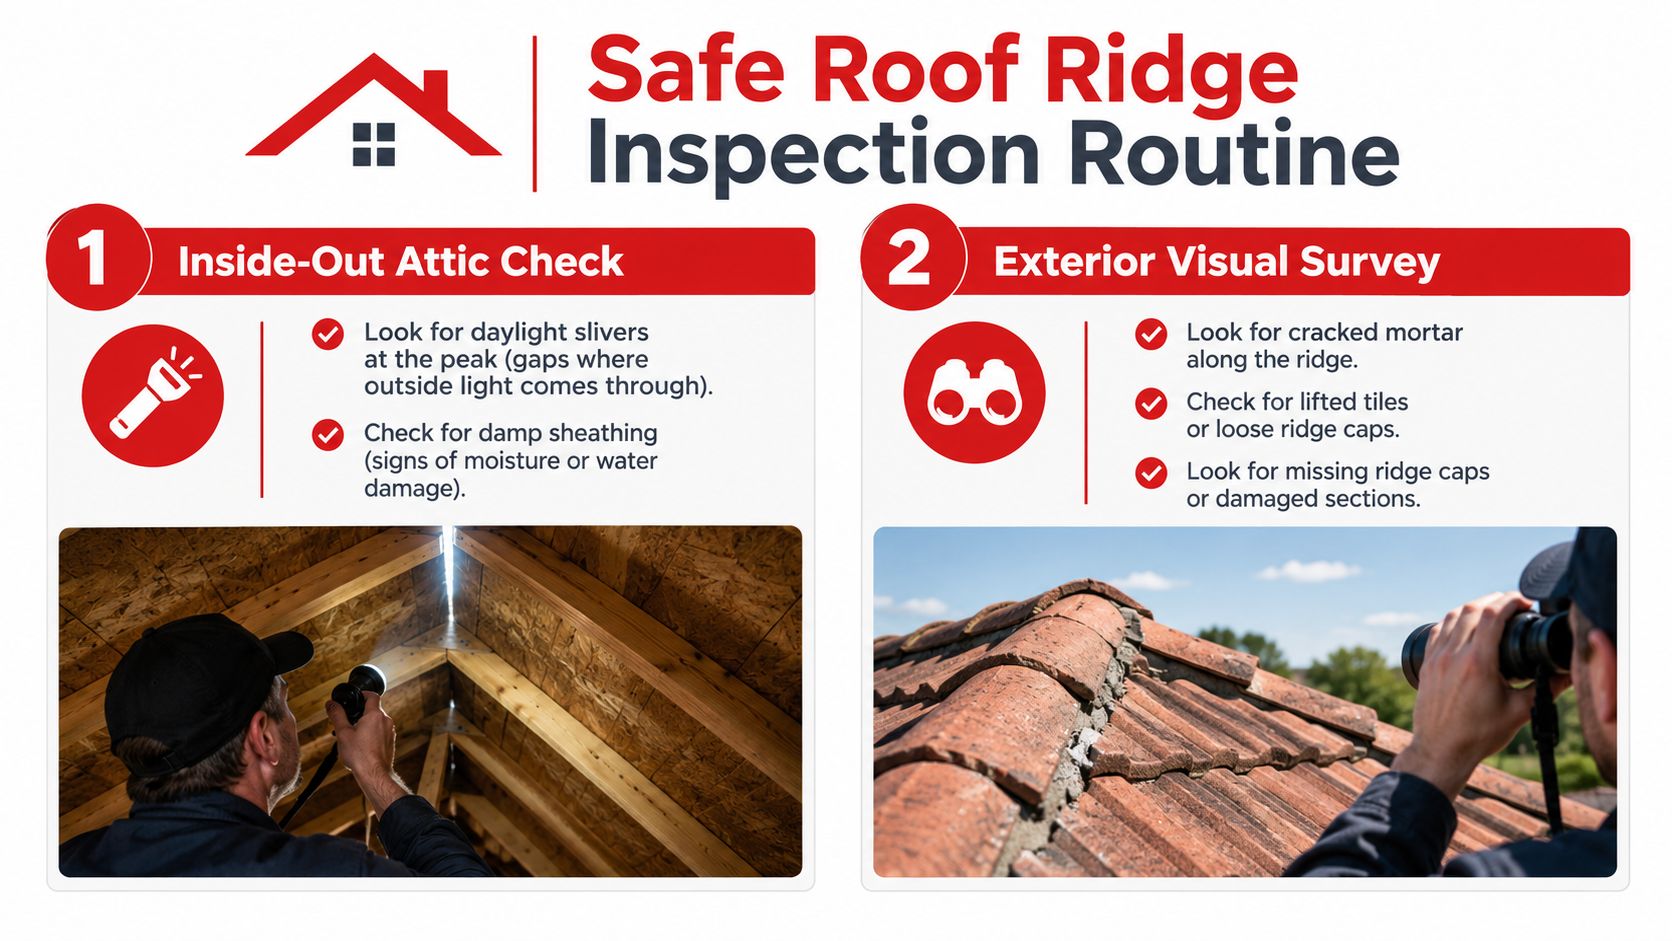
A homeowner can perform a useful first inspection without walking across the roof. The safest routine starts inside the attic, then moves outside to a ground-level visual survey. The purpose isn't to diagnose every defect. It's to decide whether the ridge needs routine service, urgent protection, or professional evaluation.
Start inside the attic
Choose a dry period and use a bright flashlight. Look along the peak for daylight slivers, damp sheathing, darkened wood, rusted nail points, or insulation that has been pushed away from the ridge line. Dampness around a ridge vent can indicate damaged flashing, blocked ventilation, or underlayment failure beneath an apparently intact cap.
A musty smell, wet insulation, or fresh staining deserves attention even if the ceiling below looks clean. Water can travel along framing before it appears indoors. Homeowners who want a broader checklist can review this roof inspection guide before starting.
Survey the exterior from the ground
Use binoculars from several sides of the property. Check whether the ridge line looks straight, whether caps are missing or displaced, and whether tile pieces appear cracked or shifted. Pay attention to exposed nail heads, open seams, missing mortar, and metal flashing that has pulled away after wind.
A ladder should only be used by someone confident with stable placement and safe footing. It shouldn't become an invitation to step onto brittle tile or steep shingles. Arizona's workmanship standards require ridges and hips to be straight, uniform, and secured, making alignment a repair checkpoint rather than a cosmetic preference. The Arizona workmanship standards provide that benchmark.
Stop when the roof shows danger signals
A homeowner should stop inspecting and call a qualified roofer when any of these conditions appear:
- Sagging ridge line: A dip or wave may indicate framing or decking movement.
- Soft roof areas: Spongy footing can signal water-damaged sheathing.
- Active leaking: Electrical fixtures, wet insulation, and spreading ceiling stains create immediate risks.
- Critter entry: Open ridge gaps can allow animals into the attic and may indicate broader displacement.
- Major tile movement: Loose tile can fall during inspection or the next wind event.
A short visual check before the pre-monsoon period in May, followed by another after major storms during August and September, gives homeowners a practical maintenance rhythm. The check takes about a minute when limited to the attic peak, roofline, and visible caps, but it can reveal whether a small repair has become a larger problem.
Common Ridge Types on Arizona Roofs
Phoenix and Tucson homes generally use one of four ridge configurations. Material choice affects how the ridge fails, how it should be fastened, and whether the repair should preserve or modify ventilation.
| Ridge Type | Material Profile | Typical AZ Failure Mode | Best Fit for Arizona |
|---|---|---|---|
| Standard asphalt ridge caps | Basic asphalt units used on common shingle roofs | UV cracking, lifted caps, exposed fasteners, and seal failure | Suitable for compatible asphalt systems when properly fastened and ventilated |
| Dedicated hip-and-ridge shingles | Thicker purpose-made units designed for hips and ridges | Heat fatigue, wind lift, and poor matching during spot repairs | Better fit than cut field shingles for durable shingle installations |
| Mortar-set concrete or clay tile | Heavy tile components with mortar bedding or mechanical attachment | Brittle tiles, cracked mortar, and wind uplift when mechanical restraint is missing | Strong Southwest appearance, but requires careful fastening and compatible underlayment |
| Standing-seam or exposed-fastener metal caps | Formed metal with seams, clips, or exposed fasteners | Loose fasteners, failed slip joints, enlarged holes, and flashing separation | Long service potential when the cap and flashing system are compatible |
A standard three-tab or laminate ridge cap may cost less to replace, but it has less tolerance for Arizona's relentless ultraviolet exposure than a purpose-made hip-and-ridge unit. Dedicated units also make it easier to maintain consistent exposure and fastening across the ridge.
Tile presents a different trade-off. Clay and concrete can deliver the appearance many Arizona homeowners want, but the pieces are brittle and the ridge sits in a high-uplift zone. Mortar can fill gaps and support alignment, yet mortar alone shouldn't serve as the primary wind restraint.
Metal caps can perform well in desert conditions, but only when the installer respects thermal movement. A rigid, caulk-heavy repair often cracks or pulls apart as the metal expands and contracts. Proper clips, seams, compatible flashing, and fastening matter more than a thick surface bead.
The most overlooked decision is whether the ridge should remain vented or become sealed. The sections of a roof guide helps homeowners identify the ridge, vent, flashing, and underlayment components before discussing that choice with a contractor. A sealed cap may stop a visible opening, but it can also block designed attic exhaust. The correct solution depends on the complete intake and exhaust system, not just the cap material.
Step-by-Step Repair Procedures by Ridge Type
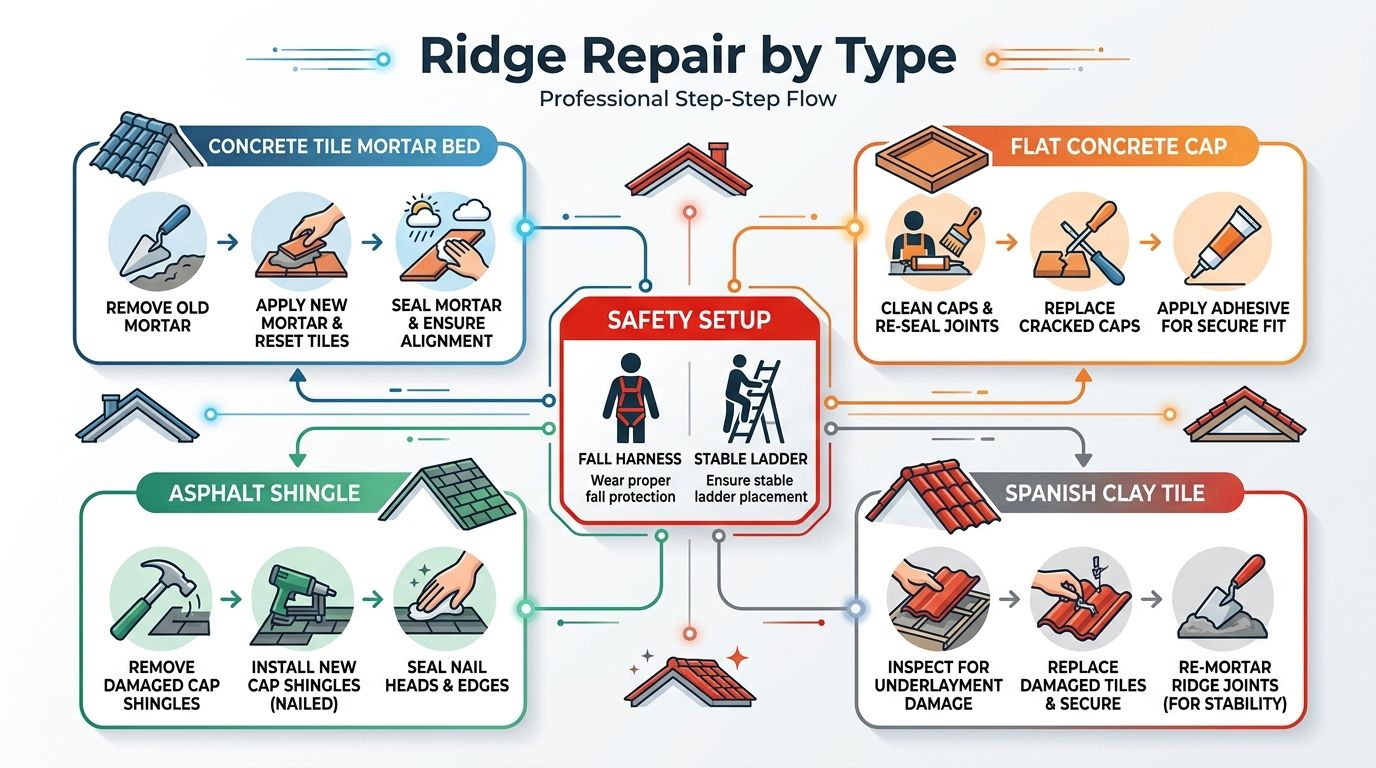
Roof work begins with access and fall protection, not with removing the first cap. A professional crew should establish a secure tie-off, position a stable ladder on the leeward side when conditions allow, and control tear-off debris so fragments don't slide into landscaping, driveways, or neighboring property. Homeowners shouldn't attempt ridge work during heat, wind, or wet conditions.
Asphalt ridge caps
For a compatible asphalt system, the repair sequence usually involves removing damaged caps and lifting the course above enough to release the nailing flange without damaging sound shingles. New caps are then aligned with the manufacturer's exposure requirements and secured with two 1.25-inch galvanized roofing nails per cap when that fastening pattern matches the product and roof assembly.
Exposed nail heads need a high-grade asphalt sealant rated above 190°F. Sealant doesn't replace correct placement or fastening. It protects the penetration after the cap has been secured.
Purpose-made hip-and-ridge shingles follow the same general process, but they shouldn't be replaced with improvised cut pieces when the roof uses a dedicated system. A 5-inch exposure is part of the specified installation approach in the planned repair method, so inconsistent exposure can leave the ridge uneven and vulnerable.
Tile ridge repair
Tile work belongs with a qualified roofing professional because the repair involves fragile materials, fall exposure, and load transfer. The installer should remove unstable pieces carefully, inspect the underlayment and supporting areas, install compatible closures where required, and use two-screw mechanical fasteners per tile when the system calls for that attachment.
Mortar may still serve an alignment or weather-sealing function, but mortar-only bedding isn't a reliable substitute for mechanical restraint in a high-wind Arizona setting. The installer should also check nearby hip connections and edge zones because ridge movement can coincide with broader uplift weakness.
Metal ridge caps
Metal repair requires more than covering a gap with caulk. The installer should inspect slip joints, clips, fasteners, and the condition of the flashing beneath the cap. Butyl tape may need to be reseated or replaced where the joint has separated, while the cap must retain room for normal thermal movement.
Arizona workmanship standards also prohibit improper flashing and specify that vents or other penetrations shouldn't be placed within 18 inches of a valley centerline, as stated in the state roof workmanship requirements. That checkpoint matters when ridge-adjacent repairs intersect with nearby penetrations.
Code and leak details
A contractor should identify the applicable high-wind nailing pattern under IRC R905 rather than applying a generic fastening habit. The planned deck-fastener inspection checkpoint, described as statewide R-30 guidance in the project scope, should also be clarified in writing because code applicability depends on the roof assembly and jurisdiction.
Ridge leaks can overlap with nearby wall, chimney, or penetration flashing failures. For a separate explanation of how to fix flashing leaks, homeowners can review the flashing-focused resource before assuming the ridge cap is the only source.
Roof Ridge Repair Costs in Arizona for 2026
For 2026 budgeting, national cost guidance places many homeowner ridge repair projects around $200 to $750, with a typical average near $475. Common pricing is about $6 to $10 per linear foot, increasing to $10 to $14 per linear foot for vented ridge caps. On a standard gable roof with roughly 60 feet of ridge, those rates imply about $475 for a basic ridge cap repair and around $720 for a vented ridge cap replacement. These figures come from the 2026 roof ridge repair cost guide.
| Ridge Type | Cost per Linear Foot | Typical Total Job | Main Cost Driver |
|---|---|---|---|
| Asphalt ridge cap | About $6 to $10 | About $200 to $750 for many projects | Labor, access, tear-off, and matching materials |
| Vented ridge cap | About $10 to $14 | Around $720 for the stated 60-foot example | Vent replacement, underlayment, and airflow detailing |
| Tile ridge | Project-specific | Varies substantially with tile and structural findings | Specialized labor, fastening, and fragile material handling |
| Metal ridge cap | Project-specific | Depends on cap length, seams, and flashing condition | Fabrication, clips, slip joints, and compatible flashing |
Labor represents about 60% to 80% of the total in many cases, and an inspection commonly adds $125 to $350, according to the same cost guide. A low material price doesn't necessarily mean a low final invoice if access is difficult or the crew finds damaged decking.
A quote should separate inspection, tear-off, replacement material, fastening, sealant, vent work, decking allowance, cleanup, and warranty terms. Homeowners can compare bids more fairly by asking every contractor to measure the same ridge length and state whether the proposal covers a vented system or a sealed cap.
Insurance is usually a separate question from price. Sudden documented wind damage may qualify under a policy, while age, ordinary deterioration, and heat cracking generally fall outside storm coverage. Dated photographs and an itemized scope help the carrier distinguish storm impact from long-term wear.
For broader budgeting context, homeowners can review this roofing cost guide while treating the ridge estimate as a component of the full roof system.
When the Ridge Itself Is the Problem
A new cap won't correct a roof frame that has moved. Re-capping a sagging ridge can hide the symptom, trap moisture against damaged sheathing, and leave the homeowner paying twice for access and materials.
From the street, a healthy ridge should read as a consistent line. A dip, peak, or wave deserves a closer look, especially when it appears with interior ceiling cracks that return after patching, doors that suddenly stick on one side of the house, or daylight visible at the attic peak.
Signs of structural movement
Arizona homes can develop ridge problems from several causes. An original tract-home design may have an undersized ridge beam. Prolonged attic heat can contribute to cracking or splitting in a ridge board, while truss uplift and inadequate diagonal bracing can create movement between the roof framing and interior partitions.
These possibilities can't be confirmed from the driveway. An attic inspection should check the ridge board or beam, truss connections, collar ties, bracing, roof decking, moisture sources, and any signs that the roof has spread. The inspector should also determine whether a leak caused the movement or whether movement opened the path for water.
Surface repair is appropriate only after the underlying ridge has been shown to remain stable.
The engineered repair path
When framing is compromised, a licensed structural contractor or engineer may need to specify the repair. Depending on the finding, the work can involve sistering a new ridge board, adding collar ties, or sistering broken truss members with gusset plates. A sagging structure may require temporary jacks and slow, incremental lifting over several days instead of a quick adjustment.
Before accepting a ridge quote, the homeowner should ask whether the contractor inspected the attic side, documented the cause of movement, checked moisture, and included permanent reinforcement where needed. If water is already entering the living space, a homeowner can use this guide to stop a roof leak inside the home as a temporary response while arranging a professional repair. Temporary measures don't replace structural diagnosis or permanent weatherproofing.
Hiring a Pro, Warranties, and Arizona-Specific Tips
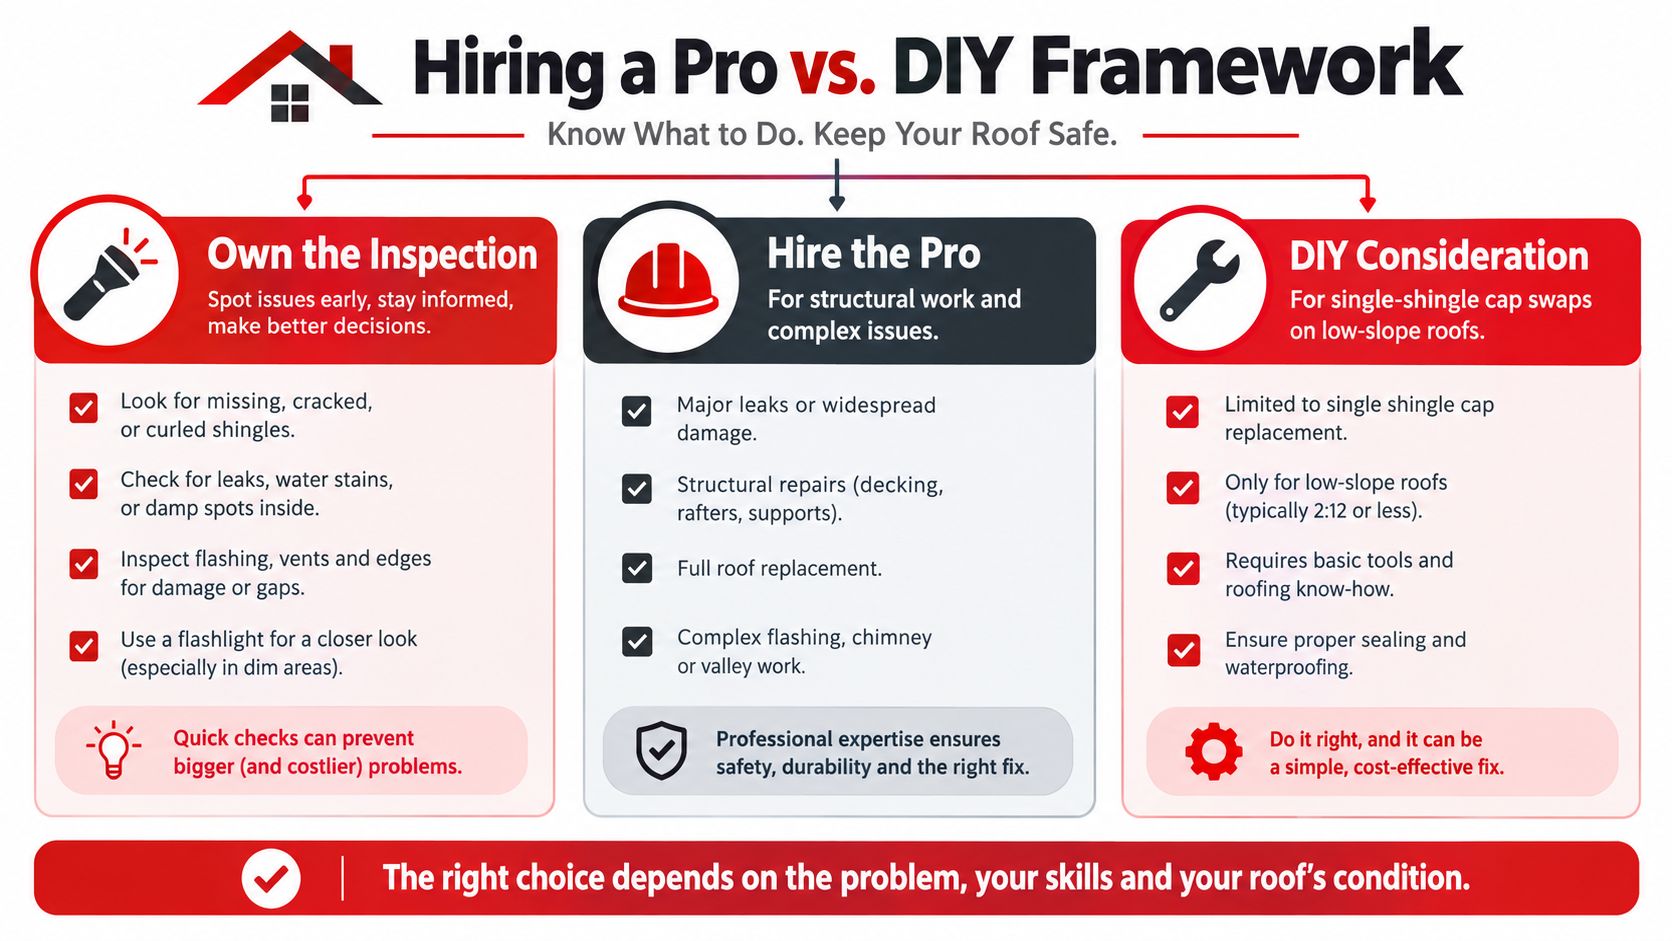
The DIY decision should follow the risk, not the apparent size of the defect. A homeowner can handle a ground-level inspection and photograph visible damage. A single-cap swap might be reasonable on a low-slope, easily accessible roof for someone with the right tools and safety knowledge. Tile work, steep access, active leaks, sagging, framing movement, and metal seam repairs belong with a qualified professional.
Vet the contractor before work begins
Arizona homeowners should verify the contractor's ROC licensing status and request proof of workers' compensation and general liability coverage. Three local references involving similar materials, such as tile, asphalt shingles, or metal, can reveal whether the crew understands the roof system rather than just replacing visible pieces.
The written scope should identify:
- Ridge material: Specify the exact cap, tile, shingle, or metal profile.
- Ventilation plan: State whether the ridge remains vented, gets repaired, or becomes sealed.
- Fastening method: Describe screws, nails, clips, or other mechanical attachments.
- Decking allowance: Explain how damaged sheathing will be handled if discovered.
- Documentation: Require photos before, during, and after the repair.
- Warranty terms: Separate manufacturer coverage from workmanship coverage.
Manufacturer warranties often treat ridge caps as part of a larger roofing system rather than as an independently covered component. Upgraded system warranties may require certified installation, so the contractor should identify which labor and material conditions apply before work starts.
Match materials to desert exposure
Class 4 impact-rated shingles can be considered where the roof design and budget support them. Cool-roof-rated ridge caps may help reduce heat absorption, while tile systems benefit from compatible underlayment and mechanical attachment details. Metal ridge caps should use galvanized or aluminum finishes selected for desert ultraviolet exposure and expected thermal movement.
Ventilation must be designed as a system. The residential code baseline uses net free ventilating area of 1/150 of attic floor area, with reduction to 1/300 only when low and high openings are balanced, as summarized in this Arizona attic ventilation guide. Upper ventilators should be no more than 3 feet below the ridge or highest point under the cited building code provision.
A seasonal plan keeps decisions simpler: inspect before the May monsoon period, check the attic and roofline after major August or September storms, and keep dated photos for any insurance conversation. Arizona Roofers provides roof inspections, emergency repairs, roof replacements, photo and video documentation, and roofing work across Phoenix, Scottsdale, Tucson, Mesa, Chandler, and nearby communities.
Arizona Roofers can inspect the ridge, distinguish cap damage from ventilation or framing problems, and provide an itemized repair plan for tile, asphalt, or metal roofs. Visit Arizona Roofers or call (480) 531-6383 to schedule an Arizona roof ridge evaluation before the next monsoon exposes the same weakness again.