
A brown ceiling stain usually shows up after the damage has already started. In Arizona, that stain often appears after a monsoon push, a wind-driven rain, or a stretch of extreme heat that dried out old sealant and loosened metal at a roof transition. Homeowners in Phoenix, Mesa, Chandler, Scottsdale, Tucson, and across the Valley see the same pattern. The shingles still look decent from the ground, but water found a weak point where the roof changes direction or wraps around a penetration.
That weak point is usually flashing. It's the thin metal detail around chimneys, skylights, vent pipes, roof-to-wall joints, valleys, and edges. When it fails, water doesn't need much room to get in.
Table of Contents
- Your Guide to Fixing Roof Flashing Leaks
- How to Inspect Your Roof Flashing Like a Pro
- Choosing the Right Materials for Arizona's Climate
- DIY Flashing Repair and Resealing Techniques
- A Guide to Replacing Damaged Flashing Sections
- Costs Timelines and When to Call a Professional
- Preventive Maintenance and Warranty Guidance
Your Guide to Fixing Roof Flashing Leaks
A homeowner usually starts with the symptom, not the cause. There's a stain over the hallway, damp drywall near a fireplace chase, or a slow drip after a hard rain. The first instinct is to blame the field shingles or tile. Most of the time, that's not where the leak begins.
Failed or improperly installed roof flashing accounts for approximately 95% of all roof leaks, which is why flashing deserves more attention than most homeowners give it (roof leak data on flashing failures). On Arizona homes, that risk gets worse because metal expands in the heat, contracts overnight, and gets hammered by UV exposure month after month.
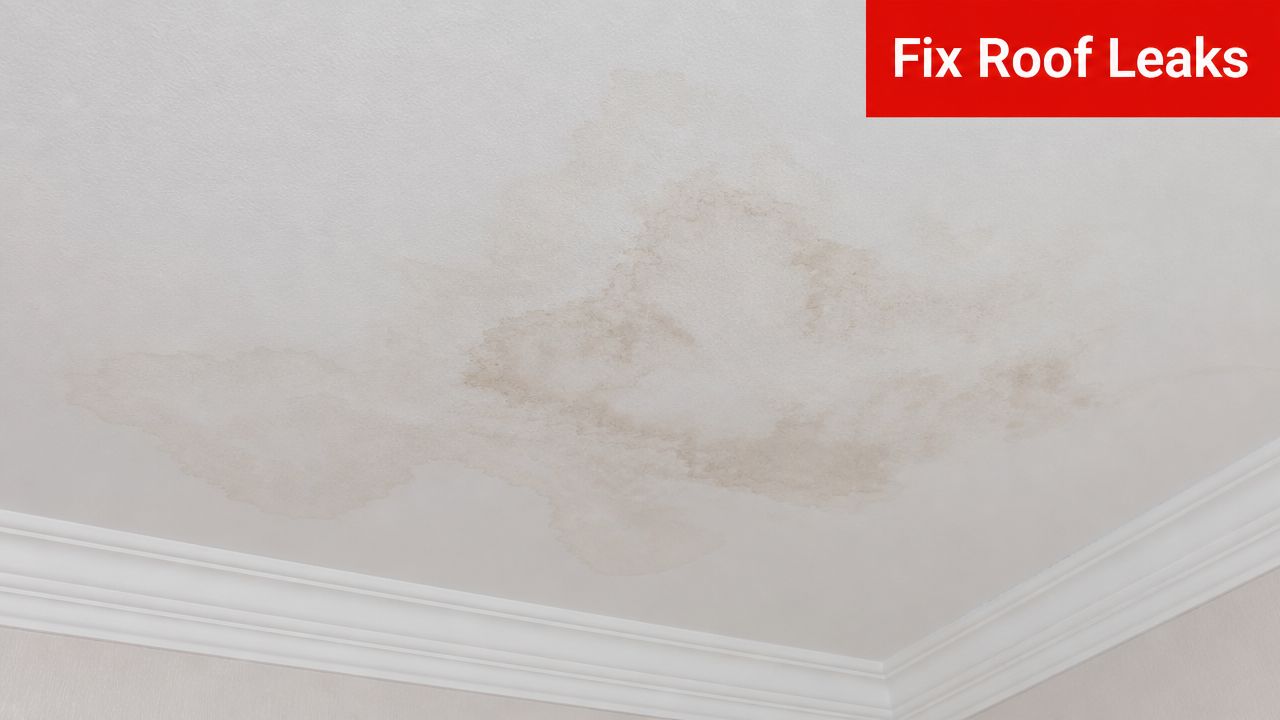
Where flashing usually fails first
The trouble spots are predictable:
- Chimneys and skylights: These details rely on layered metal pieces and clean transitions.
- Vent pipes: Rubber and sealant often fail before the surrounding roof does.
- Roof-to-wall joints: Step flashing has to shed water one course at a time.
- Valleys and edges: Fast-moving rainwater exposes any bad lap or loose fastener.
A lot of homeowners don't fully understand what flashing does until a leak shows up. A simple explanation of what flashing in construction does helps make the rest of the repair process easier to follow.
Practical rule: If the leak shows up near a penetration or where two roof surfaces meet, flashing should be the first suspect.
Why Arizona changes the repair approach
Arizona roofs don't fail the same way roofs fail in milder climates. Heat cooks sealant faster. UV breaks down exposed materials. Monsoon rain tests every overlap all at once, not gently over time. A small gap that might stay quiet elsewhere can turn into an interior leak fast here.
That's why roof flashing repair needs more than a smear of caulk and a quick glance from the ladder. The right fix depends on finding the exact failure point, knowing whether the metal still has structural life, and choosing a repair method that can survive the next hot season and the next hard storm.
How to Inspect Your Roof Flashing Like a Pro
Most bad flashing repairs start with a bad diagnosis. Water rarely drips straight down from the point where it entered. It travels along decking, under underlayment, and around framing before it finally shows up indoors. A good inspection has to be methodical.
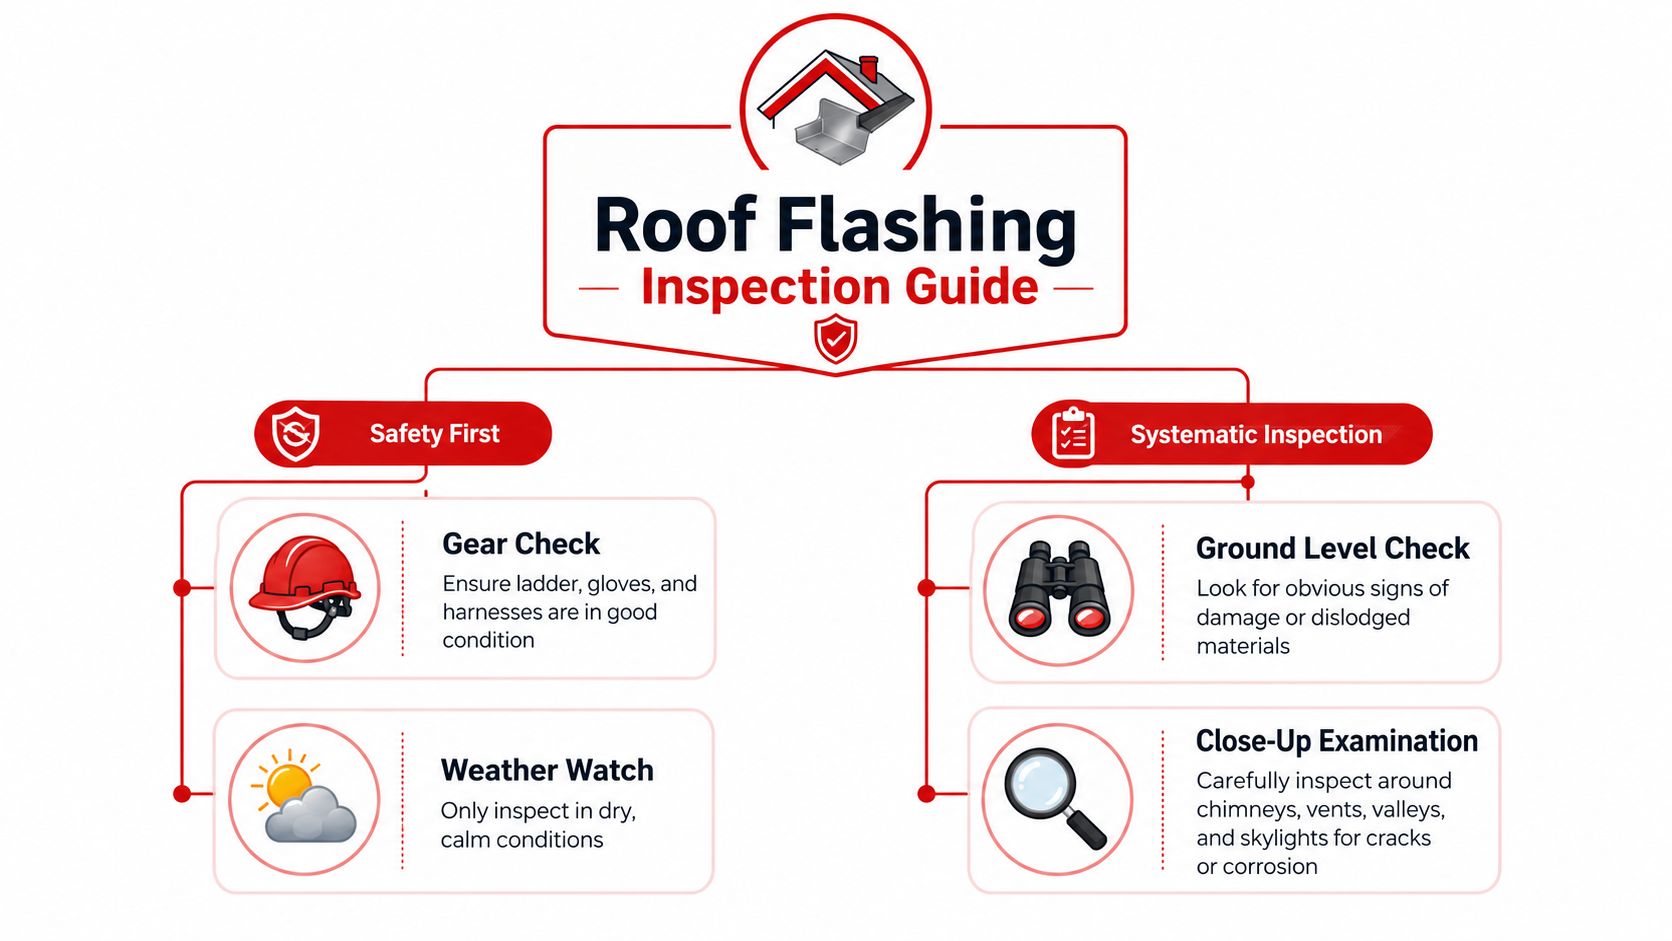
Start with safety and a ground check
Arizona roofs get dangerously hot. Midday inspection on a summer roof isn't just uncomfortable. It can be unsafe, and heat-softened roofing materials are easier to damage underfoot. Early morning, dry conditions, solid ladder setup, gloves, and good traction matter more than people think.
Before anyone climbs, a visual pass from the ground often reveals enough to narrow the search. Look for lifted metal, missing pieces, staining on stucco below a roof line, displaced shingles near walls, or rust streaks below flashing points. A more complete roof inspection guide for Arizona homes can help homeowners organize that first pass.
Check the four failure zones
Close-up inspection should focus on the places that leak most often.
Valleys
Debris buildup holds moisture and slows drainage. Look for corrosion, pinholes, open laps, or sealant smeared where sheet metal should have been properly overlapped.Roof-to-wall transitions
Step flashing should sit flat and layer correctly with each shingle course. Watch for lifted corners, exposed fasteners, cracked sealant lines, or pieces that were face-nailed in the water path.Chimneys and skylights
These areas fail when counterflashing separates, step flashing rusts, or old repairs trap water instead of shedding it. Interior staining around these details often points to hidden migration behind visible surfaces.Vent pipes and small penetrations
Small gaps at the top edge can leak for a long time before they're obvious. Homeowners who aren't sure what to look for inside the house can review common signs of a hidden water leak before opening drywall or blaming plumbing.
Water follows the easiest path, not the shortest one. The stain on the ceiling may be several feet away from the failed flashing.
Use a hose test the right way
Visual inspection alone misses a lot. Benchmark data indicates that roof flashing repairs involving proper hose-testing protocols achieve a 95%+ first-time success rate, whereas repairs relying solely on visual inspection fail 30–40% of the time due to hidden capillary water migration (hose-testing benchmarks for flashing leaks).
The method is simple but needs patience. One person stays inside in the attic or ceiling area with a flashlight. Another runs a garden hose on one section at a time, starting low and moving uphill. Hold water on each location for 10–15 minutes before moving higher. That sequence matters because spraying the whole roof at once hides the true entry point.
Choosing the Right Materials for Arizona's Climate
Material choice decides whether a repair lasts through a season or through years of Arizona heat. The cheapest metal on the shelf isn't always the cheapest repair in real life. If the flashing expands too much, corrodes early, or pairs badly with the roof system, the callback comes sooner.
On low-slope and flat roofs, drainage matters just as much as the flashing itself. Arizona's monsoon bursts require drainage systems to meet the ¼ inch per foot guideline, with ponding areas deeper than ½ inch after 24 hours marked for repair, as penetrations and flashing are the primary source of most flat roof leaks (flat roof drainage and flashing guidance in Arizona). That's why material selection has to match both the roof type and the way water moves across it.
What works best in desert conditions
Aluminum is common because it's easy to handle and reasonably priced. It works for many repairs, but it can deform more easily if it's thin or poorly supported. Galvanized steel is tougher, though it still needs proper detailing and maintenance to avoid corrosion at vulnerable points. Copper costs more, but it's a long-term option when the budget supports it and the roof detail justifies it.
Sealant matters too. In Arizona, a compatible polyurethane roofing sealant is the safer choice for exposed repair points because it handles movement better than bargain-grade products that dry out fast. The repair only holds if the surface is clean, dry, and structurally sound.
Flashing Material Comparison for Arizona Homes
| Material | Average Cost (Per Foot) | Typical Lifespan (AZ) | Best For |
|---|---|---|---|
| Aluminum | $15 to $40 | Varies by exposure, roof design, and installation quality | Standard residential repairs where corrosion resistance and lower cost matter |
| Galvanized steel | $20 to $45 | Varies by maintenance and coating condition | Areas needing more rigidity and impact resistance |
| Copper | $40 to $80+ | 50+ years | Premium homes, long-term ownership, and high-value detail work |
The trade-offs that matter
- Lower upfront cost: Aluminum usually keeps repair pricing down, but thin stock and poor fastening can shorten service life.
- More rigidity: Galvanized steel handles shape and support better on some details, especially where flashing needs to stay flat and firm.
- Longest-term value: Copper costs more up front, often significantly more, but it offers a long service life when installed correctly.
A roof in Phoenix doesn't face the same conditions as a shaded roof in a cooler region. Material movement, UV load, and monsoon runoff all punish weak details. A repair that ignores those conditions may look clean on day one and still fail early.
DIY Flashing Repair and Resealing Techniques
Some flashing problems are good DIY jobs. Some aren't. The hard part is knowing the difference before a small leak turns into deck rot.
The clean dividing line is structural condition. Sealing is only appropriate if the flashing is structurally sound with sealant failure only, whereas replacement is mandatory if rust penetrates more than 30% of the surface or if multiple sections are lifted (repair versus replacement guidance for damaged flashing). If the metal is warped, rusted through in a broad area, or loose in more than one place, caulk won't fix the underlying problem.
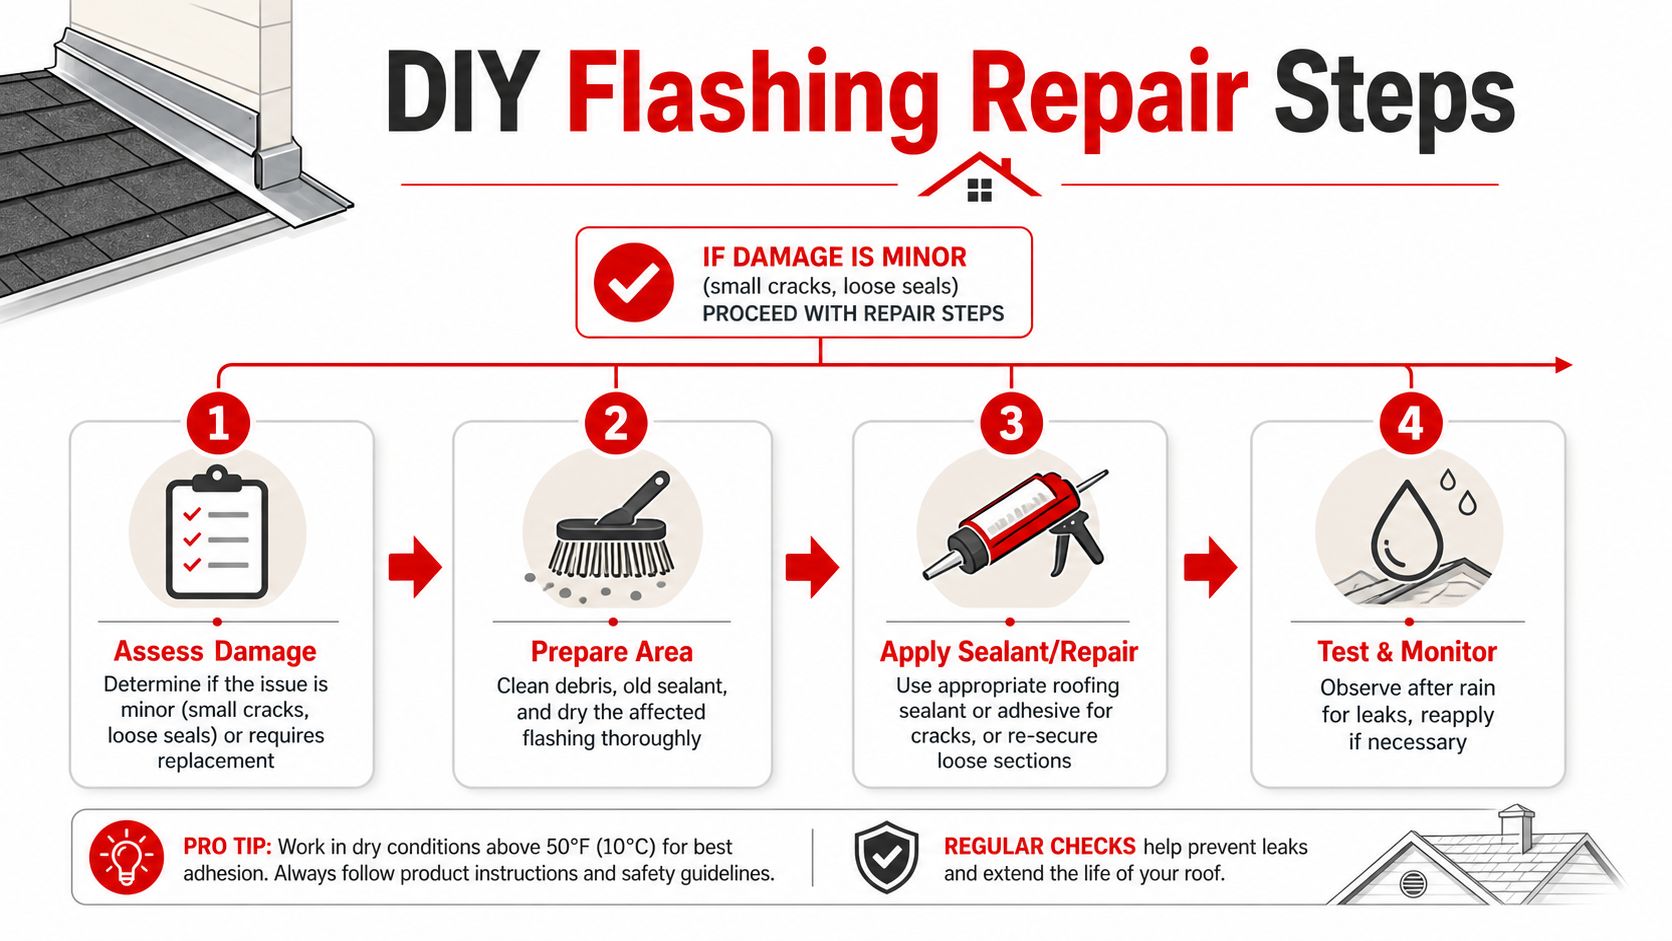
Good candidates for resealing
A homeowner can usually handle the job when the issue is limited to dried-out sealant, a small open edge, or a single exposed repair point on otherwise solid metal. The goal is to restore the water barrier, not build a sealant patch over failing components.
A practical product overview helps when choosing roof leak repair sealant for exterior use in Arizona conditions.
Basic repair sequence
Use a simple sequence and don't rush it.
- Remove failed sealant: Cut out brittle or separated material with a putty knife. Leaving loose sealant under new sealant weakens adhesion.
- Clean the substrate: Brush away rust, dirt, granules, and old asphalt residue. The bond is only as good as the surface under it.
- Dry the area completely: A damp surface traps failure under the new bead.
- Apply compatible sealant: Run a continuous bead where the original seal belongs, then tool it firmly into the gap.
- Seal exposed repair points only: Don't coat every seam on the flashing. Over-sealing can create its own problems.
A neat bead isn't the same thing as a sound repair. If the metal underneath has lost shape or strength, replacement is the honest fix.
Tools that actually help
Most small roof flashing repair jobs only need a short list:
- Putty knife and wire brush: For scraping out old material and cleaning metal.
- Gloves and eye protection: Rust flakes and old sealant debris are rough on hands and eyes.
- Caulk gun and polyurethane sealant: Use a roofing-grade product that stays flexible in heat.
- Flat bar: Helpful for checking whether a piece has lifted too far to trust.
- Rags or disposable wipes: Clean hands and tools often so the sealant goes where it should.
DIY work fails when homeowners try to seal over dirt, rust, or movement. If the metal still shifts after cleaning, the repair has moved beyond resealing and into replacement.
A Guide to Replacing Damaged Flashing Sections
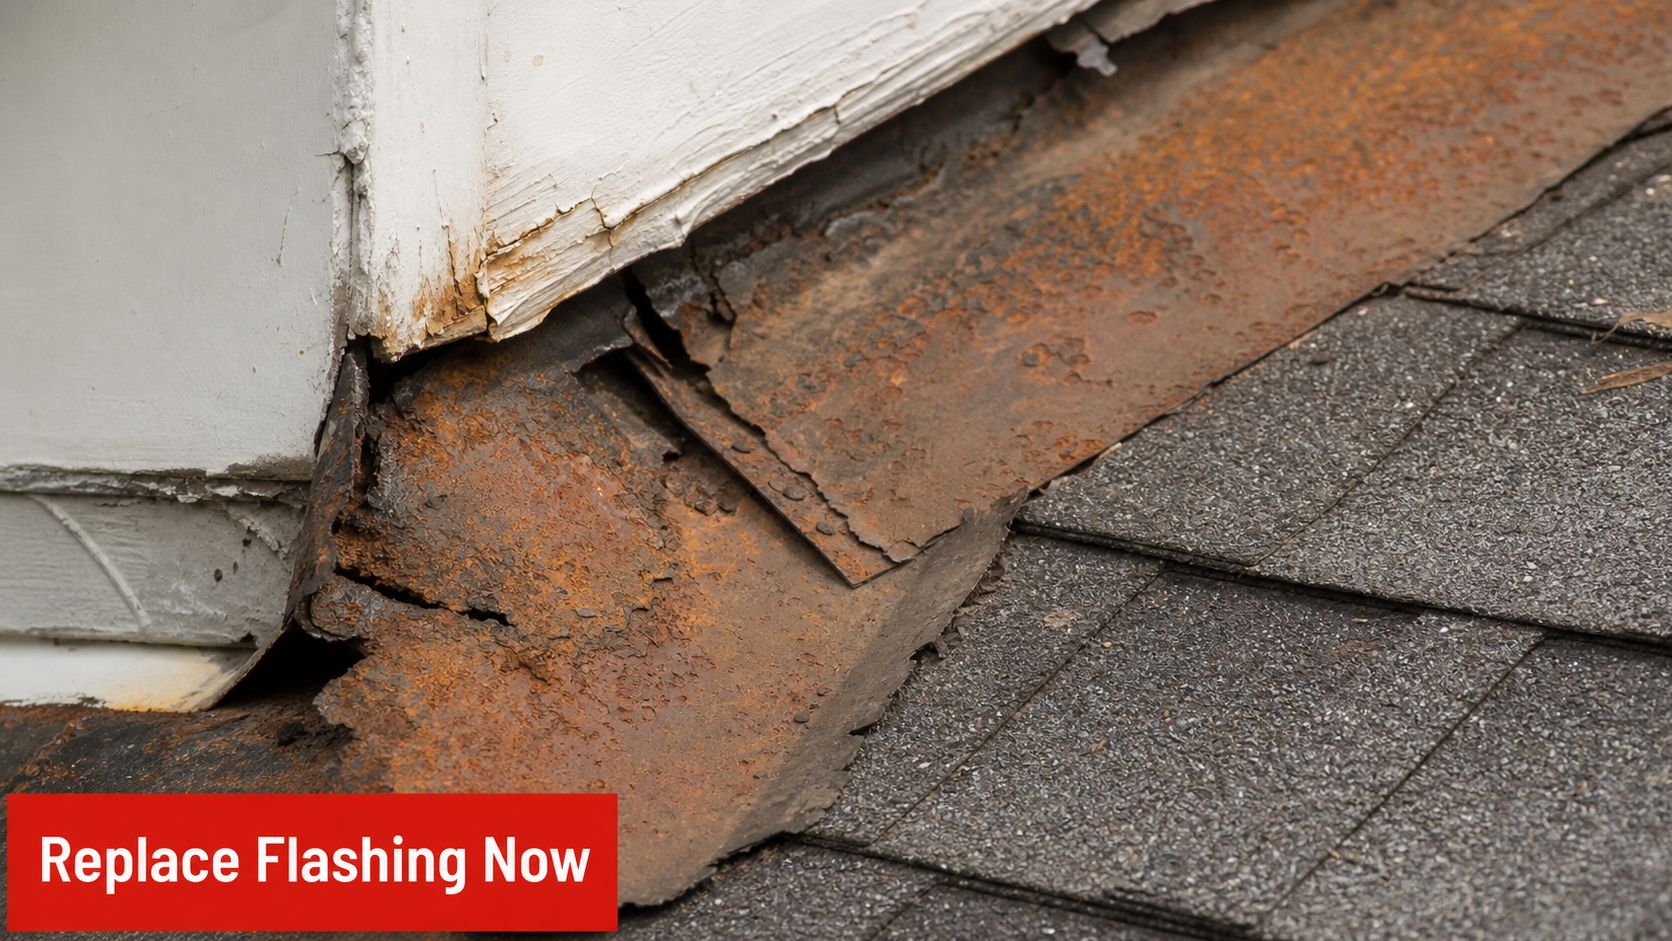
Once flashing loses structural integrity, replacement is the only repair worth doing. That usually means removing surrounding shingles or roofing material carefully, pulling the bad metal without damaging what can stay, and rebuilding the lap pattern so water sheds correctly.
This is the part of roof flashing repair where sequence matters more than force. Pulling pieces in the wrong order can tear surrounding material. Installing pieces in the wrong order can send water behind the repair on the first storm.
The bottom-up rule
Expert step-flashing repair methodology requires reinstalling new flashing from the lowest point upward to the highest point to guarantee proper interlayer overlap. When replacing a damaged piece, cut the new section roughly six inches larger than the removed piece to ensure a three-inch overlap on both the top and bottom (step flashing installation and overlap guidance).
That bottom-up sequence is what keeps water on top of the laps instead of driving it behind them. Top-down installation creates back-lapped conditions. Those often look acceptable until rain starts moving downhill and finds the reversed seam.
A practical replacement workflow
A disciplined process helps avoid creating new leaks.
Lift surrounding shingles carefully
Use a flat bar and patience. The goal is to expose fasteners and free the damaged section without tearing reusable shingles.Remove the flashing from the topmost affected piece downward
That removal order lets the installer see hidden damage and preserve the layering pattern for reconstruction.Inspect the substrate
If the deck feels soft, dark, or punky, the repair just got bigger. New metal over damaged wood is a temporary patch.Cut and test-fit the new piece
The replacement section needs enough length for proper overlap and enough width to shed water clear of the transition.Install from the lowest point upward
Each piece should lap the one below so gravity works with the repair, not against it.
Fastening and sealing details
Fastener placement matters. Nails should sit high enough that running water doesn't rest on them. Exposed nail heads need sealing at approved points, but the whole flashing assembly shouldn't be buried under sealant. Properly installed flashing sheds water by overlap and shape first, not by relying on a heavy coat of caulk.
For determined homeowners, replacing one accessible piece may be possible. Long runs of step flashing, chimney assemblies, tile transitions, and low-slope penetrations are a different level of work. Those details punish small mistakes.
Costs Timelines and When to Call a Professional
Most homeowners ask two questions right away. How much will this cost, and is this something worth doing alone?
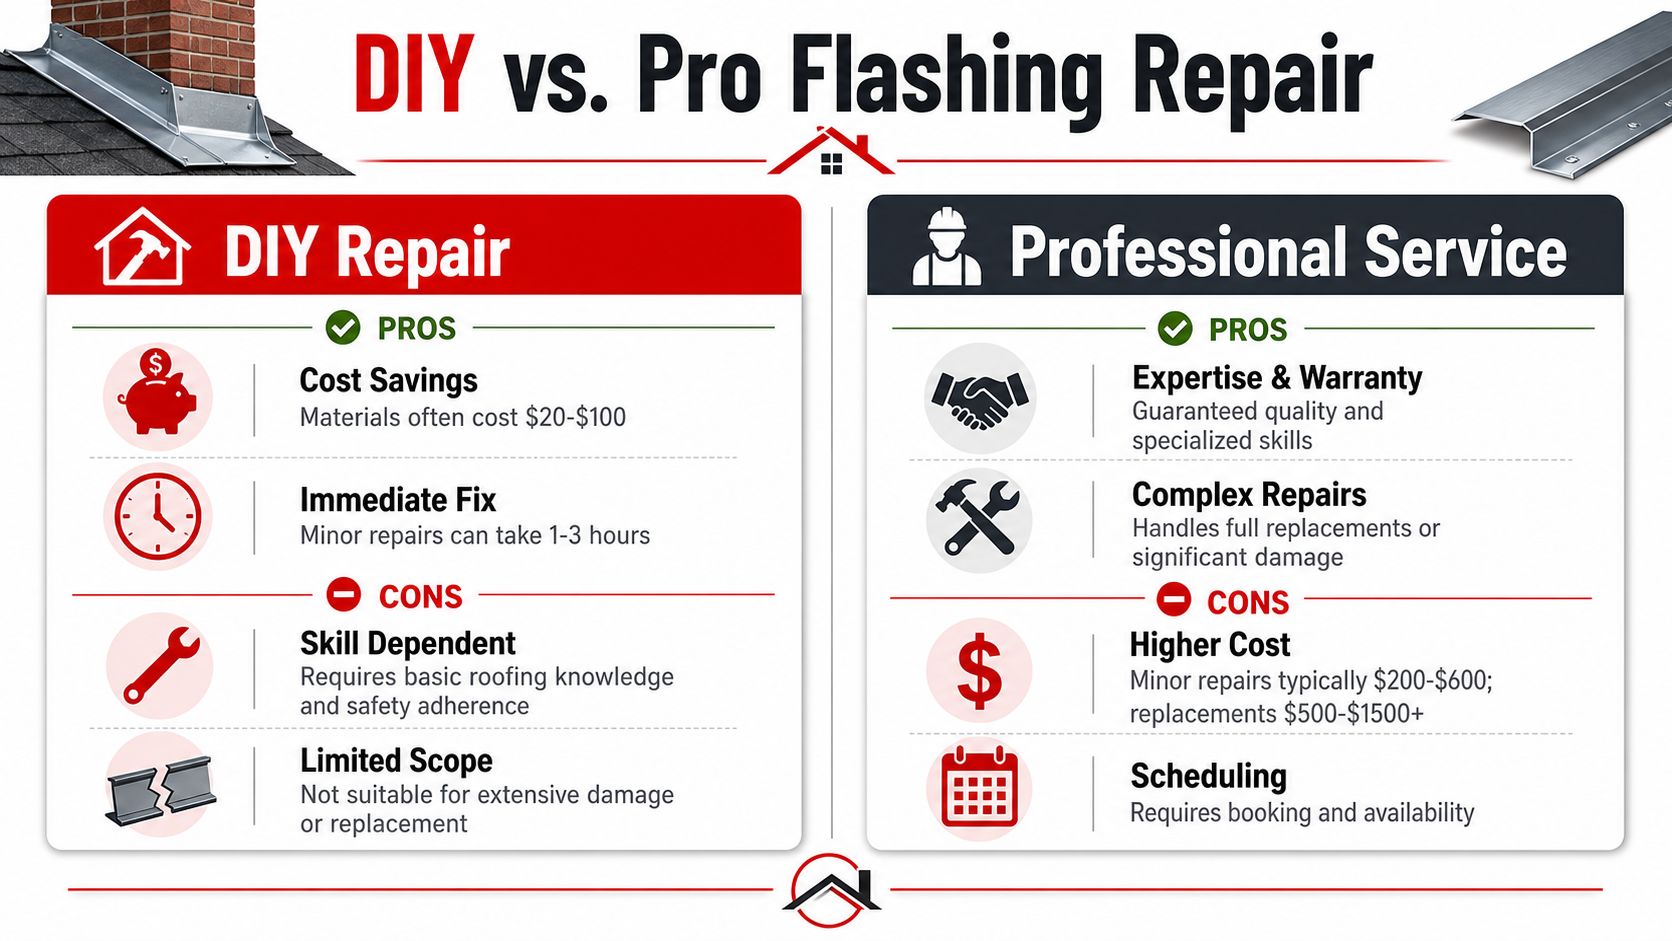
For projected 2026 pricing, the national average cost for professional roof flashing repair ranges from $569 to $2,536, with most homeowners paying around $300 to $450 for standard repairs. More complex chimney and skylight flashing repairs can range from $500 to $1,400. Actual pricing still depends on access, material, roof pitch, and whether the deck underneath is damaged.
When DIY still makes sense
A homeowner can often handle a minor reseal on a low, walkable roof when the metal is sound and the leak source is already confirmed. Small edge touch-ups, isolated sealant failure, and one accessible exposed fastener are in range for a careful DIY approach.
The timeline is usually short for those jobs, but preparation takes longer than people expect. Surface cleaning, dry conditions, and leak testing matter more than speed.
Red flags that push the job to a roofer
Some conditions change the risk immediately:
- Widespread corrosion: If the flashing has lost shape or rust is no longer superficial, repair quality depends on replacement skill.
- Soft decking or interior staining that's spreading: Hidden damage under the metal can't be solved with surface work.
- Steep roofs: Safety becomes the first issue.
- Multiple leak points: That often means system-level failure, not one isolated gap.
- Chimneys, skylights, and tile interfaces: These details have too many layers to guess through.
Cheap repairs get expensive when they hide the real failure instead of fixing it.
For homeowners who need inspection, leak tracing, or full replacement work, Arizona Roofers handles flashing tune-ups, resealing at penetrations and terminations, and larger roof system repairs across Arizona. For peace of mind and a guaranteed fix, call Arizona Roofers today at (480) 531-6383.
Preventive Maintenance and Warranty Guidance
The strongest flashing repair is the one a homeowner catches before interior damage starts. Arizona roofs reward routine checks because heat and UV usually give warning before the next leak. Loose edges, cracked sealant, rust staining, and debris-packed valleys show up before water reaches the ceiling.
A simple maintenance routine keeps those warning signs from getting ignored.
A practical yearly checklist
- After monsoon storms: Check valleys, roof-to-wall lines, skylights, and penetrations for displaced metal or fresh staining.
- Clear water paths: Remove leaves, dirt, and roof debris that hold moisture against flashing.
- Watch the fasteners: Incorrect fastener placement is a common failure point, and unsealed fasteners account for approximately 25% of post-repair flashing leaks. Exposed nail heads should be sealed with a compatible polyurethane or roofing sealant, as noted earlier in the inspection guidance.
- Look at adjacent assemblies: Homeowners dealing with exterior structures should also understand protective detailing beyond the roof itself, including flashing for deck framing, because water management problems often start where separate assemblies meet.
Warranty and insurance reality
Insurance usually turns on cause. Sudden storm damage is treated differently from neglected maintenance. That means clear photos, dates, and repair records help. If a homeowner waits too long and the damage looks age-related, the claim process often gets harder.
Workmanship warranties matter for the same reason. Flashing isn't just a piece of metal. It's a sequence of laps, cuts, fasteners, and compatible sealants. A warranty has real value when the installer documented the repair and can trace exactly what was done.
A roof in Arizona doesn't need constant attention, but it does need regular attention. Small flashing problems stay small only when someone looks for them.
Arizona homeowners who want a lasting repair, a documented inspection, or help after storm damage can contact Arizona Roofers for practical guidance and service across Phoenix, Scottsdale, Tucson, Mesa, Chandler, and surrounding communities.