A small drip from the ceiling is a homeowner's nightmare, often signaling the start of a much bigger, more expensive problem. But before panic sets in, know that a high-quality roof leak repair sealant is your first and most effective line of defense. This guide is designed to empower you with the knowledge to tackle small leaks confidently, from choosing the right product for your roof type to applying it like a pro. Using the right sealant not only stops a leak in its tracks but also buys you critical time, preventing minor issues from escalating into major water damage, mold growth, and costly structural repairs.
Key Takeaways
- Match the Sealant to the Roof: The most critical step is choosing a sealant compatible with your roofing material (e.g., silicone for metal roofs, polyurethane for flashing). Using the wrong type will lead to repair failure.
- Preparation is Everything: A successful, long-lasting seal depends on a clean, dry, and debris-free surface. Rushing this step is the most common DIY mistake.
- Safety First, Always: Working on a roof is inherently dangerous. Always use a stable ladder, wear proper footwear with good grip, and never work on a wet or windy day.
- Know When to Call a Pro: Sealant is for small, isolated leaks. If you find soft or spongy spots, widespread damage, or multiple leaks, it's time to call a professional roofer.
Your First Line of Defense Against Roof Leaks
Seeing that ugly, discolored spot spreading across your ceiling is a surefire sign of trouble overhead. While panic is a natural first reaction, you can absolutely get a handle on it with the right approach. A good roof leak repair sealant is made for this exact situation. It puts you in control, letting you fix the problem before it snowballs into thousands of dollars in water damage, mold, and rot. It’s all about shifting from that moment of panic to proactive problem-solving.
What You Really Need to Know
- Choose Wisely: The biggest mistake people make is grabbing the wrong product. A sealant that works wonders on a metal roof might fail completely on asphalt shingles or tile. Matching the sealant to your roof type is non-negotiable for a repair that lasts.
- Prep is Paramount: I can't stress this enough—the prep work is more important than the application itself. If you apply sealant over dirt, debris, or a damp surface, it’s not going to stick. Period.
- Safety First: Remember, you're working at heights. Make sure your ladder is rock-solid and on even ground. Don't be a hero; use the right safety gear.
- Know Your Limits: A little sealant can fix a small problem. But if you're seeing soft decking or widespread damage, that’s a clear sign you’re out of your league. It's time to call a pro.
From Panic to a Plan
Let’s imagine a classic Arizona scenario: a sudden monsoon storm rolls through and suddenly you've got a small leak dripping from a roof vent. Instead of just putting a bucket under it and hoping for the best, you grab a tube of polyurethane sealant and create a tough, waterproof seal around the vent flashing.
That simple, 30-minute job just prevented water from saturating your attic insulation and wrecking the drywall below. You just dodged a repair bill that could have easily topped $1,500.
This is exactly why keeping a quality roof sealant on hand is so smart. It acts as a bridge between spotting the leak and getting a professional out to take a look, giving you incredible peace of mind.
Of course, knowing the immediate steps to take inside your home is just as critical. This guide on what to do if water is leaking through your ceiling is a fantastic resource for that initial "what now?" moment. With the right materials and a clear plan, you can tackle this with confidence.
Choosing the Right Sealant for Your Roof
Walking into a hardware store and staring at an entire aisle of sealants is enough to make anyone's head spin. You’ve got tubes, tubs, and tapes all promising a perfect, watertight fix. So, how do you pick the right roof leak repair sealant for your specific problem? The secret isn't about grabbing the priciest option—it's about matching the product's chemistry to your roof material and our brutal Arizona climate.
Get this choice wrong, and you could be right back where you started after just one monsoon season. The goal is to find a repair that moves with your roof, stands up to the sun, and creates a bond that water simply can't break.
Understanding the Core Sealant Types
Not all sealants are created equal. Far from it. Each one has its own personality, with distinct properties that make it perfect for some jobs and a complete disaster for others. Knowing the difference is your first step toward a successful, long-lasting repair.
- Silicone Sealants: If you’re dealing with a sun-drenched Arizona roof, silicone is a top contender. It’s known for incredible flexibility and UV resistance, staying pliable long after it cures. That means it can expand and contract with the wild temperature swings here without cracking. This makes it a go-to for flat roofs, metal panel seams, and sealing around skylights.
- Polyurethane Sealants: Need some serious muscle? Polyurethane is your answer. This stuff creates an incredibly strong, durable bond that’s also paintable, which is a nice bonus. Its sheer toughness makes it perfect for high-stress areas like the flashing around chimneys, vents, and where walls meet the roof—places that see a lot of movement.
- Acrylic Sealants: Often sold in water-based formulas, acrylics are generally easy to work with and clean up. They can be a good all-purpose option, but they don't have the same flexibility or durability as silicone or polyurethane. I’d save them for smaller, less critical repairs in spots that aren’t constantly exposed to pooling water.
- Rubberized Asphalt Sealants: This is a classic, heavy-duty goop often used for sealing shingles and foundation leaks. It’s thick, messy, and really good at stopping water in its tracks. However, it can break down under constant, direct UV exposure, so it’s not the best choice for exposed surfaces on a flat roof.
To make it even clearer, I've put together a quick comparison to help you narrow down your options at the hardware store.
Roof Sealant Comparison Guide
| Sealant Type | Best For | Pros | Cons |
|---|---|---|---|
| Silicone | Flat roofs, metal roofs, skylights, areas with high UV exposure | Excellent flexibility, waterproof, superior UV resistance | Not paintable, can be difficult to apply smoothly |
| Polyurethane | Flashing, vents, chimneys, high-stress joints | Extremely strong adhesion, durable, paintable | Can be less flexible than silicone, shorter UV lifespan |
| Acrylic (Water-Based) | Small cracks, temporary fixes, low-stress areas | Easy to apply and clean up, paintable, low odor | Less durable, not ideal for pooling water or extreme temps |
| Rubberized Asphalt | Shingle repairs, foundation sealing, under tile flashing | Very thick and waterproof, great for below-grade use | Messy application, breaks down in direct UV, not paintable |
Choosing the right material is the foundation of a good repair. A quick look at this table can save you a lot of guesswork and ensure you're buying a product that will actually last.
Matching the Sealant to Your Roof Material
Your roof's material is the single most important factor in this decision. A sealant that bonds beautifully to an asphalt shingle might not stick at all to a metal panel or a clay tile.
Trying to use a stiff, asphalt-based sealant on a metal roof, for instance, is a recipe for failure. That metal is going to expand and contract like crazy in the heat, and the inflexible sealant will crack and pull away in no time, reopening the leak. A flexible, UV-stable silicone is the far better choice there.
On tile roofs, a common leak point is under the tiles at the flashing joints. A high-grade polyurethane sealant is perfect for this job because it has fantastic adhesion to both the metal flashing and the wood deck underneath.
Choosing a roof leak repair sealant is a significant decision. With over 60% of homeowners prioritizing durable, low-maintenance solutions, the right product makes all the difference. High-performance sealants can extend a roof's life by 10-15 years and slash future repair costs by up to 40%. The global roof sealant market was valued at USD 2.5 billion and is projected to hit USD 3.7 billion by 2032, which tells you people are investing in quality, long-term solutions. You can discover more about the roof sealant market on researchandmarkets.com.
Climate Considerations for Arizona Roofs
The climate here in Arizona is a whole different beast. The intense, year-round sun absolutely blasts our roofs with UV radiation, causing lesser sealants to turn brittle and crack. Then, the monsoon season arrives with torrential downpours ready to exploit any tiny weakness.
For these reasons, UV resistance and flexibility are non-negotiable. You have to have them. Silicone-based sealants really shine in this environment, keeping their elasticity under that relentless sun. For larger flat roof surfaces, a professionally applied coating might be an even better long-term play. To learn more about this, check out our guide on what is elastomeric roof coating and how it protects against the elements.
Making the Final Choice
Before you head to the checkout, run through this quick mental checklist.
- Read the Label: Seriously, read the fine print. Does the manufacturer say it’s for roofing? Is it compatible with your specific material (asphalt, metal, TPO, etc.)?
- Check the Cure Time: How long until it’s rain-ready? If storms are rolling in, you'll need something that cures fast.
- Think About Paintability: If the repair is in a spot you see every day, you might want a sealant you can paint to match the roof. Polyurethane and some acrylics are usually paintable; most silicones are not.
By weighing these factors—the sealant type, your roof material, and our local climate—you can confidently choose a product that will deliver a durable, watertight repair and give you peace of mind the next time the sky turns dark.
How to Properly Apply Roof Sealant for a Watertight Seal
Alright, let's get to the hands-on part. Applying a roof leak repair sealant correctly is less about brute force and more about doing things with precision and a bit of patience. I've seen it a hundred times: a sloppy application fails just as quickly as using the wrong product, and you're right back where you started with the same drip. This walkthrough is based on years of experience, designed to make the process feel manageable, not like you're about to make things worse.
We'll start with the most critical piece: safety. From there, we’ll dive into the detective work of finding where that leak is really coming from—hint, it's almost never directly above the water stain on your ceiling. We’ll also cover the crucial step of surface preparation, a detail many DIYers rush, to guarantee the sealant creates a bond that can actually stand up to Arizona's weather.
The Most Important First Step: Safety
Before you even think about setting foot on that roof, stop and assess the situation. Working at heights is no joke, and a few simple precautions can mean the difference between a successful repair and a trip to the emergency room. Your safety is non-negotiable.
- Ladder Stability: Make sure your ladder is on solid, level ground. If you can, have someone hold the base. It should extend at least three feet above the roofline so you have something to hold onto as you get on and off.
- Weather Check: This is a big one. Never, ever work on a roof that's wet, icy, or in the middle of a haboob. A dry, calm day is the only safe option for this kind of job.
- Proper Footwear: Wear sturdy, rubber-soled shoes that have excellent grip. Forget the flip-flops or anything that could easily slip.
- Essential Gear: Always wear gloves. Roof surfaces are abrasive, and sealants can be nasty. Safety glasses are also a smart move to keep grit and debris out of your eyes.
Pinpointing the True Source of the Leak
Water is sneaky. It can creep along rafters, decking, and flashing before finally finding a place to drip, often a long way from its entry point. That stain you see inside? It's just the end of the trail, not the source of the problem.
If you can safely access your attic, start there. Grab a good flashlight and look for water stains, mold, or damp insulation on the underside of the roof deck. This will at least get you in the right ballpark.
Once you have a general location, get up on the roof and inspect that area like a hawk. You're looking for the usual suspects:
- Cracked, curled, or completely missing shingles.
- Nails that have popped up, lifting the edge of a shingle.
- Old, dried-out sealant around vents, pipes, or skylights.
- Cracks in the flashing where a chimney or wall meets the roof.
It's a common misconception that most roof problems are out in the middle of the roof. In reality, 90% of leaks are found within 10% of the roof's surface area. They’re almost always concentrated around things that stick out—vents, seams, and flashing. Focus your search there first.
Surface Preparation for a Lasting Bond
This is the step that separates a quick patch from a long-term fix. Slapping sealant on a dirty, damp, or crumbling surface is a complete waste of time and money. It just won't stick, and you'll be doing this all over again after the next storm.
First, grab a stiff-bristled brush and get to work cleaning the area around the leak. You need to scrub off all the dirt, dust, loose granules, and any old, cracked sealant. Don't be shy here—the cleaner the surface, the stronger the bond will be.
Next, if the area is greasy (common around plumbing vents), use a degreasing cleaner to get it spotless. Finally, and this is critical, make sure the area is completely dry. A heat gun on a low setting can speed things up, or you can just let the Arizona sun do its job. Do not move on until that spot is bone-dry to the touch.
This chart helps break down which sealant to use for your specific roof type, ensuring you pick the right tool for the job.
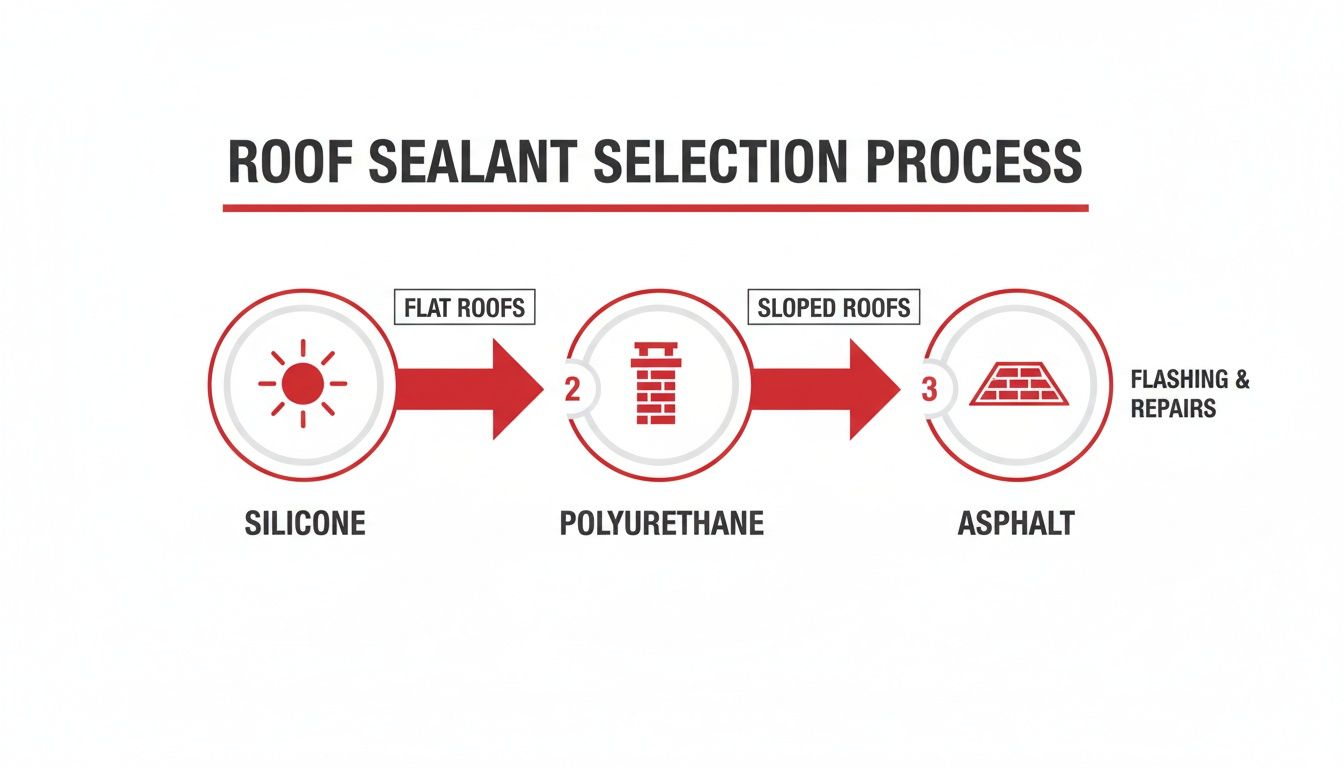
By matching the sealant type—like silicone for sun-blasted areas or polyurethane for high-stress joints—to your specific need, you give your repair the best chance of lasting.
Application Techniques for a Watertight Seal
With your surface clean and dry, it's time to lay down the sealant. Load the tube into a caulk gun and cut the tip at a 45-degree angle. Make the opening just big enough to cover the crack you're sealing.
Apply a steady, consistent bead of sealant directly over the damaged area. The key is to force the sealant into the crack, not just skim it over the top. For something small like a popped nail hole, a simple dab will do. For a damaged shingle, the process is a bit more involved. You can find the specifics in our guide on how to patch a roof shingle.
Next, use a small putty knife or a gloved finger to "tool" the bead of sealant, smoothing it down. This simple action pushes it deeper into the crack and feathers the edges. A feathered edge is crucial because it creates a smooth transition and stops water from getting underneath the sealant and lifting it up later.
Here's a pro tip for larger cracks (anything over 1/4 inch): embed a small piece of fiberglass mesh tape into the sealant. Put down a base layer, press the mesh into it while it's wet, and then immediately apply a second layer right over the top. This reinforcement adds serious strength and keeps the crack from reopening.
Finally, let it cure. Check the manufacturer's instructions, but this can take anywhere from a few hours to a couple of days, depending on the sealant, the temperature, and the humidity. Don't even think about applying sealant if rain is in the forecast. You need to give it plenty of time to set up and form that critical watertight seal.
Don't Just Fix Leaks—Prevent Them with Proactive Maintenance
Okay, you've patched the leak with a good roof leak repair sealant, and the immediate crisis is averted. That's a huge relief. But your work isn't quite finished. Now’s the time to shift from playing defense to playing offense.
Adopting a proactive maintenance mindset is genuinely the best way to protect your home and sidestep those frantic emergency calls down the road. It’s not just a chore; it’s a smart investment in your property's health and your own sanity. A little bit of routine care, just twice a year, can catch the vast majority of problems while they're still small, cheap fixes—saving you from the massive stress and cost of major water damage.
Your Twice-a-Year Roof Checkup
The ideal times for a quick roof inspection are in the spring, once the winter chill is gone, and again in late fall, before it comes back. Your mission is simple: spot the subtle signs of wear and tear before a monsoon storm finds them for you.
Here’s what I always look for:
- Flashing Around Penetrations: Get a good look at the metal flashing that seals off chimneys, vents, and skylights. These spots are Leak Ground Zero. Old sealant gets brittle and cracks, and the metal can lift just enough to let water sneak in.
- Shingles and Tiles: Scan the entire roof surface. Are any shingles cracked, curling up at the edges, or missing completely? On a tile roof, look for any that have cracked or slipped out of place, which exposes the vulnerable underlayment beneath.
- Nail Heads: Keep an eye out for "shiners"—exposed nail heads that glint in the sun. The sealant covering them can wear away over time, or expansion and contraction can make them pop up slightly. It’s a tiny opening, but water is persistent.
- Clogged Valleys: Valleys are the V-shaped channels where two roof planes meet, and they're designed to handle a lot of water. When they get clogged with leaves and debris, they essentially become a dam. Water pools and backs up under your shingles, leading to rot and leaks.
By zeroing in on these common trouble spots, you can honestly spot 90% of potential issues before they graduate into real problems. For a more detailed guide, our comprehensive roof maintenance checklist breaks it all down for you.
The Power of Preventative Sealing
During your inspection, you'll almost certainly find spots where the old sealant looks dry, cracked, or is pulling away from the seams. This is your golden opportunity to be proactive.
Applying a fresh bead of the right roof leak repair sealant to these vulnerable joints is one of the most effective things you can do. A quick touch-up around a plumbing vent or along a flashing seam reinforces your roof's weak points. It ensures these high-risk areas stay watertight, stopping a leak before it even gets a chance to start. And if you have solar, remember that every mounting bracket is a roof penetration; it's wise to be aware of the potential roof damage from solar panels and inspect those seals, too.
The impact of this simple step is huge. Industry data shows that homeowners who stay on top of sealant maintenance prevent 80% of minor leaks from becoming catastrophic failures. That translates to saving an average of $5,000 to $10,000 on a premature roof replacement. Plus, a well-sealed roof helps your home's energy efficiency, potentially cutting HVAC costs by 15-20%.
When you treat maintenance as an ongoing habit instead of a one-time fix, you change your relationship with your roof. It stops being a source of worry and becomes a reliable asset protecting your home. A small investment of your time really does pay the biggest dividends.
When Your Roof Leak Needs a Professional
There's a fine line between a confident DIY fix and knowing when to call for backup. A good roof leak repair sealant is an incredible tool for small, manageable issues, but it's not a silver bullet. Some problems are just symptoms of a much bigger, more serious failure lurking beneath the surface.
Recognizing these red flags is crucial. Pushing a DIY repair too far can not only fail to stop the leak but can also lead to thousands more in damages or, even worse, a serious accident. This is about knowing when to put down the caulk gun and pick up the phone.

Red Flags That Demand a Professional Eye
Sealant is designed to patch a specific point of failure, not to hold together a system that's failing entirely. If you spot any of these warning signs during your inspection, it’s a clear signal to stop and call a pro.
- Spongy or Soft Spots: As you walk on your roof, pay close attention to how it feels under your feet. If you hit an area that feels soft, bouncy, or spongy, that's a major red flag. It means the underlying wood decking is likely waterlogged and rotting. Slapping sealant over this won't fix the structural decay.
- Multiple Leak Points: Finding one pesky leak is one thing. But discovering leaks in three or four different spots is a sign of systemic failure. It tells you that the problem isn't just one flawed shingle; it's likely that your entire roofing system is aging or has suffered widespread damage.
- A Sagging Roofline: This one is serious. Stand back from your house and look at the roofline. If you see a visible dip, bow, or sag, it could indicate a structural issue with the rafters or trusses. This isn't just a leak; it's a potential collapse. Get a professional out there immediately.
- Widespread Shingle or Tile Damage: A single cracked tile or a few missing shingle tabs are often manageable. But if you're seeing large patches of curled shingles, significant granule loss (that gritty sand-like material), or dozens of cracked tiles, your roof has probably reached the end of its lifespan.
Roof leaks are a huge problem for homeowners, causing an estimated $15 billion in water damage every year in the U.S. While a proper DIY sealant application is effective—studies show sealant-repaired roofs have 70% fewer leaks after five years—it’s vital to know when the damage is too deep for a surface fix. You can find more data on the roofing materials market from Future Market Insights.
Finding and Vetting a Trustworthy Roofer
Once you've made the call to hire a pro, the next step is finding the right one. A great roofer is an asset; a bad one is a nightmare waiting to happen.
The best place to start is with word-of-mouth. Ask neighbors, friends, or coworkers for recommendations. A personal referral from someone you trust is worth more than a dozen online ads. Once you have a shortlist of three or four companies, it’s time to vet them properly.
Critical Questions to Ask Before You Hire
Don't sign a contract until you've had a conversation and gotten clear answers to these questions. How a contractor responds will tell you everything you need to know.
- Are you licensed, bonded, and insured in Arizona? This is the first and most important question. Ask to see their proof of general liability and workers' compensation insurance. This protects you from any liability if someone gets hurt on your property.
- Can you give me a few local references? A reputable roofer will be proud of their work and happy to provide a list of recent, local customers you can call.
- What warranties do you offer? You should get two: a manufacturer's warranty on the materials and a workmanship warranty from the roofer to cover their labor.
- Will you provide a detailed, itemized quote? A professional quote breaks down all the costs—labor, materials, permits, and cleanup. Be wary of anyone who gives you a single, vague number.
- Who is my point of contact? You need to know who the project manager is so you have one person to call with questions or concerns.
Calling in a professional isn’t giving up. It’s making a smart decision to protect your home and your family.
Frequently Asked Questions (FAQs)
Q: What is the best type of roof sealant for a flat roof?
A: For flat roofs, especially in sunny climates like Arizona, a silicone-based sealant is often the best choice. Its superior UV resistance and excellent flexibility allow it to expand and contract with temperature changes without cracking, and it holds up well against pooling water.
Q: How do I remove old, cracked sealant before applying a new layer?
A: Use a combination of a stiff-bristled brush, a putty knife, or a scraper to carefully remove as much of the old, failing sealant as possible. For stubborn residue, a heat gun on a low setting can sometimes soften it for easier removal. The goal is to get back to a clean, solid surface for the new sealant to bond to.
Q: Can I apply roof leak repair sealant in cold weather?
A: It depends on the product. Most sealants have a minimum application temperature, often around 40°F (4°C). Applying it in colder temperatures can prevent it from curing properly and creating a strong bond. Always check the manufacturer's instructions on the label for specific temperature ranges.
Q: How long will a roof sealant repair last?
A: The lifespan of a sealant repair varies widely. For a small, properly prepped fix on a minor issue (like a nail pop), a high-quality sealant can last for 5-10 years or more. However, if used as a temporary patch for a larger problem, it may only last for a single season. Regular inspection is key.

