When powerful winds tear through your neighborhood, the damage to your roof can be devastating and the path to getting it fixed, confusing. Filing a wind damage roof insurance claim can feel like navigating a maze of paperwork, adjusters, and contractors. This guide is designed to cut through that complexity, providing you with a clear, step-by-step roadmap. From the crucial first actions after the storm to handling a potential claim denial, we'll equip you with the knowledge to manage your claim effectively and secure the fair settlement you deserve.
Key Takeaways
- Act Fast, Act Safe: Your first priority is safety. Conduct a ground-level inspection immediately after the storm, but stay off the roof. Document everything with photos and videos before touching a thing.
- Documentation is Power: Meticulous records are the foundation of a strong claim. Create a detailed log of all damage, organize photos, and gather all relevant paperwork like your policy and maintenance records.
- Choose Your Roofer Wisely: Hire a licensed, local, and reputable roofing contractor. They are your best advocate and can ensure the adjuster sees the full scope of the damage. Avoid "storm chasers" at all costs.
- Understand Your Policy: Know the difference between Replacement Cost Value (RCV) and Actual Cash Value (ACV). This distinction will determine how much you pay out-of-pocket for your new roof.
- Don't Take No for an Answer: A claim denial or lowball offer is not the final word. You have the right to appeal. A well-organized, evidence-based response can overturn an initial decision.
Your Immediate First Steps After a Wind Storm
The wind has died down, and you're left looking at the mess. It's a stressful moment for any homeowner. Before you do anything else, take a deep breath and focus on safety. Your first instinct might be to get up on the roof to see the damage up close, but please, don't. A storm-damaged roof is a dangerous place—it can be slippery, weak, and unstable. Stay on the ground.

This initial phase is about building a strong foundation for your claim without putting yourself in harm's way.
The moments after a storm can be chaotic. This quick-reference table breaks down exactly what to do first to protect both your safety and your potential insurance claim.
Immediate Post-Storm Action Checklist
| Action Item | Why It's Important | Pro Tip for Arizonans |
|---|---|---|
| Ground-Level Inspection Only | Climbing on a wet or unstable roof is incredibly dangerous. Professionals have the right safety equipment. | Walk the entire perimeter of your home. Look for debris, fallen tree limbs, and any shingles on the ground. |
| Take Extensive Photos & Videos | This creates a time-stamped visual record of the damage exactly as it was before any cleanup or repairs. | Record a slow video walking around your house, narrating what you see. It adds powerful context for an adjuster. |
| Check Gutters & Downspouts | A pile of shingle granules looks like sand or coffee grounds. This "granule loss" is a key sign of wind damage. | Our intense sun makes older shingles brittle. Even a moderate wind storm can strip granules, drastically shortening a roof's life. |
| Perform Emergency Tarping | Your policy has a "duty to mitigate" clause. This shows you took responsible steps to prevent further water damage. | Get help if needed! A large, flapping tarp can be dangerous in lingering winds. Secure it well. Keep all receipts. |
| Inspect Interior for Leaks | Don't forget to look up. Water stains on your ceiling or walls are a dead giveaway that the roof's integrity is compromised. | Check attics and crawl spaces too. Small, slow leaks often start there before they become visible inside your living space. |
Following these steps methodically will provide you with the solid evidence needed to start the claims process on the right foot.
Conducting a Safe Ground-Level Assessment
Grab your phone and start walking the perimeter of your property. Look up at the roof from different angles. Are there shingles missing? Do any look like they’re lifted up, curled at the edges, or have a nasty crease running through them? These are all tell-tale signs that the wind was strong enough to break the seals holding them down.
Next, look down. Check the area around your downspouts. If you see a pile of what looks like coarse black sand, those are the asphalt granules from your shingles. This is a huge red flag. Those granules are the primary layer of protection, and losing them means your roof is vulnerable and its lifespan has been cut short. It’s the kind of subtle evidence that really strengthens a wind damage roof insurance claim.
Pro Tip: Your initial documentation doesn't need to be professional quality, but it does need to be thorough. I always tell homeowners to record a slow video as they walk around the property, talking about what they're seeing. It creates a powerful, time-stamped record that’s hard for an insurance company to ignore.
The Importance of Immediate Documentation
Before you pick up a single fallen branch or nail down a tarp, document everything. Think of it as preserving a crime scene. Your insurance adjuster needs to see the immediate aftermath to understand the full scope of the storm's impact.
Here's a quick checklist for your photos and videos:
- The Big Picture: Get shots of your whole house and roof from the street and backyard to show context.
- The Details: Zoom in on missing shingles, cracked tiles, dented flashing, and bent vents. No detail is too small.
- Collateral Damage: Did a tree branch smash a window or dent your siding on its way down? Photograph that, too. It’s all part of the same event.
- The Inside Job: Head inside and look up. Any new water spots or discoloration on ceilings or walls are critical evidence of a leak.
Mitigating Further Damage with Emergency Repairs
Your insurance policy requires you to take reasonable steps to prevent the damage from getting worse—this is called your "duty to mitigate." For a wind-damaged roof, this almost always means getting a tarp over any obvious holes or exposed areas. You can find some helpful pointers in our guide on what to do during an emergency roof repair.
Make sure you keep every receipt for tarps, wood, or nails you buy for these temporary fixes. These expenses should be covered in your claim settlement. Just remember, these are temporary measures. Don't start any permanent repairs until your insurance adjuster has seen the damage and given you the green light. Acting too soon can seriously complicate or even void your claim.
This initial response is so important. Nationwide, wind and hail are the top cause of property damage claims, accounting for nearly 49% of all claims between 2018 and 2022. With the average claim hitting $13,511, you can see why getting these first steps right is absolutely essential.
Building an Ironclad Claim with Meticulous Documentation
Once you’ve made sure the area is safe, it’s time to pivot. This next part is where successful claims are made or broken, and it’s all about documentation. I can't stress this enough: you're not just taking a few pictures; you're building a case. A strong claim is backed by a mountain of undeniable proof.
Think of it from the adjuster's perspective. Their job is to verify the loss. The clearer and more organized your evidence is, the faster they can approve your claim. A shoebox full of receipts and a few blurry photos won't cut it. You need to present a compelling story of the damage that leaves no room for doubt.
Your Smartphone is Your Best Friend (If You Use It Right)
Everyone has a high-powered camera in their pocket these days, but most people don't use it effectively for a claim. A couple of quick snaps of a missing shingle from the ground simply won't do. You have to get detailed and document everything with a critical eye.
Your photo and video evidence should be thorough. I'm talking about:
- Lifted or Creased Shingles: Get up close. Show where the wind has physically broken the tar seal and bent the shingle backward. A visible crease is a smoking gun for wind damage.
- Damaged Flashing: Don't forget the metalwork. Check around your chimney, vents, and where roof planes meet. Look for pieces that are bent, lifted, or have the sealant torn away. This is a common entry point for water.
- Granule Loss: Remember those little asphalt specks we talked about? Photograph the collections of them in your gutters or on the ground below your downspouts. This proves the storm's abrasive force.
- Interior Water Stains: If water got inside, document it immediately. Get clear photos of any spots on your ceilings or walls, and if it's actively dripping, take a short video.
Pro Tip: Before you start, go into your phone's camera settings and turn on location and date stamping. Photos with a timestamp from the day of or the day after the storm are incredibly powerful—they create a timeline the insurance company can't argue with.
Create a "Damage Log"
Photos are great, but they need context. This is where a simple damage log comes in. Grab a notebook or open a spreadsheet and start inventorying everything you find. This process forces you to be systematic and ensures you don't overlook small things that can really add up.
For every single point of damage, note the following:
- What's Damaged: "Asphalt shingle," "Turbine vent," "Gutter section."
- Where It Is: "North slope, near the west edge," "Directly over the garage."
- Specifics of the Damage: "Shingle is completely gone," "Vent is dented on one side and won't spin," "Gutter is hanging loose from the fascia board."
- Photo Reference: "Photo #IMG_5012" or "Video from 10:15 AM."
When you hand this log to an adjuster along with your organized photos, it sends a clear message: you're serious, organized, and you've done your homework.
Round Up Your Paperwork
Last but not least, you need to assemble all the documents that support your claim. Trust me, it’s far better to have this file ready before the adjuster calls than to be scrambling to find everything while they're on the phone.
Get a folder and start collecting:
- Your Insurance Policy: Have the full policy handy, especially the declarations page. This page is the cheat sheet that shows your coverage limits and, most importantly, your deductible.
- Roof Maintenance Records: Did you have your roof inspected or repaired in the last few years? Find those invoices. This is your best defense against the dreaded "pre-existing damage" argument from the insurer. A recent, clean report from a pro is worth its weight in gold. You can see what a professional report looks like by checking out our roof inspection service details.
- "Before" Photos: If you have any photos of your house from before the storm, dig them up. Even casual shots from a backyard party can establish a baseline of your roof's previous condition.
- Receipts for Temporary Fixes: Keep every single receipt for tarps, plywood, sealant, or anything else you bought to stop the damage from getting worse. These are almost always reimbursable.
By taking these steps, you’re not just filing a claim—you're methodically constructing a case for the full and fair settlement you're entitled to. This proactive approach puts you firmly in the driver's seat.
Filing Your Claim and Preparing for the Adjuster's Visit
Once you’ve documented the damage, it's time to actually file your wind damage roof insurance claim. This part can feel a little daunting, but being prepared makes all the difference. The way you kick things off with that first phone call and handle the adjuster’s visit can truly shape the outcome of your entire claim.
Think of that first call as setting the stage. Before you even pick up the phone, get your notes and documents laid out in front of you. This isn’t just about being efficient; it’s about showing your insurance company you’re organized, serious, and on top of things from day one.
What to Have Ready for the First Call
When you call to report the damage, the representative will run through a script of standard questions. Having clear, concise answers ready will not only speed things up but also establish a solid, professional foundation for your claim.
Here’s a quick rundown of what you’ll need:
- Your Policy Number: The most important piece of information. Have it handy so you’re not scrambling to find it.
- Date and Time of the Storm: Be as precise as possible. "The storm hit Tuesday evening, around 8 PM."
- A Simple, Factual Description of the Damage: Stick to what you can see from the ground. Avoid guessing. Something like, "We found dozens of shingles in the yard, and we can see a few bare patches on the south side of the roof" is perfect.
- Your Contact Information: Double-check that they have your best phone number and email so the adjuster can reach you without any delays.
After that first call, you’ll be given a claim number. Write this number down immediately. It's your key to everything. Keep it in your claim folder, as you'll need it for every single conversation and piece of correspondence moving forward.
Navigating the Adjuster's On-Site Inspection
The insurance adjuster's visit is the main event. Their report is what the insurance company will lean on most heavily to decide how much they'll pay out. Your job is to make their inspection as smooth as possible while ensuring they see the full extent of the damage.
This is where having a professional roofer in your corner is a game-changer. We always tell homeowners to have their roofer present when the adjuster comes out. Why? Because an experienced roofer and an adjuster speak the same language. They can point out subtle clues of wind lift or creased shingles that an untrained eye would easily overlook.
Having your roofer meet the adjuster isn't about being confrontational; it's about collaboration. It ensures a professional, apples-to-apples discussion about the real scope of work, from specific materials to Arizona-specific building codes. This one simple step can be the difference between a fair settlement and a lowball offer that leads to a drawn-out appeal.
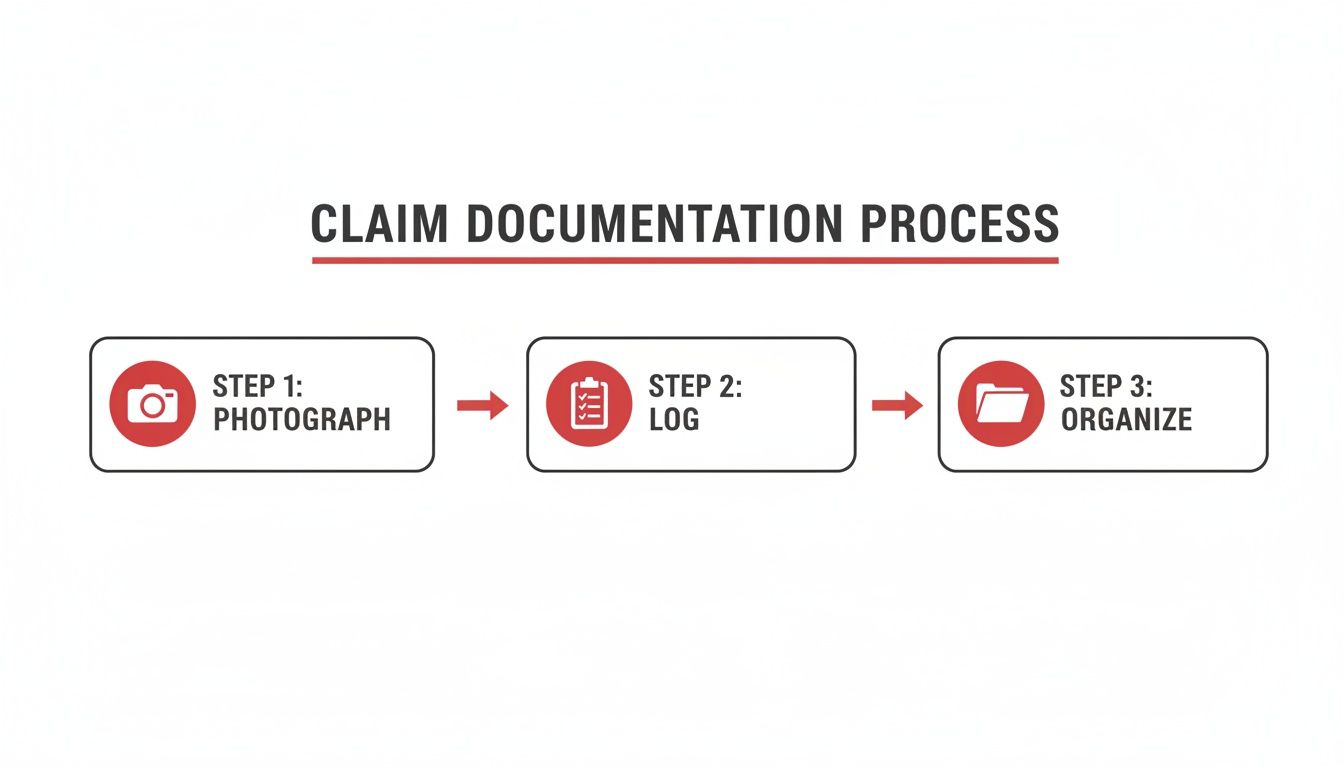
This disciplined approach—photograph, log, organize—is how you turn simple observations into a powerful file of evidence that the adjuster can't ignore.
What to Say and What to Avoid
How you talk to the adjuster matters. Be polite and helpful, but choose your words carefully. Just stick to the facts you’ve already documented.
Do:
- Share your photos and damage log. Walk them through what you found and when you found it.
- Point out every area of concern. If you noticed dented vents or loose flashing, make sure they put their eyes on it.
- Ask for a copy of their final report. It’s a completely reasonable request and allows you to see exactly how they assessed the damage.
Don't:
- Guess about the cause of damage. Never say something like, "Well, the roof was getting pretty old anyway." Let the storm damage speak for itself.
- Admit to any pre-existing problems. The conversation should only be about the damage from this specific wind event.
- Accept a settlement on the spot. Simply thank them for their time and let them know you need to carefully review the report and their estimate.
Your roof's age is a huge factor here. Insurers are getting stricter, especially as recent data shows U.S. wind peril frequency rose 5.8% and loss costs shot up 30.7% from 2023 to 2024. If your roof is over 20 years old, you might have an Actual Cash Value (ACV) policy. This means they'll deduct for depreciation, and your payout might only cover 40-60% of a $15,000 replacement. You can learn more about how roofing trends are impacting insurance claims.
Getting Estimates and Picking the Right Roofer
You've got the green light from your insurance company for your wind damage claim—that’s a huge step. But don’t celebrate just yet. Now comes the most important part: turning that approved claim into a solid, well-built roof that will protect your home for years to come. This means carefully vetting contractors, understanding their estimates, and knowing exactly how the insurance money works.

What to Expect From the Process
First things first, let's clear up a few common misconceptions that trip homeowners up.
- The Adjuster's Estimate is a Starting Point: Think of the insurance adjuster's initial estimate as an opening offer, not the final word. A professional roofer's quote will be much more thorough, digging into local labor rates, specific material costs, and current Arizona building codes.
- Watch Out for "Storm Chasers": After a big storm, you'll see them—trucks with out-of-state plates and salespeople using high-pressure tactics. Stick with a licensed, local Arizona roofer who has a reputation to uphold.
- Supplements Are Normal: It’s almost guaranteed that your roofer will find damage or code-required upgrades the adjuster missed. When they do, they’ll file a "supplement" to the insurance company for the additional costs. This is a standard, expected part of the claim process.
- ACV vs. RCV Policies are Worlds Apart: How much you pay out-of-pocket hinges entirely on whether your policy is Actual Cash Value (ACV) or Replacement Cost Value (RCV). It's a critical detail you need to understand before signing any contracts.
Deciphering the Adjuster’s Paperwork
The first document you'll get from your insurer is called a "scope of loss." It’s their breakdown of the damage and what they think it will cost to fix, usually based on standardized pricing software. In my experience, these are almost always incomplete. They might miss crucial code updates, fail to account for rotted decking underneath the shingles, or use pricing that hasn't kept up with local market costs.
Your roofer will conduct their own detailed inspection and create a line-item estimate that reflects the real-world cost of doing the job right. When comparing costs for your roof, it can also be useful to look at related maintenance expenses, like those in a Phoenix roof pressure cleaning cost guide, to get a full picture of home upkeep.
A lot of homeowners get nervous when their contractor’s estimate is higher than the insurance company’s. Don't be. This is where a supplement comes in. A good roofer will send photos, building code citations, and a clear explanation to the insurer to justify the extra funds needed for a complete, proper repair.
How to Spot a Bad Contractor and Hire a Great One
When a monsoon or major windstorm hits Arizona, the "storm chasers" are never far behind. These are out-of-town crews that follow bad weather, knock on doors, and make big promises. They often do shoddy work and are long gone by the time you discover a leak.
Here’s how to protect yourself. Only work with a contractor who is:
- Licensed, Bonded, and Insured in Arizona: Always ask for their ROC (Registrar of Contractors) license number and look it up online to verify they're in good standing.
- Local and Established: A permanent office and a track record in your community means they’ll be there to stand by their warranty if something goes wrong.
- A Patient Educator: A trustworthy roofer won’t rush you. They’ll sit down and walk you through their estimate, your insurance paperwork, and the entire process until you’re comfortable.
Choosing the right roofer is everything. We’ve put together a comprehensive guide on how to choose a roofing contractor that gives you a detailed checklist for vetting potential hires.
RCV vs. ACV: How Your Payout Really Works
The type of policy you have will make or break your budget for the project. Let’s break down the two ways insurers pay for a wind damage roof insurance claim.
ACV vs RCV Policies: What Arizona Homeowners Need to Know
This table shows how Actual Cash Value (ACV) and Replacement Cost Value (RCV) policies differ, which directly impacts your final out-of-pocket expense.
| Feature | Actual Cash Value (ACV) | Replacement Cost Value (RCV) |
|---|---|---|
| Initial Payout | Pays for the depreciated value of your old roof. | Also pays the depreciated value (ACV) upfront. |
| Final Payout | That's it. You are responsible for the difference between this amount and the full replacement cost. | After the work is done and you submit the final invoice, they pay the remaining recoverable depreciation. |
| Out-of-Pocket | Your deductible plus the total depreciation amount. This can be thousands of dollars. | Just your deductible (assuming the final cost is at or above the approved claim amount). |
As you can see, RCV coverage is what you want. It’s designed to cover the full cost of a brand-new roof, leaving you to pay only your deductible. With severe storms on the rise, this difference is more important than ever. Nationwide, roof claims from wind and hail have skyrocketed to nearly $31 billion in 2024, a 30% increase from 2022. For a typical 2,000 sq ft home in Arizona, a full replacement can run anywhere from $10,000 to $20,000, so having RCV coverage can literally save you from financial disaster.
What to Do with Claim Denials and Lowball Offers
It’s a gut punch. You’ve done everything right, and the insurance company comes back with a flat-out denial or an offer so low it won't even cover the materials. This is frustrating, to say the least, but it’s absolutely not the end of the line.
Think of this as the opening move in a negotiation. The insurance company has made its position known, and now it's your turn to respond. With a solid game plan, you can effectively challenge their decision and fight for the settlement you’re actually entitled to.
The very first thing you need to do is get the exact reason for their decision, in writing. Insurers are required to provide this. Don't settle for a vague phone call or a one-line email. You need a formal letter that points to the specific language in your policy that they believe justifies their low offer or denial. This document is the cornerstone of your entire appeal.
Common Reasons for Claim Denials in Arizona
Here in Arizona, we see the same few arguments from insurance companies over and over again. Knowing what they are ahead of time helps you build a much stronger case against them.
- Pre-Existing Damage: They’ll often claim the damage was there long before the monsoon storm rolled through. This is precisely why those "before" photos and any roof maintenance records you have are pure gold.
- Improper Maintenance: This is another favorite. They might argue your roof failed because you neglected it, not because of 100 mph wind gusts. A recent inspection report from a trusted roofer can shut this down quickly.
- Wear and Tear: This is their go-to excuse, especially for roofs that aren't brand new. The insurer will try to chalk up clear storm damage to simple aging.
- Damage Doesn't Exceed Deductible: Sometimes they’ll agree that the storm caused damage, but their estimate for the repairs magically comes in just under your deductible, leaving you with a $0 payout.
A denial isn't a final verdict; it's just the insurance company's opinion. Your evidence, your roofer's expert assessment, and your persistence are the best tools you have to change that opinion. Don't get mad—get organized.
Building a Rock-Solid Formal Appeal
With their denial letter in hand, it’s time to construct your formal appeal. This isn't just a quick email complaining about the outcome. It needs to be a structured, professional, written response that systematically dismantles their reasoning with hard evidence.
Start by clearly stating your name, policy number, claim number, and the fact that you are formally appealing their decision. Then, tackle their points one by one. If they blamed "pre-existing damage," you counter with your dated photos showing a sound roof before the storm. If their excuse was "wear and tear," you include your roofer's detailed report that explains how creased shingles are a textbook sign of wind uplift, not old age.
Keep your appeal factual and unemotional. Stick to the evidence. The goal isn't to vent your frustration but to logically demonstrate that their initial assessment was flawed.
Taking it to the Next Level When Necessary
What if your well-crafted appeal still gets you nowhere? You still have options. The first is to politely request a second inspection with a different adjuster from the same company. Explain that you believe the first adjuster may have overlooked critical evidence and you’d appreciate a fresh pair of eyes. Most importantly, make sure your roofing contractor is there for that meeting to point things out and advocate for you.
If you’re still at a standstill, it might be time to bring in a professional.
- Public Adjuster: These are licensed professionals who work for you, not the insurance company. They dive deep into your policy, document the loss, and negotiate on your behalf. Their fee is usually a small percentage of the final settlement they secure for you.
- Legal Counsel: If the denial is particularly complex or you feel the insurer is acting in bad faith (e.g., ignoring your calls, using deceptive tactics), it’s time to talk to an attorney who specializes in insurance law.
Fighting a denied wind damage roof insurance claim takes patience. It's a process. By methodically challenging the insurer’s position with strong evidence and escalating your case when you need to, you dramatically improve your odds of getting the money you need to fix your home correctly.
Frequently Asked Questions (FAQs)
What if my claim is for an older roof?
This is a big one. An older roof can definitely complicate a wind damage roof insurance claim, but it’s not an automatic denial. Insurers will look much closer, trying to separate new storm damage from old wear and tear. This is where your detailed photos and a professional roofer's inspection report become your most powerful tools. If your policy is Replacement Cost Value (RCV), the age shouldn't stop them from covering a full replacement. However, with an Actual Cash Value (ACV) policy, they’ll subtract for depreciation, leaving you with a much smaller check and a bigger bill.
Can my insurance company drop me after a wind damage claim?
It's a valid fear, but let's set the record straight: filing a single, legitimate claim for weather damage—what insurers call an "Act of God"—is not a valid reason to drop your policy. Insurance companies are looking for patterns of frequent claims, especially ones that point to negligence. A well-documented claim after a major storm is just part of why you have insurance in the first place. That said, if your entire area gets hammered by multiple storms, insurers might reassess their risk for the whole zip code, which could unfortunately lead to higher premiums or non-renewals for everyone.
How long do I have to file a claim in Arizona?
Most policies give you about a year from the date of the storm to file, but you should never, ever wait that long. The sooner you file, the stronger your case. Waiting gives the insurance company an opening to argue that the damage was pre-existing or caused by something else. A delay makes it incredibly difficult to prove the damage came from that specific storm. The best move you can make is to inspect your roof and file a claim right after a major wind event.
Should I get a roofer's estimate before calling my insurance company?
Absolutely. Getting a detailed estimate from a trusted local roofer before you even file the claim is a game-changer. It gives you a realistic, professional benchmark for what the repair should actually cost. When the adjuster comes back with their estimate, you can immediately see if it's in the right ballpark. If their number is way too low, you’re not starting from scratch—you’re already armed with a detailed, evidence-backed quote to kickstart the negotiation. Understanding the broader landscape of how to process all aspects of a claim can be challenging, so it's advisable to consult a comprehensive guide to navigating home insurance claims. This one simple step puts you in a much stronger position right from the start.
What is a "wind deductible" and do I have one?
A wind or hurricane deductible is a separate, often higher, deductible that applies specifically to damage from named storms or high winds. It's typically a percentage of your home's insured value (e.g., 1-5%) rather than a flat dollar amount like your standard deductible. Review your policy's declarations page carefully to see if you have one. In a state like Arizona, it's less common than in coastal areas but still possible, and it could mean a significantly higher out-of-pocket cost.

