Your home’s roof is arguably its most critical component, acting as the primary shield against harsh Arizona sun, monsoon rains, and seasonal storms. Yet, it's an asset that homeowners often overlook until a significant problem, like a leak or visible damage, forces them to pay attention. A proactive approach is the single most effective way to protect your investment, extend your roof's lifespan, and ensure the safety of your home.
This comprehensive roof maintenance checklist is designed to demystify the process. By systematically addressing key areas—from cleaning gutters and checking for damaged shingles to trimming nearby trees and scheduling professional assessments—you can catch minor issues before they escalate into costly structural damage. Following this guide will not only save you thousands in potential repairs but also provide the peace of mind that comes with knowing your home is secure.
Key Takeaways
- Inspect Seasonally: Check your roof in the spring and fall, and always after major storms, to catch damage early.
- Keep It Clean: Regularly clear gutters, downspouts, and the roof surface of debris to prevent water backup and organic growth.
- Seal the Gaps: Pay close attention to flashing, vents, and other penetrations, as these are the most common sources of leaks.
- Combine DIY with Pro Help: While homeowner checks are crucial, an annual professional inspection can identify hidden issues and provide an expert assessment of your roof's health.
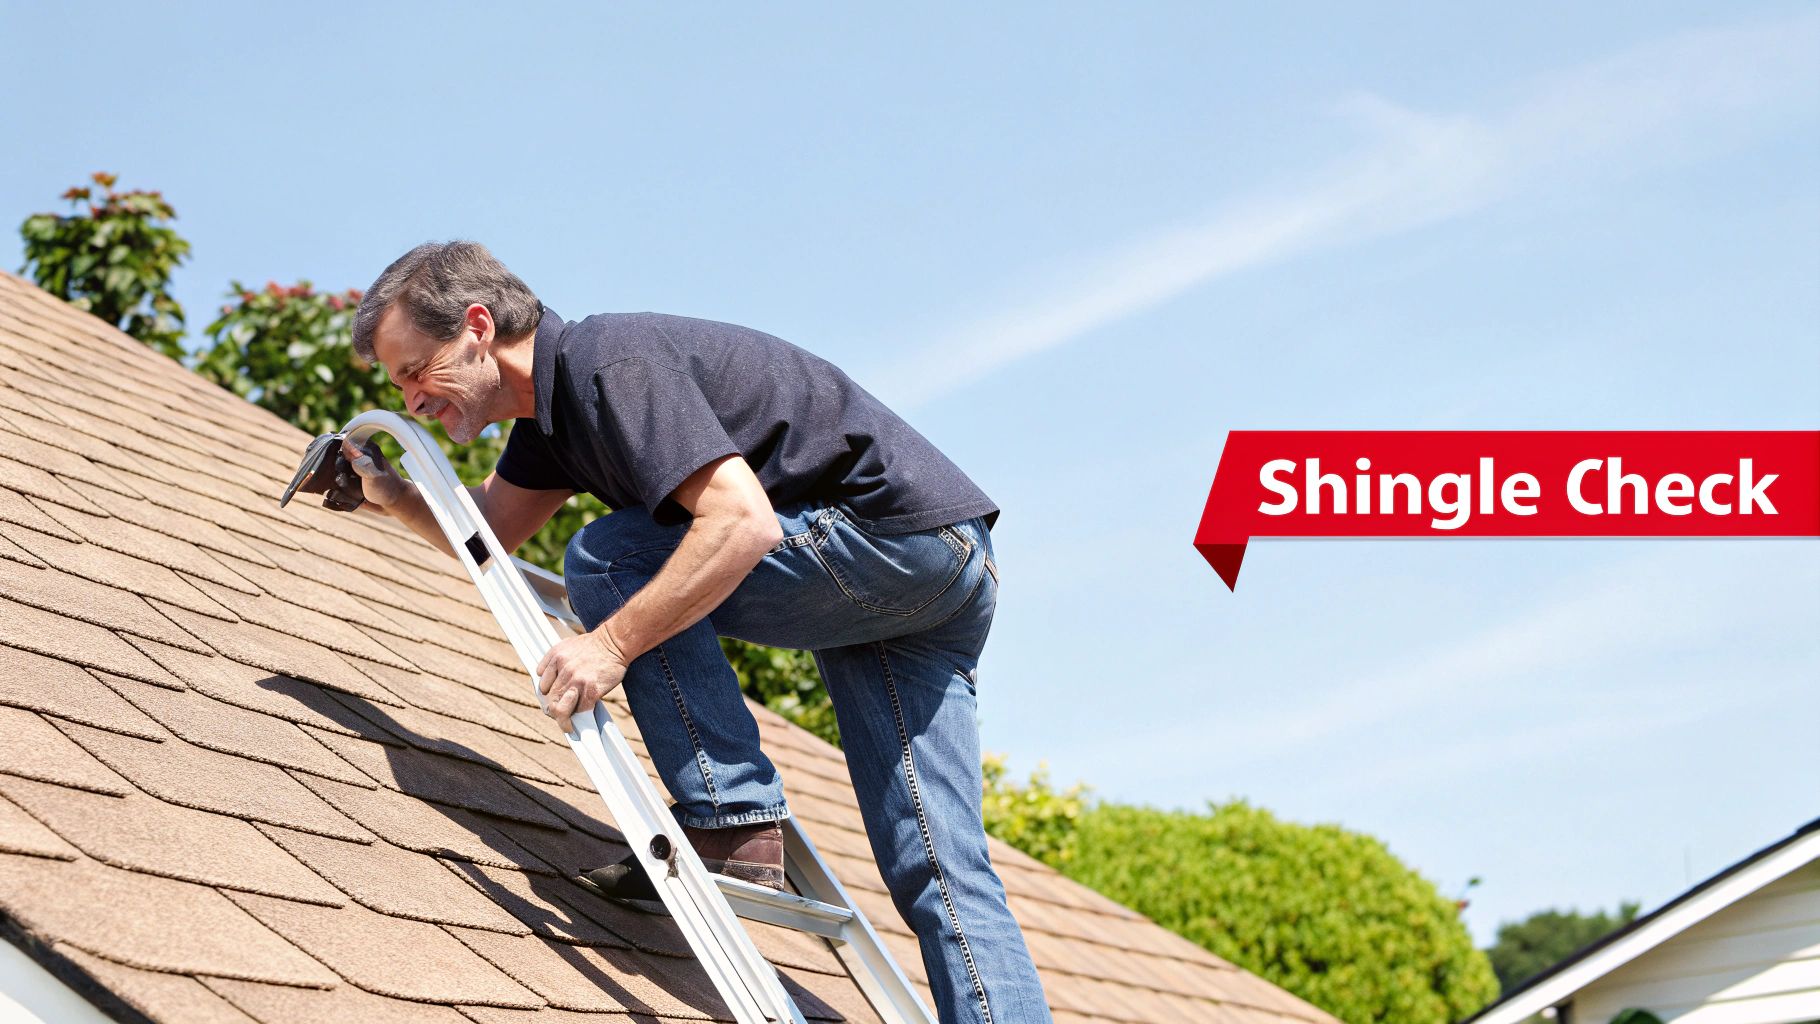
1. Inspect for Missing, Damaged, or Curling Shingles
Your shingles are the primary line of defense against the elements, making their condition a top priority in any roof maintenance checklist. A thorough visual inspection involves scanning your entire roof for shingles that are cracked, missing, warped, or curling at the edges. These signs indicate that the shingle's integrity is compromised, leaving the sensitive underlayment and roof deck vulnerable to water intrusion.
Why This Inspection is Crucial
Ignoring damaged shingles is a direct invitation for moisture damage. Even one missing shingle can allow water to seep into the roof structure, leading to wood rot, mold growth, and costly interior leaks. In Arizona's intense climate, sun exposure causes asphalt shingles to lose their protective granules and become brittle over time, while monsoon storms can easily lift or crack weakened shingles. Early detection is the key to preventing a small, inexpensive fix from escalating into a major structural problem. Recognizing these issues early can also help you determine if you're approaching the need for a full replacement. Explore the top warning signs your roof might need replacing to understand the bigger picture.
How to Conduct a Shingle Inspection
Follow these practical steps to perform a safe and effective inspection:
- Use Binoculars: For a safe ground-level check, use a pair of binoculars to get a clear, close-up view of the shingles without climbing a ladder.
- Post-Storm Checks: Always perform an inspection after a significant weather event, such as a heavy rainstorm, high winds, or a hailstorm. This is when new damage is most likely to occur.
- Document Everything: Take clear photos of any questionable areas. This creates a visual record to track deterioration over time and provides essential evidence for insurance claims.
- Check the Gutters: Look for an accumulation of shingle granules in your gutters and downspouts. Excessive granule loss is a clear sign that your shingles are aging and losing their protective layer.
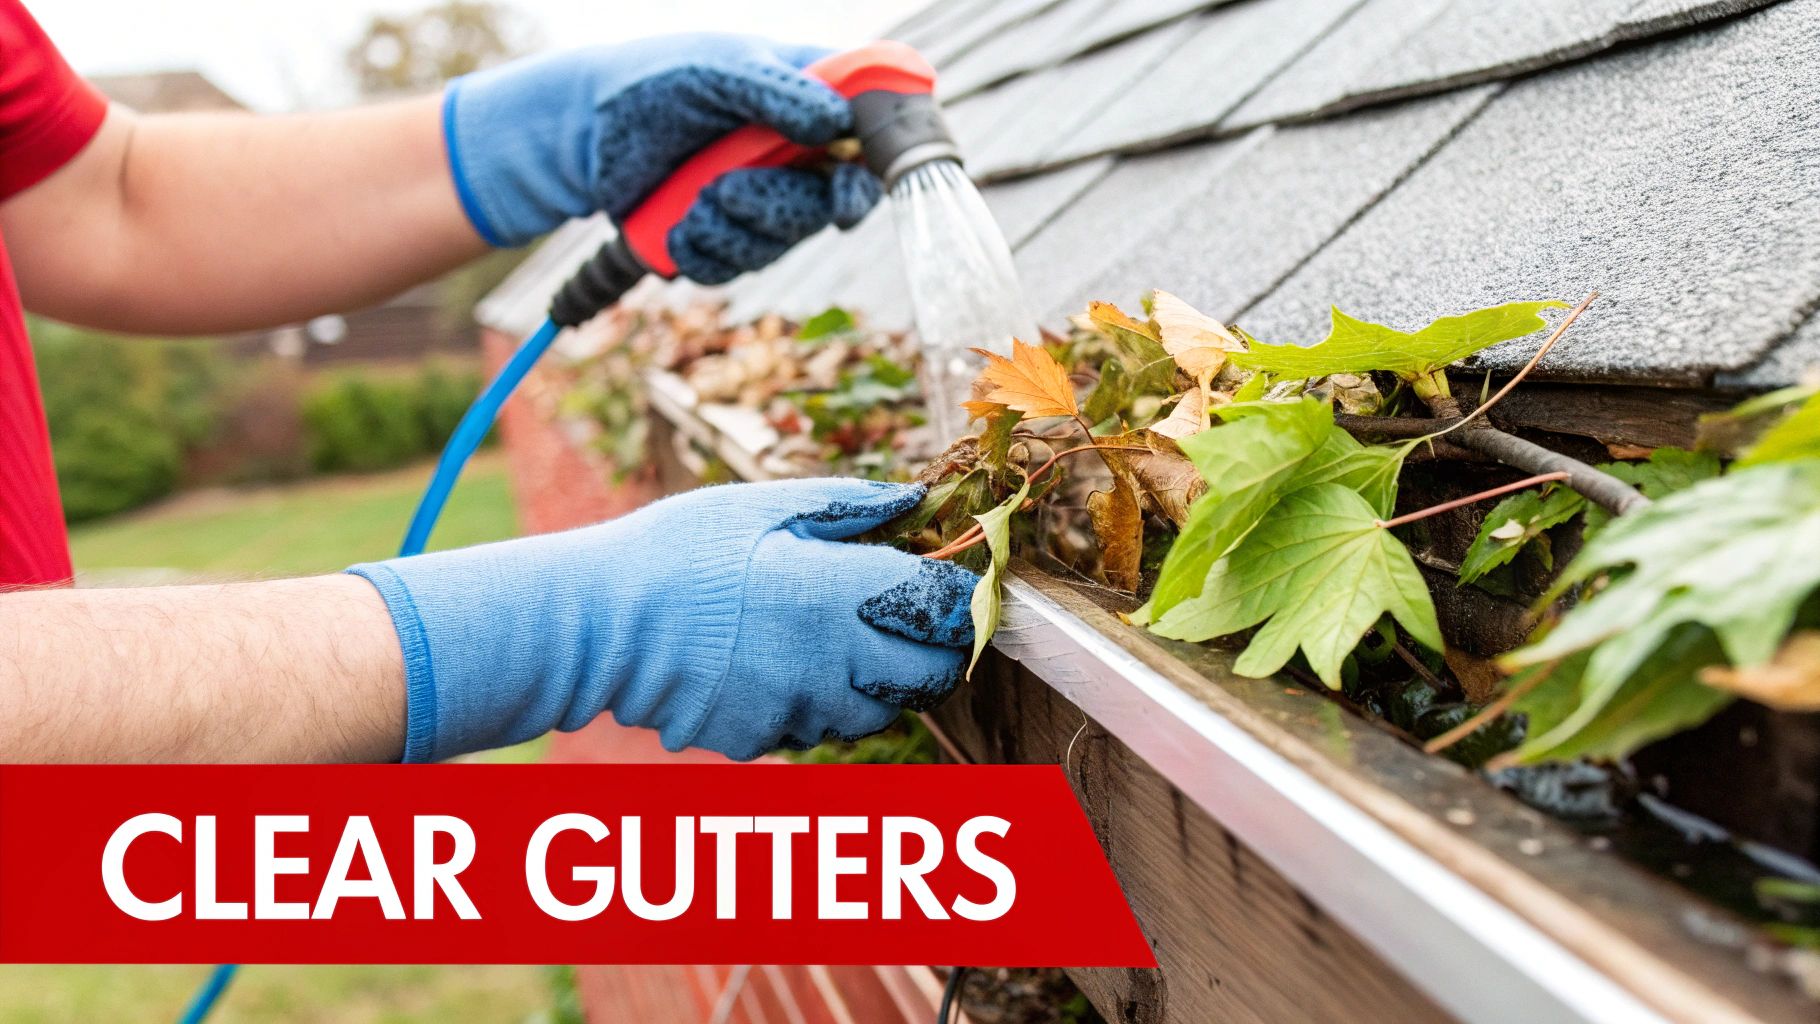
2. Clean and Clear Gutters and Downspouts
Your gutter system is the critical drainage network for your roof, designed to channel thousands of gallons of water safely away from your home's structure and foundation. When gutters and downspouts become clogged with leaves, twigs, and other debris, this system fails, forcing water to back up onto your roof and spill over the sides. Regular cleaning is a non-negotiable part of any comprehensive roof maintenance checklist.
Why This Inspection is Crucial
Clogged gutters are a direct threat to your roof, siding, and foundation. When water cannot drain, it pools against the fascia and roofline, seeping under shingles and causing rot, mold, and structural decay. In winter, this trapped water can freeze and form heavy ice dams that pry shingles loose and damage the gutters themselves. For Arizona homeowners, clogged gutters during monsoon season can lead to overwhelming water overflow that erodes landscaping and puts immense pressure on the foundation, potentially causing cracks and costly structural damage. Keeping these channels clear prevents water from becoming a destructive force against your property.
How to Conduct a Gutter and Downspout Cleaning
Follow these practical steps to perform a safe and effective cleaning:
- Schedule Smart: Clean your gutters at least twice a year, ideally in late spring after seeds and pollen have fallen and again in late fall after trees have shed their leaves. Homes with heavy tree coverage may require quarterly cleaning.
- Use the Right Tools: Wear heavy-duty gloves to protect your hands and safety glasses to shield your eyes from debris. A small garden trowel or gutter scoop works well for removing packed-in gunk.
- Flush the System: After clearing the bulk of the debris, use a garden hose to flush the gutters and downspouts. This confirms water is flowing freely and reveals any hidden blockages or leaks.
- Check the Outflow: Ensure downspouts are properly directing water at least four to six feet away from your home's foundation to prevent water pooling and potential basement leaks.
- Inspect as You Go: While cleaning, take the opportunity to check that gutter hangers and fasteners are secure and that there are no signs of sagging, rust, or separation from the fascia.
3. Check for and Repair Roof Leaks and Water Damage
Identifying and repairing roof leaks is one of the most critical tasks in any roof maintenance checklist, as it directly prevents catastrophic interior damage. This inspection goes beyond the roof's surface, requiring you to check your attic, ceilings, and walls for tell-tale signs of water intrusion like dark stains, discoloration, peeling paint, or active drips. Common culprits are often damaged flashing around chimneys and vents, failed sealants, or compromised shingles.
Why This Inspection is Crucial
A seemingly minor leak can silently wreak havoc on your home's structure. Water that penetrates the roof can saturate insulation, rot wooden rafters and joists, and promote the growth of hazardous mold and mildew within your walls and attic. In Arizona, a small leak from a monsoon storm can quickly escalate, leading to thousands of dollars in repairs to drywall, electrical systems, and structural framing. Catching a water stain early can be the difference between a simple patch and a complex, expensive restoration project. For a deeper understanding of the repair process, explore this essential guide to roof leak repair to learn what professionals look for.
How to Conduct a Leak Inspection
Follow these practical steps to spot hidden leaks before they become major problems:
- Inspect from the Inside: Your attic is the first place to look for evidence of a leak. After a heavy rain, safely access your attic with a flashlight and look for water stains, damp insulation, or mold on the underside of the roof deck and rafters.
- Focus on Penetrations: Pay close attention to areas where objects penetrate the roof, such as chimneys, plumbing vents, skylights, and exhaust fans. The seals and flashing around these points are common failure zones.
- Document and Track: If you find a stain, take a picture of it with a ruler for scale. Monitor its size after subsequent rainstorms to determine if the leak is active and worsening.
- Check Exterior Walls: Sometimes, leaks manifest on exterior walls before showing up on the ceiling. Look for long, vertical streaks of discoloration running down from the roofline or soffits.
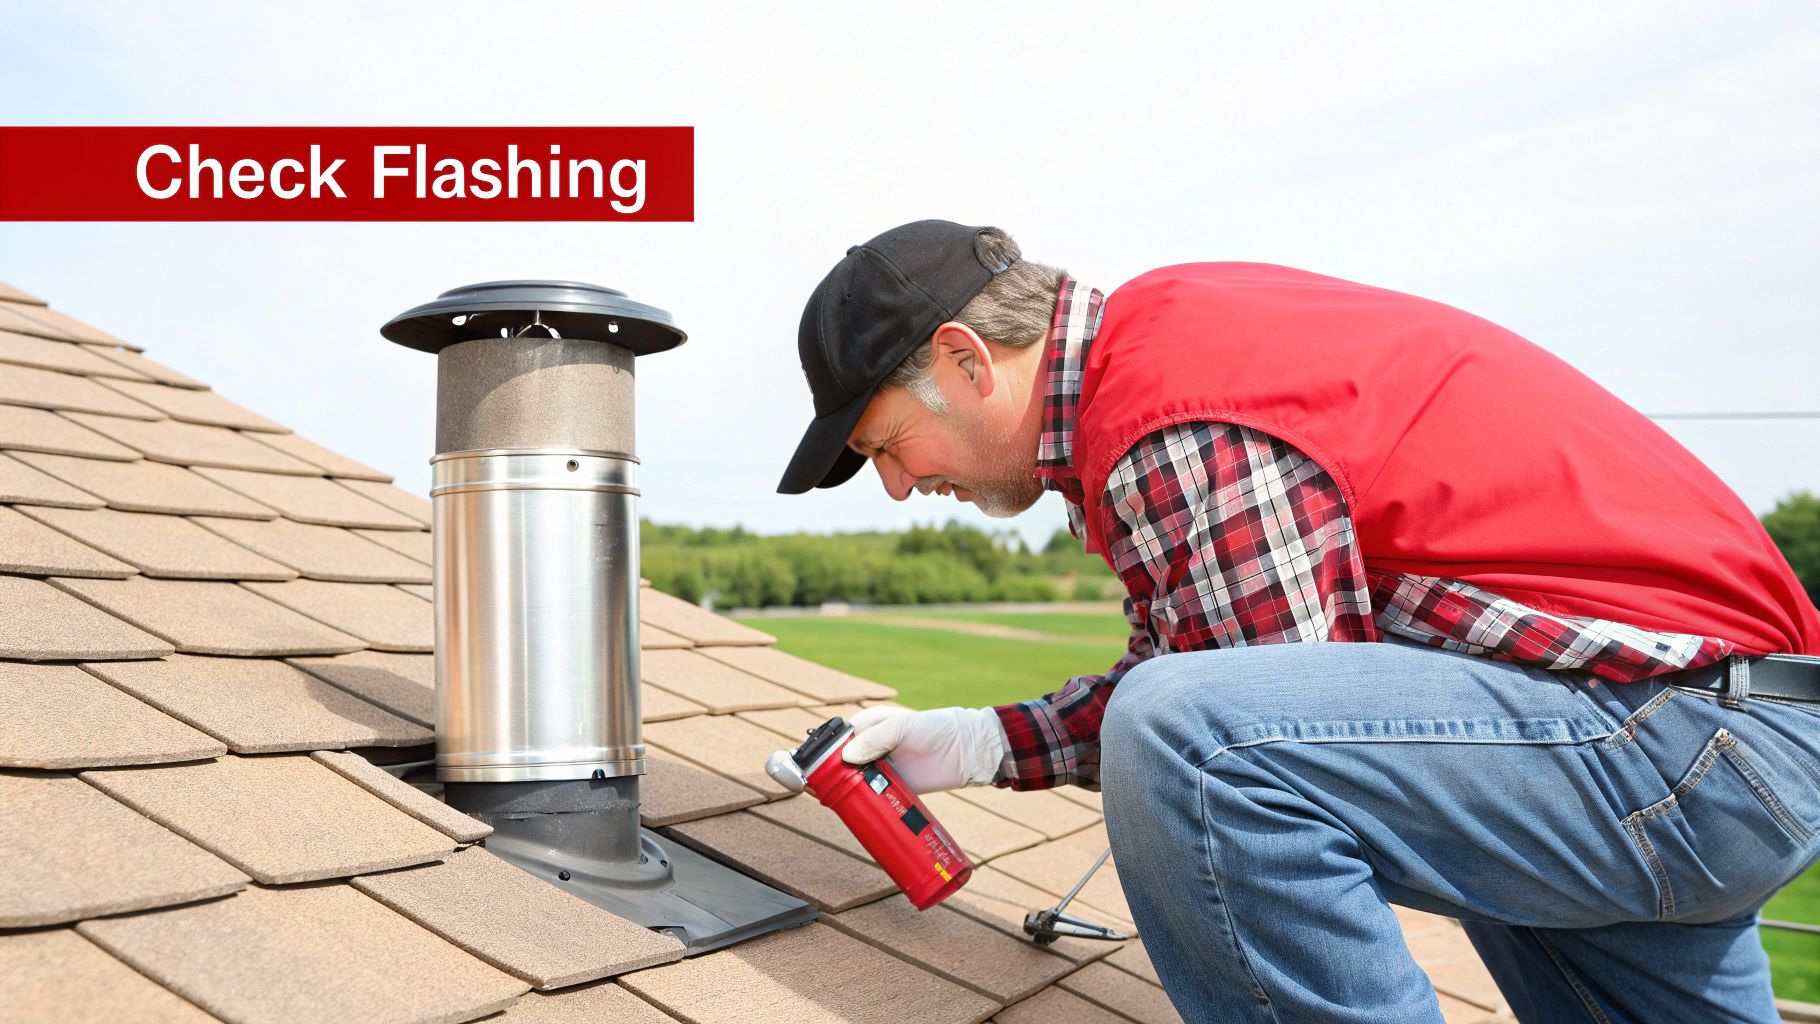
4. Inspect and Maintain Roof Flashing
Roof flashing is the thin metal material installed around roof penetrations like chimneys, vents, skylights, and where the roof meets a wall. Its sole purpose is to direct water away from these vulnerable areas and prevent it from seeping into the structure. Because flashing guards the most common entry points for leaks, its condition is a critical component of any effective roof maintenance checklist.
Why This Inspection is Crucial
Failed flashing is one of the leading causes of roof leaks. Over time, the sealant used to create a watertight bond can crack and deteriorate under Arizona’s relentless sun, creating gaps. The metal itself can also rust, corrode, or get bent by high winds or falling debris, compromising its ability to channel water. A small, undetected gap around a chimney flashing, for instance, can lead to significant water damage inside your attic, rotting the roof deck and framing before you ever see a stain on your ceiling. Regular inspections prevent this localized damage from spreading and turning into a major, expensive repair.
How to Conduct a Flashing Inspection
Follow these practical steps to ensure your roof's most vulnerable points are secure:
- Perform Biannual Checks: Inspect all flashing in the spring and fall, as well as immediately after any major storm event. This frequency helps you catch sealant degradation or storm damage early.
- Look for Separation and Gaps: Carefully examine where the flashing meets the roof and the object it's sealing (like a chimney or vent). Look for any signs of pulling away, cracking in the sealant, or visible gaps.
- Check for Rust and Corrosion: Scan the metal for any orange discoloration, rust stains, or holes. Corrosion weakens the metal and is a clear sign that the flashing needs replacement.
- Re-seal as Needed: If you find cracked or shrinking sealant but the metal is in good shape, you can often apply a new bead of high-quality roof cement or polyurethane caulk for a temporary fix. However, professional replacement is the best long-term solution.
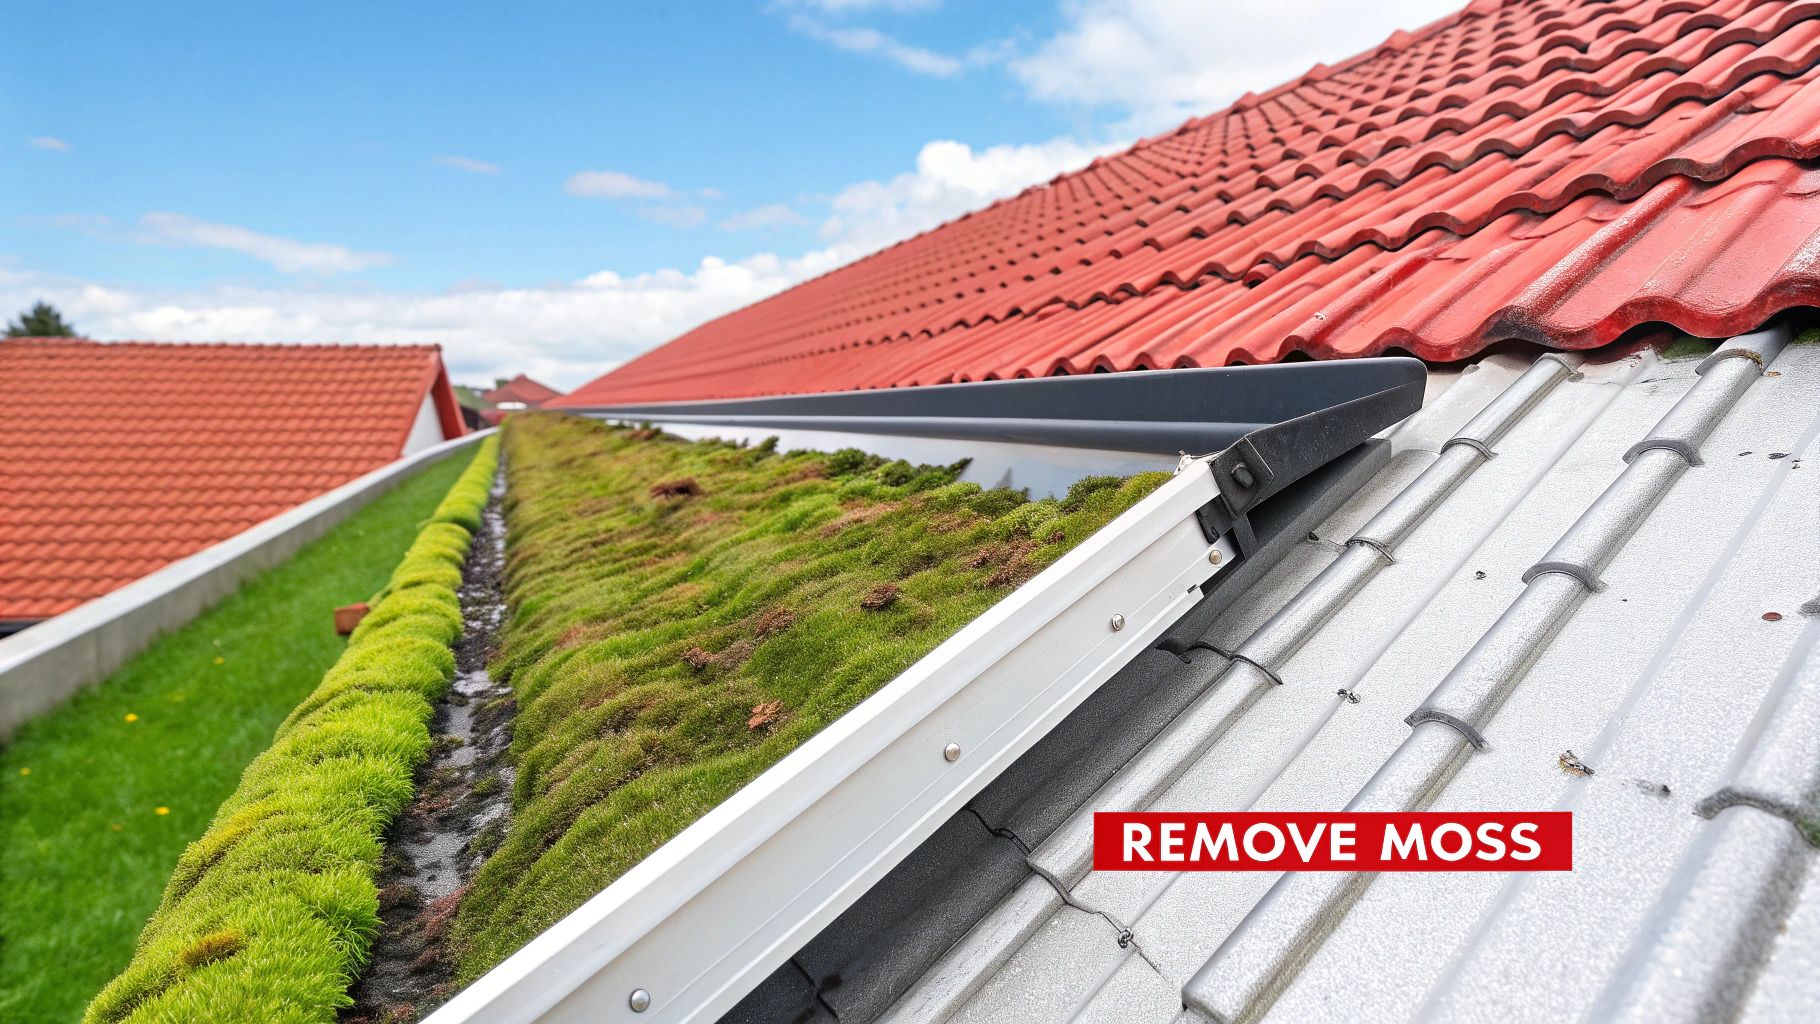
5. Remove Moss, Algae, and Lichen Growth
Organic growth like moss, algae, and lichen can accumulate on your roof, especially in shaded, damp areas common on north-facing surfaces. While it might seem like a simple cosmetic issue, this growth acts like a sponge, trapping moisture directly against your shingles. This constant dampness accelerates the deterioration of protective granules and can lead to premature aging and rot, making it a critical item on any roof maintenance checklist.
Why This Inspection is Crucial
Allowing organic growth to fester compromises your roof's integrity. Moss can grow underneath shingle edges, lifting them and creating pathways for water to penetrate the underlayment. In climates with freeze-thaw cycles, this trapped water can expand, cracking shingles and causing significant damage. By proactively removing this growth, you not only preserve your home's curb appeal but also extend the functional lifespan of your roofing materials, preventing moisture-related structural issues before they begin.
How to Safely Remove and Prevent Growth
Follow these practical steps to manage moss, algae, and lichen without damaging your roof:
- Gentle Cleaning Methods: Never use a high-pressure washer, which can strip away protective shingle granules. Instead, use a low-pressure sprayer (under 500 PSI) or a soft-bristle brush to gently dislodge the growth.
- Choose the Right Cleaner: Opt for oxygen-based or specifically formulated roof cleaners instead of chlorine bleach, which can be harsh on roofing materials and harmful to surrounding landscaping.
- Install Protective Strips: For a long-term solution, have zinc or copper strips installed along the roof ridge. As rainwater washes over these strips, it picks up metallic ions that are toxic to moss and algae, preventing future growth.
- Improve Sunlight and Airflow: Trim overhanging tree branches to reduce shade and allow more direct sunlight to hit the roof surface. This helps the roof dry out faster, creating a less hospitable environment for organic growth.
6. Inspect and Seal Roof Penetrations and Vents
Any object that passes through your roof's surface, such as plumbing vents, exhaust fans, chimneys, or HVAC units, creates a necessary but vulnerable point. These penetrations are sealed with flashing and specialized materials like rubber boots and caulk, but these seals can degrade over time due to weather exposure. Making this inspection a priority in your roof maintenance checklist is essential for preventing some of the most common and damaging types of leaks.
Why This Inspection is Crucial
Failed seals around roof penetrations are a leading cause of water infiltration that often goes unnoticed until significant damage occurs in the attic or ceiling. In climates like Arizona's, intense UV radiation accelerates the breakdown of rubber boots, causing them to become brittle and crack. Similarly, sealants can dry out, shrink, and pull away from the vent and roofing material, creating a direct path for rainwater during monsoon season. When inspecting these areas, it's also crucial to consider the maintenance and potential issues with any large installations, such as those related to rooftop AC unit repair, which can have complex sealing requirements.
How to Conduct a Penetration Inspection
Follow these practical steps to ensure all vents and penetrations are properly sealed:
- Examine Rubber Boots: Look closely at the rubber boots (or pipe collars) around plumbing vents. Check for any signs of cracking, splitting, or deterioration. A compromised boot is a guaranteed leak waiting to happen.
- Check Sealants and Caulk: Inspect the caulking around flashing and vents. Look for gaps, cracks, or areas where the sealant has pulled away. High-quality roofing sealant should be flexible, not hard and brittle.
- Verify Flashing Integrity: Ensure all metal flashing around chimneys, skylights, and vents is secure, free of rust, and lying flat against the roof. Make sure the flashing is properly nailed and sealed to prevent water from getting underneath it.
- Document and Act: Take photos of any suspect seals or damaged boots. It's often more cost-effective to preemptively replace a deteriorating rubber boot than to repair the extensive water damage it could cause later.
7. Trim Tree Branches and Remove Debris
The trees surrounding your property provide shade and beauty, but they can pose a significant threat to your roof's health if not properly managed. This step in your roof maintenance checklist involves clearing away organic debris and trimming back any overhanging branches that could cause physical damage or moisture retention. Neglecting this task allows leaves, pine needles, and branches to accumulate, creating a damp environment perfect for moss, algae, and rot.
Why This Inspection is Crucial
Overhanging branches can scrape against shingles during high winds, stripping away their protective granules and reducing their lifespan. Heavier limbs can fall during storms, causing catastrophic structural damage. Furthermore, accumulated debris like wet leaves and pine needles can clog roof valleys and gutters, leading to water backups that seep under roofing materials. In Arizona, this trapped moisture combined with intense sun can rapidly accelerate the deterioration of shingles and underlayment, inviting leaks and pests.
How to Conduct Tree and Debris Maintenance
Follow these practical steps to protect your roof from landscaping hazards:
- Maintain a Safe Clearance: Trim all tree branches so they are at least six to eight feet away from your roofline. This prevents scraping damage and limits access for pests like squirrels and rodents.
- Clear Debris Regularly: After major storms and with each new season, use a leaf blower or a soft-bristled broom to carefully remove all accumulated leaves, twigs, and other debris from the roof surface.
- Focus on Valleys: Pay special attention to roof valleys, where debris naturally gathers. Clogs in these critical drainage channels are a primary cause of water pooling and leaks.
- Hire Professionals for Large Jobs: For large, heavy branches or trees close to your home, always hire a professional tree trimming service to ensure the work is done safely and correctly. For homeowners looking for comprehensive guidance on managing the trees around your property, explore these essential tree trimming tips for homeowners.
8. Schedule Professional Roof Inspection and Assessment
While homeowner inspections are vital, nothing replaces the comprehensive evaluation of a certified professional. A professional roof inspection goes beyond a simple visual check, utilizing specialized tools and expertise to assess the entire roofing system, identify hidden issues, and accurately predict its remaining lifespan. This expert assessment is a cornerstone of any long-term roof maintenance checklist, providing the clarity needed to make informed decisions.
Why This Inspection is Crucial
A professional evaluation uncovers subtle problems that are easily missed by an untrained eye. For instance, an inspector using thermal imaging can detect moisture trapped beneath the roof's surface long before it causes a visible leak inside your home. This proactive approach helps prevent catastrophic failures and provides crucial documentation for insurance claims after a storm. For Arizona homeowners, an expert can assess how years of intense UV exposure have impacted your specific roofing material, providing an accurate timeline for budgeting future repairs or a full replacement. Discover the in-depth process and benefits of a comprehensive evaluation by exploring professional roof inspections in Arizona.
How to Approach a Professional Inspection
Follow these steps to maximize the value of a professional roof assessment:
- Choose a Certified Inspector: Look for professionals with certifications from reputable organizations like the National Roofing Contractors Association (NRCA) or who are licensed and insured in your state.
- Schedule Strategically: The best times for an inspection are in the spring or fall when weather conditions are mild. However, it's essential to schedule one immediately following any major weather event.
- Request Detailed Documentation: A proper inspection report should be comprehensive, including clear photos, a written analysis of the roof's condition, recommended repairs, and an estimated lifespan.
- Keep Diligent Records: Maintain a file of all inspection reports and repair invoices. This history is invaluable for tracking your roof's health, handling warranty claims, and for potential home buyers.
Frequently Asked Questions (FAQs)
How often should I perform a roof maintenance check?
It's best to inspect your roof twice a year, typically in the spring and fall. You should also perform a check after any major weather event, such as a hailstorm, heavy snow, or high winds, to address any new damage immediately.
Can I do all roof maintenance myself?
Many tasks on this checklist, like cleaning gutters and conducting visual inspections from the ground with binoculars, are suitable for DIY. However, any tasks that require you to get on the roof, handle complex repairs, or assess structural integrity should be left to a licensed and insured professional to ensure safety and prevent further damage.
What are the most common signs of roof problems?
The most common warning signs include missing, cracked, or curling shingles; an excessive amount of shingle granules in your gutters; water stains on your interior ceilings or walls; sagging roof decking; and damaged flashing around vents, chimneys, or skylights.
How much does a professional roof inspection cost?
The cost of a professional roof inspection can vary depending on your location, the size and complexity of your roof, and the type of inspection performed (e.g., visual vs. thermal imaging). On average, you can expect to pay between $200 and $600 for a detailed assessment and report.
Does regular maintenance really extend my roof's life?
Absolutely. Proactive maintenance can significantly extend the lifespan of your roof. By catching and repairing small issues like loose shingles, clogged gutters, or failing sealant, you prevent them from turning into major problems like widespread leaks, wood rot, and structural damage that can lead to premature roof failure.

