When a fierce Arizona storm damages your roof, the path to getting it repaired can seem daunting. Navigating the roof insurance claim process feels complex, but it doesn't have to be. Understanding the key steps—from immediate documentation to negotiating with your insurer—empowers you to secure a fair settlement and restore your home's most crucial protection. This guide will walk you through the entire process, providing the clarity and confidence you need to manage your claim successfully.
Key Takeaways
- Document Immediately: Before you do anything else, take photos and videos of all damage from the safety of the ground. This initial evidence is your most powerful tool.
- Call a Roofer First: Get a professional inspection from a trusted local roofer before calling your insurance company. Their detailed report gives you leverage and a clear understanding of the damage.
- Understand Your Settlement: Learn the difference between Replacement Cost Value (RCV) and Actual Cash Value (ACV) to know how and when you will be paid.
- Don't Accept a Lowball Offer: If the initial settlement is too low, a good contractor can file a supplement with evidence to negotiate for the full amount needed to do the job correctly.
- Never Let a Contractor Waive Your Deductible: It is illegal and a major red flag. Your deductible is your responsibility as the homeowner.
Your First Steps in the Roof Claim Process
Let's paint a picture. A nasty hailstorm just barrelled through your part of Phoenix. The next day, you notice dents all over your metal awnings and a bunch of shingle granules—the sandy stuff—piled up where your downspouts drain. It's easy to feel a surge of panic, but this is exactly when a clear head and a methodical plan pay off. What you do in the first 24 to 48 hours is crucial.
This isn't the time to grab a ladder and play hero on the roof; that's just asking for trouble. Your job right now is to gather proof from the safety of the ground and stop things from getting worse, like covering a hole to prevent a leak.
This simple chart breaks down those first critical actions.
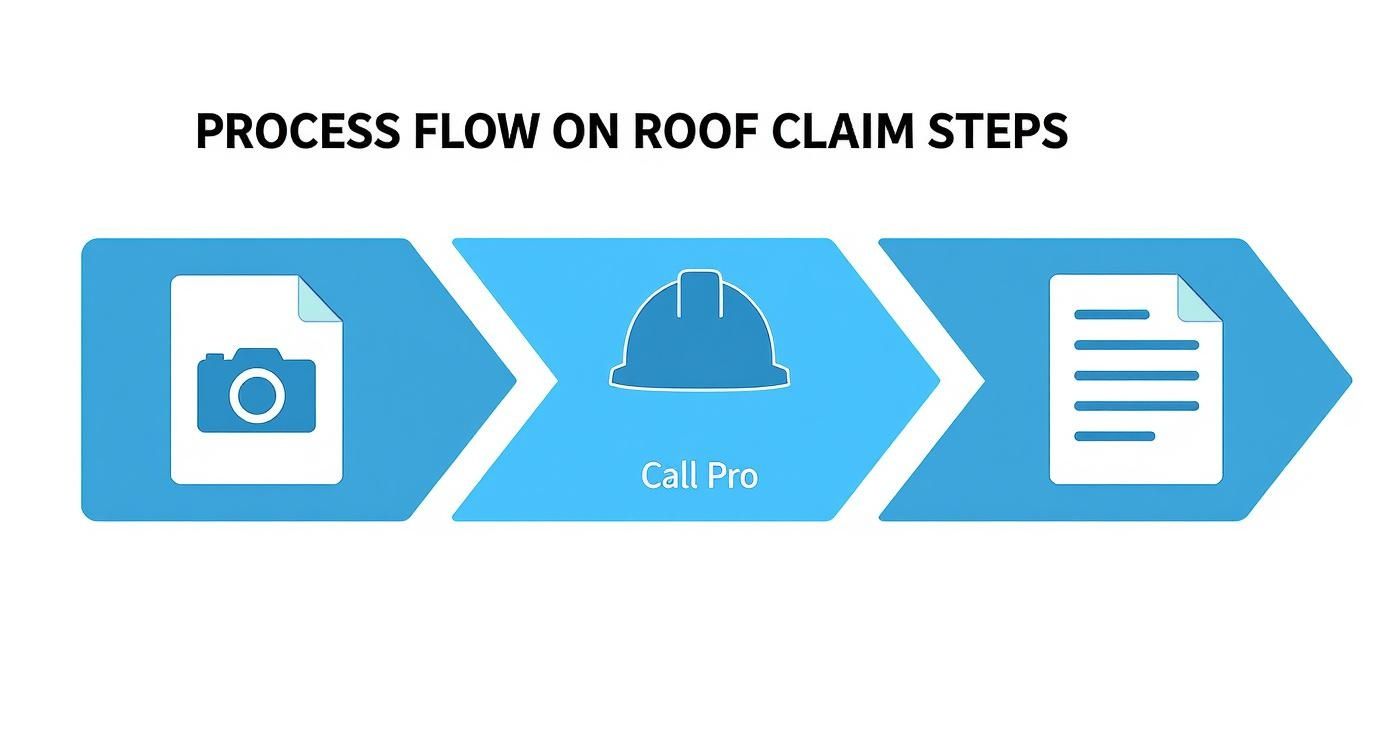
As you can see, getting that professional assessment is the essential step that connects seeing the damage to actually filing the claim. It’s about having an expert back you up from the very beginning.
What to Do Immediately After Discovering Roof Damage
That sinking feeling you get after a big Arizona storm rolls through is all too familiar. You might spot a tree limb on your roof, find a few shingles scattered across your lawn, or worse, see a new water stain blooming on your ceiling. It’s easy to feel a surge of panic, but what you do in these first few moments can make or break your entire roof insurance claim process.
The most important thing to remember? Your safety comes first. Always.

First, a Safety Check from the Ground
I can't stress this enough: never climb onto a roof you suspect is damaged. A roof system that's been hit by heavy winds, hail, or falling debris is unpredictable. It can be slippery, weak, and flat-out dangerous. It's simply not worth the risk.
Instead, grab your smartphone and do a thorough walk-around of your property. This is your chance to become a detective. Take pictures and videos of everything you see, no matter how small it seems. The more evidence you can gather before anyone touches anything, the stronger your claim will be.
Here are the tell-tale signs I tell homeowners to look for:
- Missing Shingles: Are there obvious gaps where shingles should be? Look for pieces that are cracked, curled up at the edges, or lifted.
- Debris: Take photos of any tree branches or other objects that landed on the roof.
- Dents and Dings: Your gutters, downspouts, and roof vents are your best friends here. Dents on these metal surfaces are clear evidence of hail.
- Granules: See a pile of what looks like coarse black sand in your gutters or at the base of your downspouts? Those are the protective granules from your shingles—a major red flag.
- Interior Damage: Don't forget to look up when you go back inside. Water stains, bubbling paint, or any sign of moisture in the attic needs to be photographed immediately.
Document Everything Like a Pro
Think of your photos and videos as the foundation of your insurance claim. You're building a visual record that proves the damage happened as a direct result of a specific event.
Your initial documentation is the single most important piece of evidence you'll have. Insurance adjusters work off proof, and time-stamped photos from the day after the storm are undeniable. Be more thorough than you think you need to be.
A picture of a hail-dented gutter is a thousand times more powerful than just saying, "the hail damaged my house." This is especially true when you consider that wind and hail damage account for nearly 50% of all homeowners insurance claims in the U.S. Your detailed proof is what will make your claim stand out.
To help you get started, we've put together a quick checklist for that initial damage assessment. It walks you through what to do, why it's important, and a few pro tips from our years of experience.
Initial Roof Damage Assessment Checklist
| Action Item | Why It's Important | Pro Tip |
|---|---|---|
| Stay on the ground. | Your personal safety is the absolute top priority. Damaged roofs are unstable. | Use binoculars or your phone's zoom feature to get a closer look from a safe distance. |
| Photograph/video everything. | This creates a time-stamped, undeniable record of the damage before any repairs. | Take wide shots of each side of the house, then zoom in on specific problem areas like dented vents or missing shingles. |
| Inspect gutters & downspouts. | Dents on metal are clear, objective proof of hail impact size and severity. | Check for granule accumulation at the bottom of your downspouts—it’s a key sign of shingle wear. |
| Check inside the house. | Leaks, water stains, and attic dampness confirm that the roof's integrity has been compromised. | Use a flashlight in your attic to look for wet spots on the insulation or wood decking. |
Following these steps ensures you have a solid, well-documented starting point before you even pick up the phone.
Stop the Damage from Getting Worse
Once you have your evidence, your next job is to prevent more damage. In the insurance world, this is called mitigation, and it’s a requirement in most policies. Your insurer expects you to take reasonable steps to protect your home from further harm.
This doesn't mean doing a full repair. It means taking temporary measures like:
- Tarping a hole to keep rain out.
- Moving furniture and valuables away from an active leak.
- Boarding up a shattered skylight.
Make sure you keep the receipts for any supplies you buy, like tarps or plywood. These costs are usually reimbursable. If you skip this step, an insurer could argue that they aren't responsible for secondary issues, like mold that grew a week after the initial leak.
Your First Call? A Professional Roofer.
This may sound backward, but your first call shouldn't be to your insurance company. It should be to a reputable, local roofer.
Why? Getting an expert from AZ Roof Co to perform a professional inspection gives you a detailed, unbiased report from your side of the table. Our inspection is different from the one the adjuster will do; we're looking for every little detail to ensure your home is properly restored.
We know how to identify the subtle signs of damage that are often overlooked, like the small, bruised circles that hailstones leave behind. We even have a guide on how to spot hail damage on your roof that explains what we look for.
When you file your claim with our professional assessment already in hand, you're starting the process from a position of knowledge and strength.
Filing Your Claim and Meeting the Adjuster
You've got a professional inspection report in your hands, which means you're no longer just guessing about the damage—you have documented proof. This is where the rubber meets the road, and it's time to officially kick off the roof insurance claim process. Getting this part right, from the first phone call to the adjuster's visit, is absolutely crucial for a fair outcome.
Making the Initial Call to Your Insurer
First things first: you need to contact your insurance provider’s claims department. The number is usually on your policy paperwork, your insurance card, or their website. Before you pick up the phone, take a minute to get your ducks in a row.
Having this information ready makes the call go much smoother:
- Your Policy Number: This is the first thing they’ll ask for.
- Date and Time of Damage: Be as precise as you can. Saying "during the monsoon storm on the evening of August 15th" is much better than "sometime last month."
- A Simple, Factual Description: Stick to what you know for sure. All you need to say is, "My home sustained roof damage from a recent hailstorm, and a professional roofer has confirmed it."
Resist the urge to speculate on the full extent of the damage. Let the roofer's report and your photos tell the story. Your job is simply to report the loss, not to play claims expert. After the call, they'll give you a claim number—write it down and keep it handy, as you'll need it for every conversation from here on out.
The Adjuster's Visit Is the Main Event
Not long after you file, an insurance adjuster will call to schedule a visit to your property. I can't stress this enough: this meeting is the single most important moment in your entire claim. The adjuster works for the insurance company, and their job is to evaluate the damage and calculate the repair costs based on their findings and your policy.
This is exactly why you need your own expert in your corner. You should always have your trusted roofing contractor present when the adjuster comes out. It's like bringing a trusted mechanic to check out a used car before you buy it—your roofer is there to advocate for you.
A seasoned roofer knows precisely what to point out, making sure the adjuster doesn't overlook subtle but critical damage. They speak the same technical language and can discuss local building codes, specific material needs, and proper installation methods that directly impact the settlement amount. If you're looking for an expert to have on your side, our guide on how to find a good roofer is a great place to start.
What the Adjuster Is Looking For
The adjuster's primary goal is to verify that the damage was caused by a covered event, like a hailstorm, and isn't just the result of old age or poor maintenance. They'll take a methodical look at your entire property, not just the shingles.
Here’s what’s on their checklist:
- Collateral Damage: They'll hunt for hail dents on softer metals—gutters, roof vents, and A/C units. This is their way of confirming the storm's intensity.
- Roof Surface Inspection: On the roof itself, they will mark out a 10×10 foot "test square" on each slope. They're counting the number of hail impacts within that square to see if it meets their threshold for a full replacement, which is often 8-10 hits per square.
- Overall Condition: They will also assess the roof's age and general wear and tear to factor in depreciation against your claim.
Pro Tip: Have your contractor's damage report and photos organized and ready to hand to the adjuster. Presenting a professional folder shows you’re prepared and serious, which helps set a collaborative tone right from the start.
The roof insurance claim process has definitely gotten tougher across the United States as insurance companies grapple with rising costs. After seeing a huge spike in roof-related payouts, insurers have tightened their standards. This often means stricter documentation, higher deductibles, and far more scrutiny during inspections, especially for roofs over 10 years old.
When you come prepared with your contractor by your side, the inspection shifts from a one-sided assessment to a balanced, professional conversation. Taking this proactive stance dramatically boosts your chances of getting a fair and accurate settlement that truly covers the cost of restoring your roof.
Making Sense of the Adjuster’s Report and Your Settlement
After the adjuster leaves, you’ll probably find yourself in a waiting game. Then, all at once, a stack of paperwork arrives from your insurance company. This is the adjuster’s report and your settlement offer, and honestly, it can feel like it’s written in a different language.
Don’t get overwhelmed. Understanding this document is the single most important step in making sure you’re treated fairly. This report is the insurance company’s final word on what they think is damaged and what they’re willing to pay for it. Let's break down the jargon.
The Big Three: RCV, ACV, and Depreciation
Every insurance settlement boils down to three key terms: Replacement Cost Value (RCV), Actual Cash Value (ACV), and Depreciation. These three numbers work together in a formula to determine how much money you actually get.
-
Replacement Cost Value (RCV): Think of this as the "new roof" price. It's what it would cost to completely replace your roof today, using similar quality materials, with no discounts.
-
Depreciation: Your roof wasn't brand new when the storm hit. Depreciation is the value it lost over the years from normal wear and tear. The insurance company calculates this to figure out what your roof was worth right before it was damaged.
-
Actual Cash Value (ACV): This is the "old roof" price—what your roof was actually worth in its used condition. The math is simple: RCV – Depreciation = ACV. This number is the basis for the first check you’ll receive.
A real-world example: Let’s say the RCV for your new roof is $20,000. The insurance company decides your 15-year-old roof had $8,000 in depreciation. That makes the ACV $12,000, and that’s the starting point for your first payment.
Factoring in Your Out-of-Pocket Costs
That ACV number isn't what you'll see on the check, though. Your deductible—the amount you agreed to pay yourself before insurance kicks in—gets subtracted first.
Let's stick with our example. Your ACV is $12,000, and your policy has a $2,000 deductible. The insurance company will subtract that $2,000 from the ACV.
$12,000 (ACV) – $2,000 (Deductible) = $10,000 (First Check Amount)
You’ll get a check for $10,000 to get the project moving. The remaining $8,000 is called "recoverable depreciation," and you'll get that money later.
The Two-Check System and Getting Your Full Amount
Most insurance policies these days pay out in two installments. That first check (ACV minus your deductible) is meant to help you hire a contractor and get materials ordered.
The second check—for the recoverable depreciation—is held back until the job is done. This is the insurance company's way of making sure you actually use the money to fix the roof. Once we complete the work and send them a final invoice, they release that second payment.
In our example, they'd send the final $8,000. You'd end up with $18,000 total from the insurer ($10,000 + $8,000). You pay your $2,000 deductible directly to us, and the full $20,000 project is covered.
What if the Settlement Offer Is Too Low?
It happens all the time. The insurer’s initial offer comes in lower than our estimate for the work. This doesn’t mean anyone is trying to pull a fast one; it usually just means details were missed. With roof repair costs in the U.S. soaring to nearly $31 billion annually, adjusters are often looking to keep costs down.
Here are a few common reasons for the price gap:
- Different Materials: The adjuster might have priced for a basic shingle, but your roof requires a higher-grade, impact-resistant material to meet local standards.
- Incomplete Scope: They may have overlooked necessary items like replacing all pipe jacks, adding a proper ice and water shield, or accounting for rotten wood decking we find after tearing off the old roof.
- Building Code Upgrades: Arizona building codes are always being updated. An adjuster from out-of-state might not factor in the cost of bringing your roof system up to the current, legally required standard.
This is where having an experienced local roofer in your corner is a game-changer. When an offer is too low, we step in and file a "supplement." This is a formal request for more funds, and we back it up with hard evidence: photos, line-item pricing for materials, and citations of the local building codes.
For a ballpark idea of what a full replacement might run in your area, our roof replacement cost estimator is a great starting point.
These negotiations require a delicate touch. It's about knowing how to advocate for your needs while understanding the insurer's process—a perfect example of managing client expectations effectively. A great contractor handles these supplement negotiations for you, making sure the final settlement is fair and covers everything needed to do the job right.
What to Do After the Adjuster's Decision: Approval vs. Denial
So, you’ve heard back from the insurance company. This is the moment of truth. Whether you get an approval or a denial, what you do next is critical. Each path requires a different set of actions, but staying on top of the process is key to getting your roof fixed and your life back to normal.
An approval letter is a huge sigh of relief. It means you’re on the home stretch and can finally get your home’s most important line of defense restored. Let's get this project rolling.
You Got Approved! Here’s What Happens Next
With an approval in hand, it’s time to shift from paperwork to the actual roof replacement. Your first move is to sit down with your chosen contractor (like us here at AZ Roof Co.) and finalize the contract. Make sure that document spells everything out—the exact scope of work, all the materials, the total cost, and a clear payment schedule. No gray areas.
Next up is managing the insurance money. You’ll typically get an initial check from your insurer for the Actual Cash Value (ACV) of your roof. You'll endorse this check over to your contractor so they can lock in materials and get your project on their schedule. This is also when you'll pay your deductible directly to the roofer.
A quick word on deductibles: The total cost of your new roof is covered by three pots of money: the insurer's first ACV check, your deductible, and the final insurance check for recoverable depreciation. A contractor offering to "waive" or "eat" your deductible isn't doing you a favor—they're committing insurance fraud. Steer clear.
The actual roof replacement usually moves fast, often taking just a couple of days, though bigger or more complex roofs can take a bit longer. Once the last shingle is in place and the work passes final inspection, your contractor will send a final invoice to the insurance company. This is the proof they need that the job is complete, which triggers the release of the remaining funds—the recoverable depreciation.
Got a Denial? Don't Panic. Here's How to Fight It.
Getting that denial letter in the mail is incredibly frustrating, but I’m here to tell you it’s not the end of the line. Not even close. We see initial denials get overturned all the time with a little persistence and the right evidence.
So, why do they deny claims? Often, the insurer will chalk up the damage to "wear and tear" or claim you didn't maintain the roof properly, conveniently ignoring the recent hailstorm. Other times, they’ll argue the damage isn’t severe enough to warrant a full replacement.
If you find yourself in this situation, here’s your game plan:
- Demand a Second Look: You are well within your rights to request a second inspection from a different adjuster. Sometimes, all it takes is a fresh pair of eyes to see what the first person missed.
- Bring in the Reinforcements: This is where having a knowledgeable roofer in your corner really pays off. We can create a detailed, evidence-based report pinpointing the storm damage—complete with photos and professional analysis—that the initial adjuster overlooked.
- Escalate with an Expert: For really tough cases, bringing in a third-party structural engineer or a licensed public adjuster can be a game-changer. Their unbiased, expert reports carry a lot of weight and can be incredibly persuasive with an insurance company.
Appealing a denial takes patience, but it’s a battle you can win. By methodically building your case with new evidence and expert opinions, you give yourself the best possible shot at turning that "no" into a "yes." Don’t let the first answer be the last word.
Frequently Asked Questions
How long does a typical roof insurance claim take?
It really depends. A straightforward claim might wrap up in a few weeks, but more complex ones can stretch out for a few months. The timeline is affected by how bad the damage is, how slammed your insurance company is after a big storm, and how quickly you get them all the paperwork they need.
Should I get a roofing estimate before I file a claim?
Absolutely. We can't recommend this enough. Having a detailed inspection and estimate from a qualified contractor like AZ Roof Co gives you a solid, real-world baseline. When the insurance adjuster comes out, you'll already know what the damage looks like and what it should cost to fix, putting you in a much stronger negotiating position.
Will filing a roof claim make my insurance premium go up?
A single claim following a major weather event (an "Act of God") will almost never cause your individual rate to go up. Insurance companies cannot single you out. However, they may raise rates for the entire area affected by the storm. Your rates could increase whether you file a claim or not, so don't let this fear stop you from using the coverage you pay for.
Can my roofing contractor pay my deductible?
No. It is illegal for a contractor in Arizona to waive, absorb, or cover your insurance deductible. This practice is considered insurance fraud. Your deductible is your legal responsibility in the claim. Any roofer who offers to do this is a major red flag, and you should avoid them.
What's the difference between ACV and RCV?
- Replacement Cost Value (RCV) is the full amount it costs to replace your roof with new materials at today's prices.
- Actual Cash Value (ACV) is the value of your old roof right before it was damaged. It's calculated by subtracting depreciation (value lost due to age and wear) from the RCV.
Most policies pay in two parts: first, a check for the ACV (minus your deductible), and then a second check for the remaining amount (the recoverable depreciation) after the work is complete.
If your claim gets denied or the settlement offer feels unfairly low, you might need some extra help. Navigating complicated policy disputes can be tough, but flexible legal advice can make a difference. Some property owners even choose to access lawyers on demand to get expert guidance on specific issues without the cost of hiring a full-time attorney. It's a smart way to get professional support exactly when you need it.

