Whether you're planning a DIY shingle replacement or gathering quotes from professional roofers, knowing how to calculate your roof's square footage is the critical first step. An accurate measurement ensures you buy the right amount of materials, create a realistic budget, and avoid costly delays. This guide breaks down the process into simple, manageable steps, from understanding key terms like "roofing square" and "pitch" to using different measurement techniques, so you can start your project with confidence.
Key Takeaways
- A "Roofing Square" is 100 Square Feet: All roofing materials are bought and sold in "squares." A 2,000 sq. ft. roof is a 20-square roof.
- Pitch is Everything: The slope, or pitch, of your roof significantly increases its surface area compared to its ground-level footprint. You must use a pitch multiplier to get an accurate measurement.
- Always Add a Waste Factor: Order 10-15% more material than your final calculation to account for cuts, starter rows, and ridge caps.
- Safety First: If your roof is steep or you're uncomfortable with heights, use ground-based or digital measurement methods instead of climbing a ladder.
Your Blueprint for an Accurate Roof Measurement
Knowing how to calculate your roof's square footage is the starting line for any roofing project, whether you're tackling a repair yourself or getting quotes from contractors here in Arizona. An accurate measurement is what drives your budget, your material order, and your project schedule. A bad number can mean running out of shingles halfway through the job or, just as bad, having stacks of expensive materials leftover.
The biggest mistake I see homeowners make is measuring the ground-level footprint of their house and thinking that’s the size of their roof. It's never that simple. Because of its slope, or pitch, a roof always has a larger surface area than the floor plan it covers.
Getting Geared Up and Talking the Talk

Before you even think about climbing a ladder, let's talk prep work. A successful roof measurement project starts on the ground with the right gear and a solid grasp of the lingo. Trying to wing it without the proper equipment is a recipe for bad numbers and, more importantly, a serious safety risk.
Learning the terminology is just as crucial. It's the language contractors and suppliers speak, and knowing it will help you understand every part of the process, from measuring to ordering materials. Nailing this prep phase is what separates a confident, accurate calculation from a whole lot of guesswork.
Your Roof Measurement Toolkit
Having the right tools ready to go makes the job flow smoothly and safely. You don’t want to be making extra trips up and down the ladder because you forgot something.
- 100-Foot Tape Measure: Don't even try this with a 25-foot tape. You need the length to measure entire roof planes in one shot for the most accurate numbers.
- A Solid Ladder: Make sure it’s tall enough to get you to the roofline safely and always place it on firm, level ground. No wobbling allowed.
- Safety Harness & Rope: This is non-negotiable. If your feet touch the roof, you need to be wearing a harness. It’s the single most important piece of safety equipment you'll own.
- Good Boots: Footwear with excellent grip is a must. Roof surfaces can be slick with dust, debris, or morning dew.
- Pencil & Paper (or a phone): You need a reliable way to write down your numbers immediately. A clipboard with a pen tied to it is a classic for a reason.
The biggest mistake I see homeowners make is skimping on safety. A fall from even a one-story roof can be life-altering. Treat your ladder setup and safety harness as mission-critical—because they are.
Decoding the Lingo: Key Roofing Terms
Once you’re on the roof, you’ll be looking at different features and sections. Knowing what they’re called is essential for breaking the job down into manageable, measurable parts.
- Pitch: This is simply the roof's steepness. It’s written as a ratio, like 6/12, meaning the roof rises 6 inches for every 12 inches it runs horizontally.
- Plane: Any single flat surface of the roof. A basic gable roof has two large planes.
- Ridge: The highest point of the roof, where two opposing planes meet at a horizontal peak.
- Eave: The bottom edge of the roof that hangs over the side of the house.
- Valley: An internal angle where two roof planes meet, forming a V-shaped channel for water runoff.
- Hip: The opposite of a valley—it's an external angle where two planes meet.
The Magic Number: What Is a "Roofing Square?"
Here's the most important term you'll learn: the roofing square. In the roofing world, nobody talks in thousands of square feet. We talk in "squares."
One roofing square is exactly 100 square feet.
This has been the industry standard for a century, and it simplifies everything. A roof that measures 2,350 square feet is simply called a 23.5 square roof. This number is used to calculate everything from the amount of shingles and underlayment to the cost of labor. You can learn more about how contractors work with this crucial unit of measurement.
How to Measure Roof Pitch and Use Pitch Multipliers
If there’s one mistake that will completely derail your roofing estimate, it’s ignoring the pitch. This is a classic rookie error. A sloped roof has far more surface area than the simple, flat footprint of the house below, and if you don't account for that slope, you'll come up short on materials every single time.
Put simply, pitch is just the roof's slope. We measure it as the vertical 'rise' over a standard 12-inch horizontal 'run.' So, a 6/12 pitch means the roof goes up 6 inches for every 12 inches it runs horizontally. Getting this one concept right is the key to an accurate material order.
Safely Finding Your Roof Pitch
You don't need fancy equipment to figure out your roof's pitch. All it takes is a reliable level and a tape measure. You can usually get this measurement safely from a sturdy ladder at the eaves or even by leaning out of an attic window that overlooks a gable end.
Here’s a tried-and-true method:
- Set Your Level: Place a 24-inch level so it’s sitting horizontally against the roof slope. You’ll want that bubble perfectly centered.
- Mark the Run: From one end of the level, measure exactly 12 inches along its horizontal edge.
- Measure the Rise: At that 12-inch mark, measure straight down to the surface of the roof. That number, in inches, is your 'rise.'
So, if you measure a 7-inch vertical drop from your 12-inch mark, you've got a 7/12 pitch. It's that straightforward. For a deeper dive into how different slopes affect roof design, take a look at our guide on what is a pitched roof.
The Power of the Pitch Multiplier
Once you have the pitch, you can find its pitch multiplier. This number is the secret sauce that converts your flat, ground-level measurements into the roof's actual, sloped surface area. You just multiply your roof’s footprint area by this number.
For example, a home with a 1,500 sq. ft. footprint and a common 6/12 pitch uses a multiplier of 1.118. The math is simple: 1,500 × 1.118 = 1,677 sq. ft. That extra 177 sq. ft. is all in the slope. Other common multipliers are 1.054 for a 4/12 pitch and a hefty 1.414 for a steep 12/12 pitch.
Pro Tip: Never, ever guess your roof's pitch. The difference between a 5/12 and a 6/12 might not sound like much, but on an average-sized home, that small miscalculation can leave you hundreds of square feet short on materials. Take five minutes and measure it right.
Common Roof Pitch Multipliers
Finding the right multiplier is easy because the geometry has already been done for us. Just use a standard conversion table like the one below.
Here are the multipliers for the most common residential roof pitches you'll run into.
Common Roof Pitch Multipliers
Use this table to find the correct multiplier for your roof's pitch to accurately calculate its total surface area.
| Roof Pitch (Rise/Run) | Slope Angle | Pitch Multiplier |
|---|---|---|
| 3/12 | 14.04° | 1.031 |
| 4/12 | 18.43° | 1.054 |
| 6/12 | 26.57° | 1.118 |
| 8/12 | 33.69° | 1.202 |
| 10/12 | 39.81° | 1.302 |
| 12/12 | 45.00° | 1.414 |
Using a chart like this takes all the guesswork out of the process. Just find your measured pitch in the first column, grab the corresponding multiplier, and you're ready for the next step. This is how you translate basic measurements into the real-world surface area needed for your material order, avoiding those costly shortages and frustrating delays.
How to Calculate Square Footage for Any Roof Type
Now that you've got a handle on what pitch and multipliers are, let's put that knowledge to work. Figuring out your roof's square footage isn't about a single magic formula; it's about picking the right approach for your specific roof and your comfort level. Whether you have a simple gable roof or a complex beast with tons of facets, there's a solid method for you.
First, we'll cover the safest and fastest technique: measuring from the ground. It's perfect for a solid estimate without ever climbing a ladder. Then, we’ll get into the nitty-gritty with the plane-by-plane method, which is the gold standard for getting a truly accurate number, especially on those more complicated roofs.
This simple visual breaks down the core process that every good estimate follows.
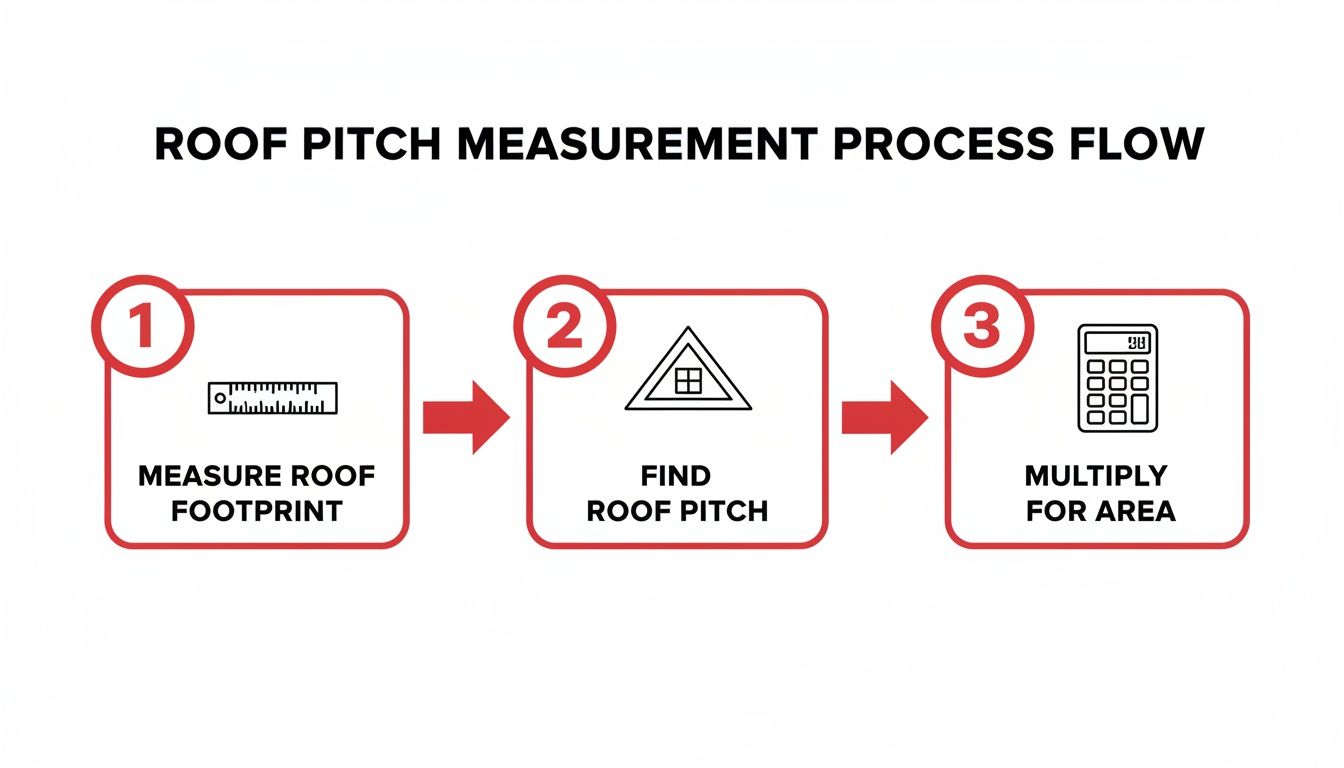
As you can see, it boils down to three key things: getting your base measurements, figuring out the slope, and then doing the right math to find the actual surface area.
The Ground Measurement Method for Quick Estimates
This is the best place to start, especially if you're dealing with a basic gable or shed roof. You're essentially measuring the building's footprint—overhangs included—and then using the pitch multiplier we talked about earlier. It's safe, it's fast, and it gives you a reliable ballpark number for budgeting and ordering materials.
Here’s the key: measure the length and width of your house from eave to eave, not just from one wall to the other. This little detail is crucial because it accounts for the roof overhangs. I’ve seen plenty of DIY projects come up short because that step was missed.
Once you have those two numbers, multiply them to get the total footprint area. Then, just multiply that figure by your roof's pitch multiplier.
Example: A Simple Gable Roof
Let’s run through a quick example for a classic gable roof, which is just two big, rectangular planes.
- Measure the Footprint: Your house measures 50 feet long (including overhangs) and 30 feet wide (also including overhangs).
- Calculate Footprint Area: 50 ft × 30 ft = 1,500 square feet.
- Apply Pitch Multiplier: You’ve determined your roof has a common 6/12 pitch, which uses a multiplier of 1.118.
- Do the Final Math: 1,500 sq ft × 1.118 = 1,677 square feet.
And that’s it. You now have a very solid estimate of your total roof area. This method is a lifesaver for getting a quick idea of your project's scope.
The Plane-by-Plane Method for Unmatched Accuracy
When you get into more complex roof designs, like a hip roof with all its triangular and trapezoidal sections, the ground measurement method starts to lose its accuracy. That's when you need to switch to the Plane-by-Plane Method. This means you measure each individual roof surface (don't forget the dormers!) as its own shape and then add all the areas together.
This is the exact method most professional roofers use because it eliminates guesswork. It systematically accounts for every single peak, valley, and unique angle on your roof, ensuring the final number is as precise as it gets.
Yes, it takes more time and some careful measuring, but the reward is an exact figure you can confidently use to order materials without a doubt.
Calculating a Complex Hip Roof
A hip roof is the perfect candidate for this detailed approach. It generally has four sides: two larger trapezoid-shaped planes and two smaller triangle-shaped planes on the ends.
Let's imagine a hip roof on that same 50-foot-long by 30-foot-wide house.
- Triangles (the ends): The base of each triangle is the width of the house (30 feet). Let's say the height of that triangle, from the eave up to the ridge, is 12 feet. The area of one triangle is (0.5 × base × height), which gives us 0.5 × 30 × 12 = 180 square feet. Since you have two of them, that's 360 sq ft total.
- Trapezoids (the sides): These are a little trickier. You'll need to measure the length of the top ridge and the bottom eave, plus the height of the trapezoid. The formula is: (top length + bottom length) ÷ 2 × height.
After you've calculated the area for all four planes, you just add them up. This meticulous process makes sure every square inch is accounted for—something that's absolutely critical for complex roofs.
What About a Simple Shed Roof?
A shed roof is the easiest of all. It’s just one large, flat, rectangular plane tilted at an angle.
- Measure the length of the roof, either along the ridge or the eave.
- Measure the width, which is the distance from the high side down to the low side (this is often called the "slope length").
- Multiply the length by the width.
For instance, if your shed roof is 20 feet long and 15 feet wide (measured along the slope), its area is simply 20 × 15 = 300 square feet. If you can safely get on the roof and measure the sloped surface directly, you don't even need to worry about pitch multipliers. It’s just simple multiplication.
Using Modern Tech for Safer Roof Measurements
Climbing a ladder with a tape measure might be the old-school way to size up a roof, but it's definitely not your only option anymore. Technology has given us safer, faster, and surprisingly precise alternatives that keep your feet planted firmly on the ground. These digital tools are completely changing the game for both homeowners and professional roofers.
You can now get the data you need for your roofing project without ever leaving your driveway. From free satellite imagery to specialized software, these methods turn a potentially hazardous job into a simple desktop task, taking the biggest risks right out of the equation.
Satellite and Aerial Imagery Services
One of the easiest ways to get started is with satellite imagery. A tool like Google Earth Pro—which is the free, downloadable desktop version—is a powerful way to get a solid preliminary measurement of your roof's basic footprint.
Using its built-in measurement tools, you can trace the outline of your roof, making sure to include all the overhangs. This will give you a remarkably accurate horizontal area, which is the perfect starting number before you factor in your roof's pitch.
Key Insight: While Google Earth is fantastic for measuring the flat footprint, remember that it cannot see or calculate your roof's pitch. You will still need to determine the slope separately to convert this 2D measurement into the true 3D surface area.
Dedicated Roof Measurement Software
If you need even better accuracy without doing the fieldwork yourself, you can turn to dedicated roof measurement software. These professional-grade services use high-resolution aerial photos, which are often much clearer and more up-to-date than public satellite maps, to generate incredibly detailed reports.
These platforms can automatically pick out every single roof plane, hip, valley, and ridge. You get a complete breakdown of your roof's geometry and a final, precise square footage calculation. While these services usually have a fee, the accuracy and safety they offer are often well worth it, especially for complex or large roofs.
Drones: The New Frontier in Measurement
Drones are quickly becoming the go-to tool for roofing pros, and for good reason. Outfitted with high-definition cameras, a drone can perform a full aerial survey of your roof in just a few minutes, capturing detailed images from every conceivable angle. It’s an exceptionally safe method that delivers a ton of useful data.
Specialized drone roofing inspection software can then stitch these images together to create a 3D model of your roof, automating the entire calculation with incredible precision. This tech doesn't just help with square footage; it's also a fantastic tool for a thorough visual check-up.
For an even more detailed analysis, you can learn about our professional roof inspection service that uses similar advanced techniques.
Weighing the Pros and Cons
Choosing your method comes down to a few key trade-offs. You really have four main options: manual plane-by-plane measurement, footprint multiplied by pitch, aerial measurement, and drone surveys. A hands-on measurement can be highly accurate (under 2% error) but it's also time-consuming and carries obvious risks.
On the other hand, aerial and drone services boast accuracy levels between 90-99% while keeping everyone safe on the ground. It's important to remember that even small errors can have a big economic impact. A 5% miscalculation on a 2,000 sq. ft. roof means you’re short by one whole roofing square, which can lead to frustrating material shortages and project delays.
Ultimately, the best method really depends on your specific needs. For a quick budget estimate on a simple gable roof, Google Earth is a great place to start. But for a complex roof or any project where pinpoint precision is critical, investing in a professional report from an aerial or drone survey is the smarter, safer bet.
Finalizing Your Estimate with Waste and Local Factors
You've done the hard work of measuring your roof planes and factoring in the pitch. You’ve got a solid square footage number, but don't head to the supply store just yet. That raw number is just the starting point.
To get a truly project-ready estimate—one that won't have you making a panicked trip back to the supplier mid-job—you have to factor in material waste and a few local quirks. This is the step that separates the amateurs from the pros and ensures your project goes smoothly.
Accounting for the Inevitable Waste Factor
I've never seen a roofing job that didn't generate waste. It’s just part of the process. Every time you cut a shingle to fit a valley, a hip, or around a plumbing vent, you create a leftover piece that’s often unusable. You also need extra material for the starter course along the eaves and for the ridge caps.
This is where the waste factor comes in, and getting it right is crucial.
For a straightforward gable roof with minimal features, a 10% waste factor is usually a safe bet. But if you’re working on a more complex roof riddled with hips, valleys, and dormers, you’ll want to bump that up to 15%, or even 20% if it's really chopped up.
Let's run the numbers. Say your roof measures out to 1,850 sq ft and it's a complex hip roof.
- Math: 1,850 sq ft × 0.15 (15% waste) = 277.5 sq ft of extra material.
- Total You Need to Order: 1,850 + 277.5 = 2,127.5 sq ft. Since materials are sold in squares (100 sq ft), you'd round up and order 22 roofing squares.
Trust me on this one: Forgetting to add a waste factor is the single most common mistake I see homeowners make. It always leads to a last-minute scramble for more materials, which can kill your momentum and drive up costs. Always, always add it in.
Special Considerations for Arizona Homeowners
Roofing in Arizona isn't like roofing anywhere else. Our intense sun and unique building styles mean you have to think a little differently when finalizing your material order.
- Tile vs. Shingles: Those beautiful clay and concrete tiles you see all over Phoenix and Tucson are heavy and brittle. You're guaranteed to break a few during installation, and the cuts are much less forgiving than with asphalt shingles. I always recommend a higher waste factor—think 15% at a minimum—for any tile roof.
- Local Building Codes: Don't assume anything. Cities across the Valley and the rest of Arizona have their own specific codes for things like wind resistance and fire ratings. Before you buy a single shingle, check with your local municipality to make sure your materials are up to snuff.
- Thinking About Energy Efficiency: Once you have an accurate measurement of your roof's surface area, you can start thinking beyond just the roofing material. It's the perfect foundation for other important calculations, like calculating insulation needs in board feet, which can make a huge difference in your summer cooling bills.
When to Call a Professional
Look, this guide gives you the tools to get a very solid estimate. But some roofs are just plain tricky. If you're looking at a very steep pitch (anything over an 8/12), a multi-level roof, or a complex design with turrets and lots of dormers, the chances of making a costly measurement error go way up. The safety risks do, too.
For a gut check on your numbers or for a complex project, our roof replacement cost estimator is a great place to start. Ultimately, though, nothing beats having a professional on-site. We can provide a guaranteed measurement and will likely spot potential issues—like soft decking or poor ventilation—that you might not see from the ground.
Frequently Asked Questions (FAQs)
How do I calculate the square footage of my roof?
The simplest method is to measure the length and width of your house's footprint (including overhangs), multiply them to get the area, and then multiply that number by the correct pitch multiplier from a standard chart. For example, a 1,500 sq. ft. footprint with a 6/12 pitch (multiplier 1.118) has a roof area of 1,677 sq. ft. (1500 x 1.118).
What is a roofing square?
A roofing square is the standard unit of measurement in the roofing industry, equal to 100 square feet. If a roof is 2,400 square feet, roofers refer to it as a "24 square" roof. All materials, from shingles to underlayment, are ordered in squares.
How much extra material should I buy for a roof?
You should always add a "waste factor" to your final measurement. For a simple gable roof, add 10% for waste. For a more complex roof with hips, valleys, and dormers, add 15%. This covers material used for cuts, starter strips, and ridge caps.
Can you calculate roof square footage from the ground?
Yes, absolutely. You can measure the footprint of your home from eave to eave and then determine the roof's pitch from the ground or a ladder. Using those two pieces of information, you can accurately calculate the total square footage without ever stepping on the roof.
Does roof square footage include overhangs?
Yes. Your roof's total square footage must include the overhangs (eaves). When measuring your home's footprint, measure from the outer edge of the roof, not from the walls of the house, to ensure you account for the entire surface that needs to be covered.

