Discovering a water stain on your ceiling is a sinking feeling every homeowner dreads. A leaky roof isn't just an annoyance; it's a direct threat to your home's structural integrity and your peace of mind. Acting quickly and correctly is crucial to prevent a minor drip from escalating into a major disaster involving rotted wood, damaged drywall, and costly repairs.
This comprehensive guide will walk you through the essential steps of repairing a leaky roof, from immediate damage control inside your home to identifying the source, performing the repair, and knowing when it’s time to call in a professional. We'll provide the practical, step-by-step advice you need to protect your biggest investment.
Key Takeaways
- Act Immediately: Your first priority is damage control inside. Place a bucket under the leak, relieve pressure from ceiling bulges, and move valuable belongings to a safe, dry area.
- Find the True Source: The leak on your ceiling is rarely directly below the entry point on the roof. You must investigate your attic for water stains and inspect the roof exterior for common culprits like damaged flashing, cracked tiles, or failed seals around vents.
- Safety is Paramount: Never get on a roof without proper safety gear, including rubber-soled boots and a safety harness for sloped roofs. Always work in safe conditions, avoiding wet surfaces and extreme heat.
- Know Your Roof Type: The repair method depends entirely on your roofing material. A fix for a tile roof is different from one for asphalt shingles or a flat foam roof. Using the wrong technique can make the problem worse.
- Prevention is Cheaper Than Repair: Regular maintenance, such as cleaning gutters and inspecting seals twice a year, can prevent most leaks from ever starting and significantly extend the life of your roof.
Your Immediate Action Plan for a Leaky Roof
Acting fast can be the difference between a small, manageable repair and a catastrophic failure that ruins drywall, insulation, and your personal belongings. Let's walk through the emergency triage you need to perform inside your home.
The goal right now is simple: contain the water, protect your home, and prevent a small problem from becoming a massive headache. Don't panic, but don't delay either. Water damage gets worse by the minute.
This image shows the classic first-response maneuver every homeowner should know.
It might seem obvious, but getting a bucket under the drip immediately stops the water from spreading and causing more extensive floor damage.
First Steps to Manage the Leak
Leaky roofs aren't just an annoyance; they're a massive part of a global roofing industry valued at $296.21 billion. Here in the U.S., the average fix for a leaky roof hovers around $1,150, but ignoring one can invite mold, rot, and even spike your energy bills by up to 16.6% as your insulation gets soaked and ruined.
So, what should you do the second you spot a leak?
- Catch the Drip: Grab a bucket, a large pot, or even a trash can and place it directly under the drip. If you have plastic sheeting or old towels, lay them down around the bucket to catch any splashes. Every drop you contain is a win.
- Relieve the Pressure: If you see the paint or drywall on your ceiling starting to bubble or sag, it’s holding a pocket of water. This is a bad sign, as it can lead to a ceiling collapse. Carefully take a screwdriver or something similar and poke a small hole in the center of the bulge to let the water drain into your bucket. It’s better to have a small, controlled hole than a giant, gaping one.
- Move Your Stuff: Get electronics, furniture, rugs, and anything else of value out of the way. Water is ruthless, and the less it can touch, the better.
Once the immediate crisis is contained, you'll have to deal with the aftermath. If water has already reached your floors, it's crucial to know how to restore water-damaged wood floors to prevent long-term warping and mold.
To help you stay focused in a stressful moment, here's a quick checklist to run through.
Emergency Leak Response Checklist
When you find a leak, it’s easy to feel overwhelmed. Use this table as a quick guide to make sure you've covered all the immediate bases to protect your home.
| Immediate Action | Why It's Important | Tools Needed |
|---|---|---|
| Place a Bucket Under the Drip | Prevents water from saturating floors, subfloors, and spreading to other areas. | Bucket, waterproof container, or trash can |
| Surround with Towels/Plastic | Catches splashes and overflow, protecting the immediate floor area. | Old towels, plastic sheeting |
| Puncture Ceiling Bulges | Safely releases trapped water, preventing a larger ceiling collapse and more severe drywall damage. | Screwdriver, awl, or a small sharp tool |
| Move Valuables | Protects furniture, electronics, and personal items from irreversible water damage. | Your hands and maybe a helper |
| Take Photos and Videos | Creates crucial evidence for your insurance claim, documenting the leak and resulting damage. | Smartphone or camera |
Following these steps methodically will save you a ton of money and stress by mitigating the damage right from the start.
How to Pinpoint the Source of Your Roof Leak
The most frustrating thing about a roof leak is that the drip you see inside is rarely where the real problem is. Water is sneaky. It can slip in through a tiny crack in a shingle, travel down a rafter, and then decide to soak your ceiling a good ten feet away. Finding the true entry point takes some patient detective work.
Before you can even think about repairing a leaky roof, you have to nail down its origin. It’s a lot like learning how to detect a water leak anywhere else in your house—you have to trace the evidence back to the source.
When you first spot a leak, the immediate goal is to manage the situation. This simple protocol is your best first move.
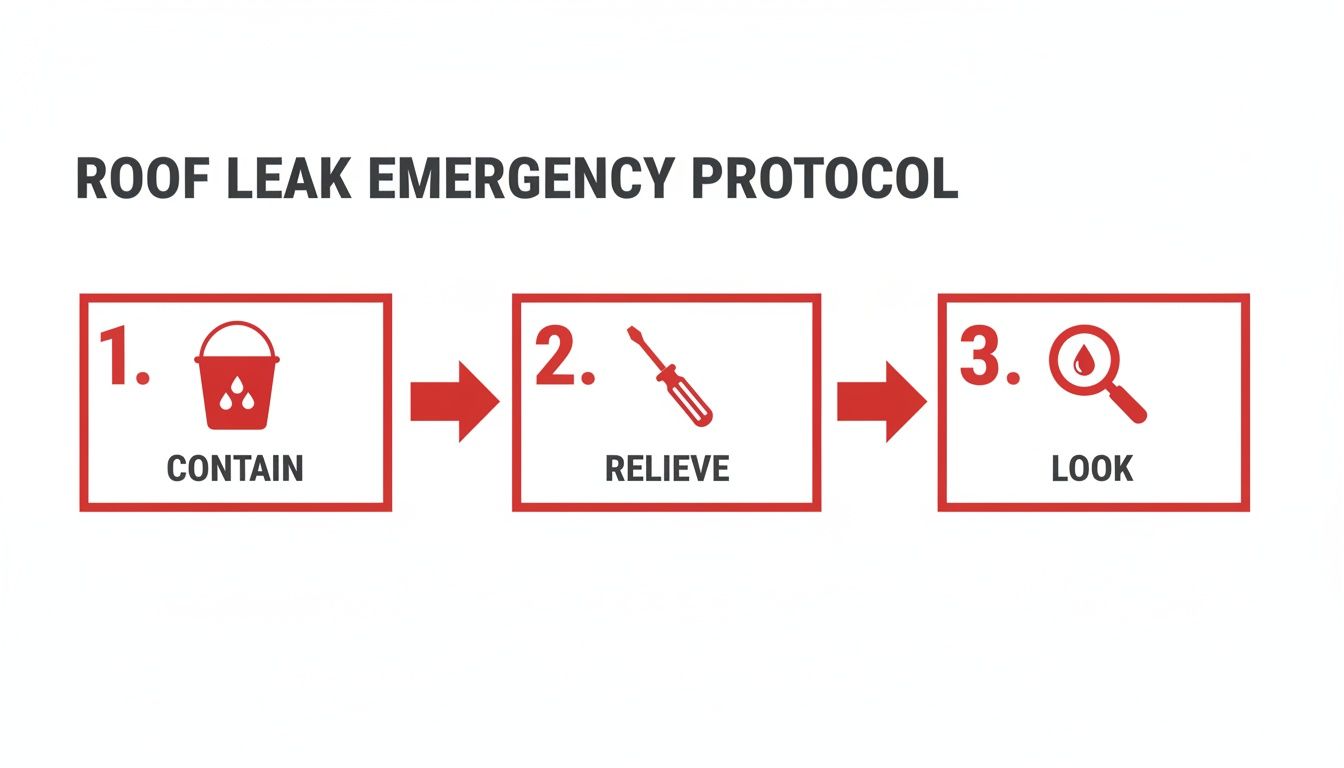
Following this "Contain, Relieve, Look" flow will help you shift from panicked damage control to a more methodical investigation.
Start Your Investigation in the Attic
Your attic is always the best place to start the hunt. Grab a powerful flashlight and head up there on a bright, sunny day. Kill the lights and scan the underside of the roof deck for any slivers of daylight peeking through. Those are the most obvious culprits.
If you don't see any light, use your flashlight to look for subtle signs of water intrusion.
- Dark Stains: Keep an eye out for streaks, water spots, or discolored wood on the rafters and sheathing.
- Wet Insulation: Feel around for insulation that looks matted down, damp, or has changed color.
- Mold or Mildew: Any black or splotchy spots are a dead giveaway that water has been getting in for a while.
Trace any stains you find upward. Water runs downhill, so follow the trail back to its highest point—that's almost certainly where it's getting in.
Inspect the Roof Exterior for Common Culprits
Once the attic gives you a general idea of the location, it's time for a safe look outside. You can do a lot with a good pair of binoculars from the ground or from the top of a securely placed ladder. Never walk on a wet or steep roof.
Here in Arizona, the relentless sun is brutal on roofing materials, making them brittle and prone to cracking. Pay close attention to these high-risk areas:
- Roof Penetrations: Anything that pokes through your roof—vents, pipes, chimneys, skylights—is a potential failure point. Check the rubber boots and metal flashing (the metal strips sealing these joints) for any cracks, gaps, or deterioration.
- Damaged Shingles or Tiles: Scan for shingles that are cracked, curling at the edges, or missing altogether. On tile roofs, a single cracked or slipped tile is all it takes for a monsoon rain to pour right in.
- Valleys: These are the V-shaped channels where two different roof planes meet. They carry a massive volume of water, and if that seal is compromised in any way, you've got a leak on your hands.
Perform a Controlled Water Test
Still can't find it? The water test is your next best bet, but you'll need a helper. One person goes inside (back up in the attic, ideally), while the other stays outside with a garden hose.
Pro Tip: Always start low and work your way up the roof. It's a common mistake to just blast the area right above the interior stain, but that can give you a false positive. Water always runs downhill.
Start by gently soaking a small section of the roof just above where you see the interior damage. Isolate small areas at a time, giving the water a few minutes to seep through after each section. The moment your spotter inside sees a drip, they should yell. It might take a while, but it's a surefire way to confirm the exact entry point before you start any repair work.
Finding the source is truly half the battle. This step ensures you’re fixing the actual problem, not just patching up the symptoms.
The Right Tools and Safety Gear for Roof Repair
Before you even think about propping a ladder against the house, let’s talk about what you need to do this job safely and effectively. Going up on a roof unprepared is a recipe for disaster. Seriously, it's one of the most common ways homeowners get hurt. Taking a few minutes to gather the right equipment is the smartest thing you can do.
This photo gives you a good idea of the baseline safety gear and hand tools you'll want within reach.

Having all this laid out before you start saves you from dangerous, frustrating trips up and down the ladder.
Your Personal Safety Checklist
Your personal protective equipment (PPE) is what stands between you and a trip to the emergency room. A fall from even a single-story roof can have life-altering consequences, so don't ever cut corners here.
Here’s the absolute minimum you should be wearing:
- Grippy, Rubber-Soled Boots: Your everyday sneakers aren't going to provide the traction you need on a dusty, sloped, or granulated roof surface. This is non-negotiable.
- Safety Harness & Rope: If your roof has any kind of noticeable pitch, a harness is a must-have. It's your lifeline, anchored securely to a point that won't budge.
- Heavy-Duty Gloves: A good pair of work gloves will save your hands from splinters, sharp metal flashing, and hot shingles.
- Safety Glasses: Eye protection is crucial. You don't want dust, debris, or a drip of sealant ending up in your eye, especially on a windy day.
A quick word of warning for us here in Arizona: that roof is going to be incredibly hot. Surfaces can easily top 150°F in the sun. This makes burns a real risk and can lead to heat exhaustion fast. Always try to work in the cooler morning hours.
Building Your Roof Repair Toolkit
Once you’re geared up for safety, it's time to assemble your tools. The goal is to have everything you need in a bucket or tool belt to minimize your trips up and down the ladder—that’s where most accidents happen.
Here’s a look at the essentials for a typical leak repair:
- A Solid Extension Ladder: Make sure it's tall enough to extend at least three feet past the roofline for stability. Always place it on solid, level ground.
- Pry Bar: A flat pry bar is the key to gently lifting shingles so you can get underneath them without causing more damage.
- Hammer & Galvanized Roofing Nails: Don't just grab any nails. You need the right length and type of galvanized roofing nail for your specific material.
- Utility Knife: Bring a sharp one with plenty of extra blades. You'll use it for trimming everything from underlayment to new shingles.
- Caulking Gun & Roofing Sealant: Get a quality, all-weather sealant. This is what you'll use to seal around flashing, vents, and nail heads.
- Tape Measure & Chalk Line: Absolutely essential for making sure any replacement shingles are installed straight and properly aligned.
Gathering this gear isn't just about being prepared; it's about adopting the mindset of a professional. It makes the entire repair process smoother, safer, and far more successful.
Repairing Leaks on Common Arizona Roof Types
Here in Arizona, our roofs take a beating from the relentless sun and the dramatic monsoon downpours. It's no surprise that different roofing materials—from classic clay tile to modern spray foam—have their own unique weak spots. When a leak springs, knowing how to tackle it correctly for your specific roof type is half the battle. This is where we get into the nitty-gritty of the actual repair work.

Fixing a roof leak is a hands-on job. A successful repair isn’t just about plugging a hole; it demands precision and the right technique for the material you're working with.
Fixing Leaks on Tile Roofs
Tile roofs are a signature of Arizona architecture, prized for their durability and timeless style. But all it takes is one cracked or slipped tile to give rainwater a direct path to the underlayment—the real waterproof barrier of your roof.
The fix usually boils down to two key tasks: swapping out the bad tile and making sure the underlayment beneath it is still solid.
- Get the old tile out: You'll need to carefully slide the tiles above and next to the broken one up and out of the way. A flat pry bar helps. Once you have clearance, you can shatter the damaged tile with a hammer and pull out the pieces.
- Check the underlayment: This is the most important step. With the tile gone, inspect the felt or synthetic layer underneath for any tears or holes. This is where the leak is actually coming from. Patch any damage you find with a quality roofing sealant and a fresh piece of underlayment, making sure to overlap it with the existing material.
- Slide in the new tile: Fit the new tile into place, tucking its top edge securely under the tile in the row above it. Often, the weight of the surrounding tiles is enough to hold it, but a dab of roofing adhesive is good insurance.
Here's a pro tip: Remember, the tile is just a shield. The underlayment does the waterproofing. If that underlayment is old and brittle, just replacing one tile is a band-aid on a much bigger problem.
If you're dealing with this classic Arizona roof issue, it pays to know the details. You can dive deeper into the best practices for effective tile roof repair tips and costs to make sure your repair holds up.
Repairing Leaks on Asphalt Shingle Roofs
Asphalt shingle roofs are everywhere, but they're especially vulnerable to our state's punishing sun, which leads to cracks. Our high winds can also lift and tear them right off. The repair itself is pretty direct, but you have to be gentle to avoid wrecking the neighboring shingles.
The first move is to carefully break the tar seal on the shingles sitting above the damaged one. I use a flat pry bar for this, but go slow—older shingles get brittle and crack easily. Once you lift the upper shingle, you can get at the nails holding the bad one down and remove them.
Slide the new shingle into place, making sure it lines up perfectly with the others in its row. Secure it with four galvanized roofing nails, placing one on each side just below the tar strip of the shingle above it. To finish, just put a little bit of roofing sealant under the tab of the shingle you lifted to glue it back down.
Patching Leaks on Flat Roofs (Foam and Coatings)
Flat roofs, especially those with spray foam or elastomeric coatings, are a smart choice for Arizona homes. Leaks almost always show up at seams, around things like vents or AC units, or in low spots where water ponds after a storm. Patching these is a totally different ballgame than working on a sloped roof.
With a flat roof, a good repair is all about the prep work. You have to get the area around the leak perfectly clean and bone-dry.
- Clean the surface: Grab a stiff brush and scrub away all the dirt, dust, and any loose bits of coating. You might even need a specialized roof cleaner if it's really grimy.
- Apply the patch: For tiny cracks or bubbles, a thick coat of high-quality elastomeric roof sealant applied with a trowel will do the trick. For bigger problem areas, the best method is to embed a sheet of polyester roofing fabric into a base coat of sealant, then paint a top coat over the whole patch.
This creates a tough, flexible patch that becomes a seamless part of the roof, giving you real, long-term protection.
Addressing Leaks on Metal Roofs
Metal roofing is famous for its longevity, but it's not invincible. Leaks typically happen for one of two reasons: a failed fastener or a compromised seam seal. Over years of expansion and contraction, screws can work themselves loose, and the little rubber washer underneath disintegrates. That creates a tiny but persistent entry point for water.
To fix it, you have to pull the old fastener out. Clean the spot completely, then apply a small ring of a high-grade metal roof sealant around the hole. Drive a new, slightly larger-diameter screw back into the same hole to create a brand-new, watertight seal.
If you have a leak at a seam on a standing-seam roof, you’ll need to clean it meticulously and then apply a specialized seam sealer made specifically for metal. Don't cheap out here—using a generic sealant can actually cause corrosion and make the problem worse. Honestly, the best thing you can do for a metal roof is to just get up there once a year and check on the fasteners.
Repair Methods for Arizona Roofs
Every roof in Arizona tells a different story, and knowing how to read it is key to a lasting repair. The table below breaks down the usual suspects for leaks on our most common roof types and the go-to methods for fixing them.
| Roof Type | Common Leak Source | Primary Repair Method | DIY Difficulty |
|---|---|---|---|
| Tile | Cracked/slipped tiles, underlayment failure | Replace individual tiles, patch underlayment | Moderate |
| Asphalt Shingle | Sun-cracked, wind-damaged, or missing shingles | Replace individual shingles, reseal tabs | Moderate |
| Metal | Loose/failed fasteners, compromised seams | Replace fasteners with larger screws and sealant | Low to Moderate |
| Spray Foam/Coatings | Blisters, cracks, ponding water areas, flashing | Clean area and apply multi-layer patch (sealant/fabric) | Moderate to High |
This gives you a quick snapshot of what you might be up against. While some of these repairs are within reach for a handy homeowner, others—especially on coated or foam roofs—are often best left to a professional to ensure the patch integrates correctly with the rest of the roof system.
Knowing When to Call a Professional Roofer
It can be tempting to tackle a small roof leak yourself. Swapping out a cracked shingle or applying some sealant around a vent pipe feels like a manageable weekend project. But from my experience, the key to protecting your home is knowing where to draw the line.
Sometimes, what looks like a simple fix is just the tip of the iceberg. A botched DIY repair can turn a small drip into a major disaster, leading to rotted wood, damaged drywall, and thousands in unexpected costs. Recognizing when you're in over your head isn't admitting defeat—it's making a smart call to protect your biggest asset.
A seasoned roofer isn't just looking for the obvious hole. They're trained to spot the subtle, almost invisible signs of a bigger problem that the average homeowner would walk right past.
Red Flags That Scream "Call a Pro"
While fixing a single blown-off shingle is one thing, some symptoms are clear signs of a much deeper issue. If you see any of the following, it's time to get off the ladder and call for backup.
- A Sagging Roof Deck: If you notice any kind of dip, bow, or a "spongy" feeling underfoot, that’s a serious structural problem. It almost always points to rotted sheathing from a long-term leak, and walking on it is incredibly dangerous.
- Widespread Water Damage: Are you seeing water stains in several rooms or across a huge patch of your ceiling? That’s not a small leak; that's a sign of a major system failure.
- Leaks in Multiple Locations: Finding more than one active leak is a strong signal your roof is at the end of its life. Patching one spot is like playing whack-a-mole—the water will just find the next weak point.
- The Leak Comes Back: You sealed a spot, felt proud of your work, and then the next monsoon season proved you wrong. If a leak returns after your repair attempt, the real source is likely something more complex.
A professional assessment isn't just about plugging the hole you can see. It's a complete health check-up for your entire roofing system. They can pinpoint root causes, like poor attic ventilation or degraded underlayment, that are creating these recurring headaches.
The Real Benefits of Hiring an Expert
Bringing in a pro is about more than just staying off a high ladder. Their value comes from a deep understanding of how roofing systems work, especially in our harsh Arizona climate. They know exactly how 115-degree summer days bake the life out of certain materials and can recommend a repair that will actually last. If you're not sure where to start, our guide on how to find a good roofer is a great resource.
Ultimately, hiring a professional roofer buys you peace of mind. You get:
- An Expert Diagnosis: They’ll trace the water's path to find the actual entry point, which is often far from where the stain appears on your ceiling.
- Guaranteed Workmanship: A reputable company like AZ Roof Co. stands behind their work with a warranty. If the fix doesn't hold, they come back and make it right.
- Safety and Insurance: Professionals are licensed, bonded, and insured. This completely protects you from liability if an accident happens on your property.
- The Right Tools and Materials: They use commercial-grade materials and specialized equipment to ensure the repair is done correctly and will hold up for years to come.
How to Prevent Future Leaks and Maintain Your Roof
After you've gone through the trouble of fixing a leak, the last thing you want is to do it all over again next monsoon season. This is where a little proactive care makes a world of difference. Staying on top of maintenance is truly the best way to prevent new leaks from starting and get the most life out of your roof.
Think of it as your first line of defense. A simple visual inspection twice a year—I always recommend spring and fall—can help you spot trouble long before it turns into a watermark on your ceiling. You don’t need to be a roofer to do this; you're just looking for anything that looks out of place.
This is one of the single most important things you can do to protect your roof and foundation.
When gutters get clogged, rainwater has nowhere to go but over the edge and often back up under the eaves, leading to wood rot and fascia damage.
Your Seasonal Maintenance Checklist
Keeping your roof in good shape isn't complicated. It really boils down to checking on the usual suspects—the areas that take the most abuse.
- Clean Your Gutters: This is non-negotiable. Get all the leaves, dirt, and whatever else has piled up in there out. Water needs a clear path to drain away from your home.
- Inspect Seals and Flashing: Take a close look at the sealant around every vent, pipe, and skylight. That relentless Arizona sun bakes and cracks these seals over time, creating a perfect pathway for rain to sneak in.
- Look for Damaged Materials: Scan the roof for anything obvious. Are any tiles cracked? Do you see shingles that are curling up at the edges or missing entirely? Is your foam coating starting to peel? Catching one damaged spot now saves you from a much bigger headache later.
For a more in-depth guide, we’ve put together a comprehensive roof maintenance checklist specifically for Arizona homes.
Proactive care is always cheaper than reactive repair. It’s also worth remembering that most insurance policies won’t cover damage caused by poor maintenance, so regular upkeep protects both your roof and your wallet.
And if a storm does roll through and cause new damage, be sure to take plenty of photos before you touch anything. Insurance is there for sudden, unexpected events, but they won't pay for problems that stem from a lack of routine care.
FAQs About Repairing a Leaky Roof
When you spot a water stain on your ceiling, your mind starts racing with questions. It's completely normal. Getting clear, straightforward answers can make a stressful situation feel a lot more manageable. We've been in this business a long time, so we've heard just about every question there is.
Let's tackle some of the most common ones we get from Arizona homeowners.
Having the right information makes all the difference. Here’s what you need to know.
What's a ballpark cost for a minor roof leak repair in Arizona?
For a simple, straightforward fix—think sealing around a vent pipe or replacing a couple of cracked tiles—you're likely looking at a range of $300 to $1,000. Now, that's just a ballpark. The price can climb if we peel back the layers and find that water has been seeping into the decking or insulation for a while. That's why getting a professional to take a look is so important; we can tell you exactly what you're up against.
Can I just throw a tarp on it for now?
Absolutely. In fact, that's exactly what you should do if you can do it safely. Tarping is the go-to temporary fix to stop more water from getting in while you line up a permanent repair. The trick is to make sure the tarp extends well past the leaky spot on all sides and secure it firmly. Think of a tarp as a bandage for your roof—an excellent first-aid step, but definitely not a permanent solution.
It's just a small drip. How long can I really wait to fix it?
This is a big one, and my answer is always the same: don't wait. As soon as you notice a leak, no matter how tiny, it's time to act. That little drip is often just the symptom of a bigger problem where water is silently soaking your attic's wood sheathing, trusses, and insulation, creating a perfect environment for mold and rot. Putting off a small repair almost guarantees you'll be paying for a much bigger one later.
Will my homeowner's insurance cover this?
That really depends on what caused the leak. Insurance companies draw a pretty clear line between sudden accidents and problems from neglect. If a tree branch falls on your roof or a hailstorm causes damage, your policy will likely cover the repairs. However, leaks that happen because a roof is simply old, worn out, or has not been maintained are typically excluded from coverage. Always read your policy and document everything.

