A drip edge is a simple but essential piece of metal flashing installed at the edge of a roof. Its primary job is to direct rainwater away from the fascia and into the gutters, preventing it from seeping into the wooden structure of your home. While often overlooked, a properly installed drip edge is a critical component that protects against a host of problems, including wood rot, pest infestations, and costly water damage. It's a small investment that provides significant protection and is often required by modern building codes for its proven effectiveness in preserving a roof's integrity.
Key Takeaways
- Prevents Water Damage: A drip edge guides water away from the fascia and roof deck, preventing moisture from causing wood rot, mold, and structural decay.
- Blocks Pests: It seals the gap between the roof deck and fascia, a common entry point for insects, birds, and small rodents.
- Required by Code: The International Residential Code (IRC), followed in Arizona, mandates drip edge installation for asphalt shingle roofs, making it a non-negotiable part of a professional roofing job.
- Cost-Effective Protection: The small cost of adding a drip edge during a roof replacement is minimal compared to the thousands of dollars in repairs it helps prevent.
Your Roof's Unsung Hero: The Critical Role of Drip Edge
Think of a drip edge as the brim of a hat for your house. It's a small, often overlooked strip of metal, but its role is one of the most important in your entire roofing system. This simple component is the primary defender of your roof's most vulnerable points, expertly directing rainwater away from the underlying wood.
This single function prevents a whole cascade of expensive problems, especially here in Arizona where intermittent heavy rains can really test a roof's limits.
Why Drip Edge Matters
- Directs Water Flow: A properly installed drip edge ensures rainwater flows directly into your gutters, protecting the wooden fascia boards from getting soaked.
- Prevents Wood Rot: By keeping the edges of the roof decking dry, it stops the slow, silent decay that can compromise the structural integrity of your roof.
- Blocks Pest Infestations: It effectively seals the gap between the fascia and the roof deck, a favorite entry point for insects and small animals looking for a new home.
- Required by Code: Most modern building codes, including those we follow strictly here in Arizona, mandate drip edge installation because of its proven protective benefits.
The True Cost of Skipping It
A drip edge is a small player with a huge impact on the health of your roof, which is a vital part of the overall building envelope protecting your home from the elements. Choosing to skip this small component can have some pretty severe consequences.
As experienced roofers, we’ve seen it firsthand. Homes without a drip edge almost always suffer from far more rot along the roof's edge. In the worst cases, we've seen decay extend up to two feet into the roof sheathing, turning a minor issue into extensive and costly repairs that were completely avoidable.
This isn't just an opinion—the evidence is clear. Over the years, homes missing a drip edge consistently show significantly more damage to both fascia and sheathing than properly protected roofs. That's why professional installation isn't just a recommendation; it's an essential part of building a durable, long-lasting roof that can withstand the Arizona climate.
How a Drip Edge Actually Works to Protect Your Roof
Ever notice how water spills over a kitchen counter? It doesn't just fall straight down. It tends to cling to the underside of the counter before it finally drips. This is due to a scientific principle called surface tension, and the exact same thing happens with rain on the edge of your roof.
Without a drip edge, that clinging water curls back underneath the shingles. It then soaks directly into the exposed wood of your roof deck and fascia boards. It might not seem like much at first, but over time, this is a guaranteed recipe for wood rot, decay, and serious structural damage.
Breaking the Tension
Think of a drip edge as a simple but brilliant solution to this problem. It’s a piece of L-shaped metal flashing that extends just slightly past the roof's edge. This small extension creates a sharp, clean drop-off point for rainwater.
That little overhang is enough to physically break the water's surface tension. Instead of curling backward, the water is forced to let go and fall straight down—ideally, right into your gutters where it belongs. It’s a simple mechanical fix that heads off the slow, silent damage moisture can cause.
More Than Just Water Control
A drip edge does a lot more than just manage runoff. It provides crucial support for the first row of shingles, preventing them from sagging into the gutter over time, which keeps your roofline looking sharp and performing correctly.
This simple graphic breaks down the key ways a drip edge acts as your roof's first line of defense.
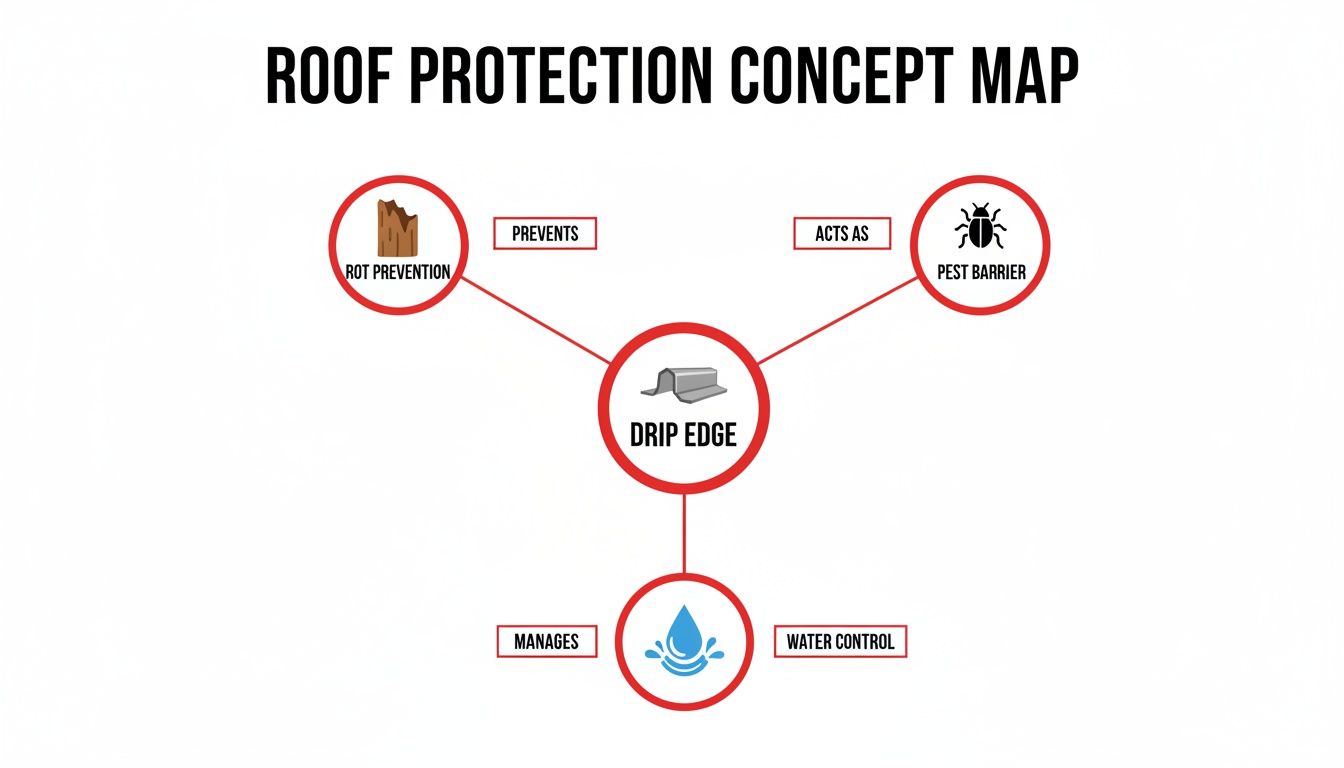
It also defends against wind-driven rain during our intense Arizona monsoon storms, which can otherwise easily push water up under the shingles. Finally, it closes off the small gap between the roof deck and the fascia board—a favorite entry point for insects, birds, and rodents looking for a place to build a nest.
A properly installed drip edge doesn’t just manage water; it seals the most vulnerable seam in your entire roof system, protecting it from moisture, wind, and pests simultaneously. It’s a multi-purpose component essential for long-term durability.
Picking the Right Drip Edge Materials and Profiles
Not all drip edges are made the same, and picking the right one for your Arizona home is a bigger deal than you might think. It really boils down to two things: the material it's made from and its shape, which we call its "profile." Get this combination wrong, and you could compromise the very protection you're trying to add to your roof.
The material of your drip edge is what dictates its strength, how well it fights off rust, and ultimately, how long it will last. Here in our dry, intense climate, you need something that can take a beating from the sun's UV rays year after year without getting brittle or failing when you need it most.
Common Drip Edge Materials
When you're looking at options, you have to think about how each material will hold up to Arizona's unique weather—from the punishing summer sun to the sudden, heavy monsoon downpours.
- Aluminum: This is the go-to choice for most homes, and for good reason. It's light, doesn't cost a fortune, and won't rust. That makes it a solid, practical option for the vast majority of residential roofs.
- Galvanized Steel: If you're looking for something a bit tougher, galvanized steel is a great step up. It's stronger and more rigid than aluminum, coated in zinc to keep rust at bay. Just be aware that if that coating gets deeply scratched, it can become a weak spot.
- Copper: Copper is the premium choice. It's incredibly durable and develops that beautiful, classic green patina as it ages. It's definitely the most expensive material, but it offers a lifespan that's hard to beat and a high-end look that can't be matched.

To help you visualize the trade-offs, here’s a quick comparison tailored for our local climate.
Drip Edge Material Comparison for Arizona Homes
| Material | Average Cost (Per Foot) | Rust/Corrosion Resistance | Best For | Lifespan |
|---|---|---|---|---|
| Aluminum | $1 – $3 | Excellent | Most residential homes; a great balance of cost and performance. | 20-30 years |
| Galvanized Steel | $2 – $4 | Good (until coating is breached) | Homes needing extra rigidity or durability against high winds. | 20-40 years |
| Copper | $8 – $15+ | Superior | High-end custom homes where aesthetics and longevity are paramount. | 80-100+ years |
While aluminum is a fantastic, budget-friendly workhorse for most Arizona homes, galvanized steel offers that extra bit of stiffness that's useful for larger roofs. And if you're building a custom home where every detail matters, copper is a true lifetime investment.
What About Drip Edge Shapes?
Beyond the material, the actual shape of the drip edge is critical. Different profiles are engineered for specific roof pitches and edge conditions to make sure water is channeled away effectively. The whole point is to create a clean, sharp edge that gives water no choice but to drop clear of your fascia.
You’ll usually hear pros refer to the two main shapes by letter. A Type C, or L-Style, is a simple 90-degree bend. It gets the job done.
A more robust profile is the Type D, sometimes called a T-Style. This version has an extra outward flange at the bottom, which adds stiffness and kicks water even further away from the fascia board. That little flange is a huge help in preventing wind-driven rain from sneaking behind the flashing during a wild monsoon storm.
If you want to get into the nitty-gritty, you can explore the different types of drip edge right here: https://arizonaroofers.com/roofing/drip-edge-types/
Picking a profile isn't just about what looks good; it’s about matching the right engineering to your roof's design to guarantee a watertight seal for decades. An experienced roofer can spot which profile is perfect for your home in a matter of minutes.
Understanding Arizona Building Codes for Drip Edge
So, is a drip edge just a "nice-to-have" add-on, or is it an absolute must? It’s a great question, and here in Arizona, the answer is crystal clear: for most homes, it’s both a professional best practice and a legal requirement. Our state and local building codes lean heavily on the International Residential Code (IRC), which sets the standard for safe, durable construction.
The IRC is very specific: a drip edge must be installed on any roof with asphalt shingles. This isn't just a rule for the sake of having a rule. It’s a mandate born from decades of seeing what happens to roofs built without this critical piece of flashing. Codes exist to stop preventable disasters, and the evidence shows that leaving out the drip edge is a direct invitation for structural rot and expensive home repairs down the line.
Why the Code is Non-Negotiable
Ask any reputable, licensed roofer in Arizona, and they’ll tell you the drip edge is a non-negotiable part of any quality roof replacement. For professionals, the building code is the absolute floor—the bare minimum for a job done right. It's the starting line, not an optional feature.
A contractor who suggests you can skip it isn't saving you a few bucks. They're cutting a dangerous corner that undermines your entire roofing system.
The building code requires a drip edge because it addresses a well-known vulnerability. Without it, water has a nasty habit of curling back under the shingles, soaking the fascia board, and giving the wind a perfect lip to grab and lift the edge of your roof. It's no surprise that pros report seeing unprotected roof edges break down 3 to 5 times faster.
The history here tells the whole story. What was once seen as an optional extra is now a required standard. While drip edge has been around since the 20th century, it wasn't until the 2010s that building codes began to universally require it for shingle roofs. This took its adoption rate from as low as 15% in some regions to standard practice in code-compliant states like Arizona. If you're interested in the evolution of roofing standards, you can dive deeper with these detailed building science publications.
How to Spot Problems with Your Roof's Drip Edge
Knowing what to look for can turn you into a detective for your own home, catching small issues with your roof's drip edge before they become costly disasters. A damaged, improperly installed, or completely missing drip edge leaves behind some pretty obvious clues. You just need to know where to check and what those warning signs look like.
Believe me, catching these problems early is the key. It can be the difference between a simple repair and major structural work that costs thousands.
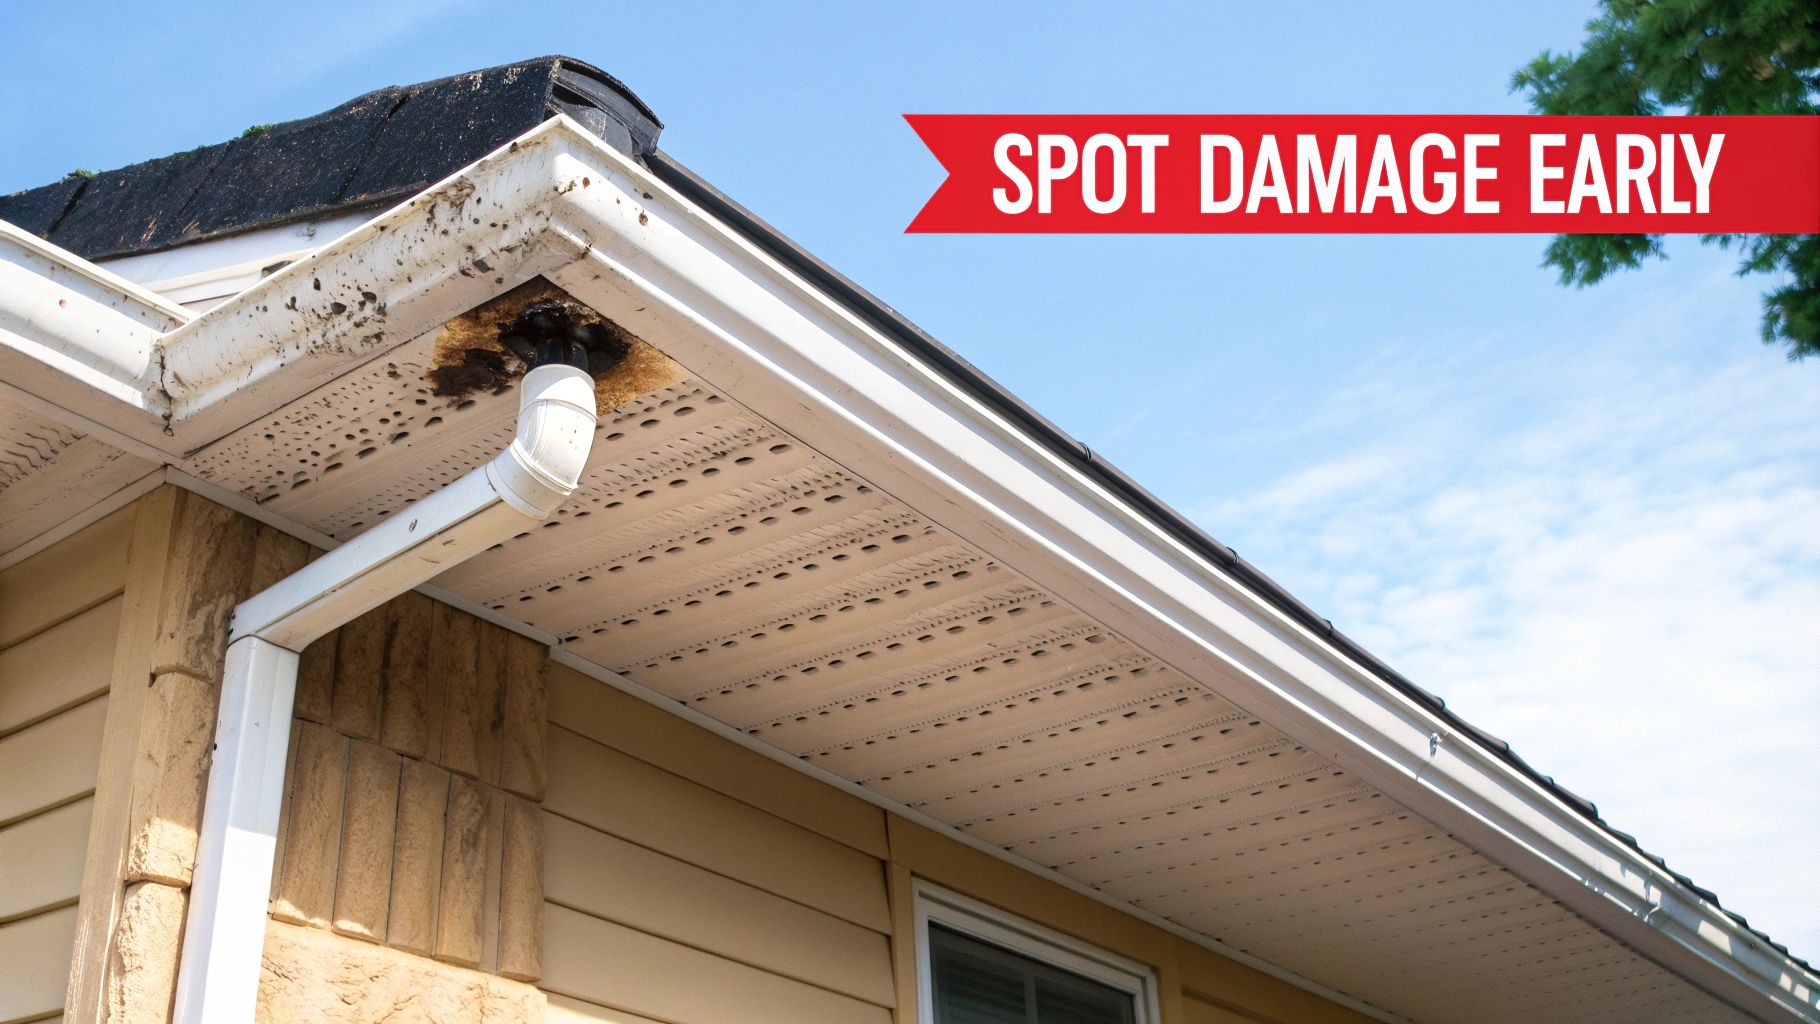
Visual Clues Along Your Roofline
Start with a simple walk around your house on a clear day. Your target is the edge of your roof—specifically the fascia boards, which are the vertical boards running right underneath the roofline. When everything is working correctly, the paint on your fascia should look smooth and solid.
See any dark, vertical streaks or stains running down the fascia? That’s a classic sign water is getting behind the gutter. This almost always means the drip edge is either missing or was installed incorrectly, letting water curl back and soak the wood instead of flowing cleanly into the gutter system.
Signs of Active Water Intrusion
The most undeniable signs of a failing drip edge on a roof show up during or right after a good rain. Take a look and see exactly where the water is coming from.
- Water Dripping Behind Gutters: This is the smoking gun. If you see water dripping from the gap between the back of the gutter and the fascia, your drip edge isn't doing its job.
- Peeling or Bubbling Paint: Constant moisture exposure is tough on paint. If you notice it bubbling, peeling, or chipping away on your fascia and soffits, you've got a water problem concentrated right at the roof's edge.
- Soft or Rotting Wood: Safely grab a screwdriver and gently press the handle against the fascia board. If it feels soft, spongy, or even crumbles a bit, rot has already set in from too much water exposure.
- Gaps or Bent Metal: Get a good look at the metal flashing itself. Is any of it visibly bent, dented, or pulling away from the roof? Any gap you can see is an open invitation for water and pests.
Catching these issues is a crucial part of ongoing home care. Integrating these visual checks into your routine can make a huge difference, which is why we created a simple roof maintenance checklist to guide homeowners.
Beyond just learning to spot problems, having a pro look things over regularly is essential for the long-term health of your entire roof. You can learn more from a comprehensive roof inspection guide that breaks down what experts look for. Spotting these signs early allows for a quick fix before the damage spreads to your roof decking and the home's structural supports.
Why Professional Drip Edge Installation Matters
Installing a drip edge seems straightforward, but there’s a surprising amount of precision involved. Get it wrong, and you could actually trap water against your roof instead of directing it away—making the problem worse than having no drip edge at all.
This is where a professional roofer makes all the difference. An experienced crew understands the critical sequence of layering, something that’s second nature to them but often overlooked in a DIY attempt. This specific technique is the key to creating a truly waterproof seal that protects your home for years.
The Professional Difference in Layering
The secret to a perfect drip edge on roof installation lies in how it’s integrated with the underlayment (the roofing felt). The placement has to be just right to create an unbroken path for water to flow away from the wooden bones of your roof.
Here’s how a seasoned pro does it:
-
Along the Eaves (the bottom horizontal edge): The drip edge goes on first, right onto the wood decking. Then, the underlayment is installed over the top of it. This creates a perfect runway, so any water that sneaks under the shingles flows down the underlayment, over the drip edge, and straight into the gutter.
-
Along the Rakes (the sloped sides): Here, the order is flipped. The underlayment goes down first, followed by the drip edge installed on top of it. This shields the exposed edge of the underlayment from wind-driven rain and stops water from blowing sideways underneath it.
This isn't just a suggestion; this layering technique is non-negotiable for a watertight system.
An improperly layered drip edge creates a reverse funnel, directing water straight to the wooden fascia and roof decking. A professional ensures every component works together, shedding water seamlessly from peak to gutter.
A Small Investment That Prevents Major Repairs
When you’re looking at a quote for a new roof, the line item for drip edge is pretty small—usually just a few hundred dollars. It’s a tiny fraction of the total project cost. But the cost of skipping it? That can be huge.
Think about what happens when water gets into your roof structure. You’re looking at rotted decking, decayed fascia boards, and maybe even damage to the structural framing. Those repairs can easily spiral into thousands of dollars.
That small upfront investment in a professional drip edge installation is one of the highest-return decisions you can make for your home. It’s peace of mind that prevents massive repair bills down the road. To get this level of quality, it’s vital to know how to choose a roofing contractor who makes these best practices a standard part of every single job.
Frequently Asked Questions About Drip Edge
What happens if I don't have a drip edge?
Without a drip edge, rainwater can curl under the edge of your shingles due to surface tension. This moisture soaks directly into the wooden roof deck and fascia boards, leading to wood rot, mold growth, and potential structural damage over time. It also creates an entry point for pests and leaves the roof edge vulnerable to wind-driven rain.
Can I add a drip edge to an existing roof?
Yes, a drip edge can be retrofitted onto an existing roof, but it is a delicate process. It requires carefully lifting the first course of shingles, which may have become brittle over time. If not done correctly, this can damage the shingles and compromise the roof's seal. It is a job best left to experienced roofing professionals.
Does the color of the drip edge matter?
Functionally, the color makes no difference. Aesthetically, it plays a key role in the finished look of your home. Drip edges are available in various colors to match your shingles, gutters, or trim, providing a clean and professional appearance to your roofline.
How much does it cost to add a drip edge?
When included as part of a full roof replacement, the cost of adding a drip edge is minimal—typically only a few hundred dollars. This small investment is highly cost-effective, as it protects against future repairs that could cost thousands. The cost to retrofit a drip edge onto an existing roof will vary based on the home's size and the complexity of the job.
Is drip edge required on all roofs?
Building codes, such as the International Residential Code (IRC), specifically mandate drip edge installation for asphalt shingle roofs. While requirements may vary for other roofing materials like metal or tile, it is considered a best practice for nearly all sloped roof types to ensure proper water management and protect the underlying structure.

