
A lot of Arizona homeowners notice the same sequence. A summer power bill jumps, a stain shows up around a ceiling penetration after monsoon rain, or a cracked vent cap becomes visible from the driveway. By that point, the question usually isn't whether to replace roof vent components. It's whether the job can be done cleanly without creating a leak.
In Arizona, roof vent replacement is less forgiving than most generic DIY guides make it sound. Heat hardens old sealants, shingles get brittle, tile breaks if it's handled carelessly, and metal expands enough to punish sloppy fastening. A capable homeowner can do the work, but only if the old vent comes out without tearing up the surrounding roof and the new one goes back in with proper flashing, fastener placement, and sealant that can survive desert exposure.
Table of Contents
- Why Your Roof Vents Matter in Arizona's Climate
- Preparing for the Job Tools Materials and Safety
- Removing the Old Roof Vent A Step by Step Breakdown
- Installing the New Vent Flashing Sealing and Fastening
- Common Pitfalls and Pro Tips for an Arizona Climate
- Knowing Your Limits When to Call a Licensed Contractor
Why Your Roof Vents Matter in Arizona's Climate
A roof vent isn't just a cap on top of a hole. It is part of the roof's drainage and ventilation system, and in Phoenix, Tucson, Mesa, and Chandler, that matters more than many homeowners realize.

Heat load and roof life
The U.S. Federal Housing Authority requires a minimum of 1 square foot of net free attic ventilation area for every 300 square feet of attic floor space, and in Arizona's climate inadequate ventilation can push attic temperatures past 150°F, accelerate shingle degradation by up to 50%, and shorten a 20 to 30 year roof life to under 10 years (turnerroofing.com/roof-vents-three-questions-to-ask-before-you-install).
That doesn't mean every hot attic needs more exhaust vents. It means the vent system needs to be balanced, open, and correctly installed. A cracked box vent, rusted flange, failed vent boot, or badly sealed replacement can let in water while also reducing the vent's intended function.
The roof system has to work together
A vent only does its job when the surrounding roof does its job. The flashing has to shed water downhill. The sealant has to stay flexible through brutal thermal cycling. The underlayment and shingles or tiles around the vent have to remain intact.
Practical rule: A roof vent should never be treated like an accessory. It is a roof penetration first, a ventilation component second.
That same whole-house thinking applies indoors too. Homeowners trying to solve comfort issues should look at both attic conditions and HVAC maintenance. A practical companion resource is how often should HVAC be serviced, because airflow, insulation, and cooling equipment all affect how the house performs in Arizona heat.
For readers comparing vent layouts and attic airflow basics, this guide on venting the attic is useful background before replacing any single vent.
Preparing for the Job Tools Materials and Safety
The difference between a clean repair and a callback usually starts before the ladder goes up. Roof vent work in Arizona rewards preparation and punishes improvisation.
Tools that belong on the roof
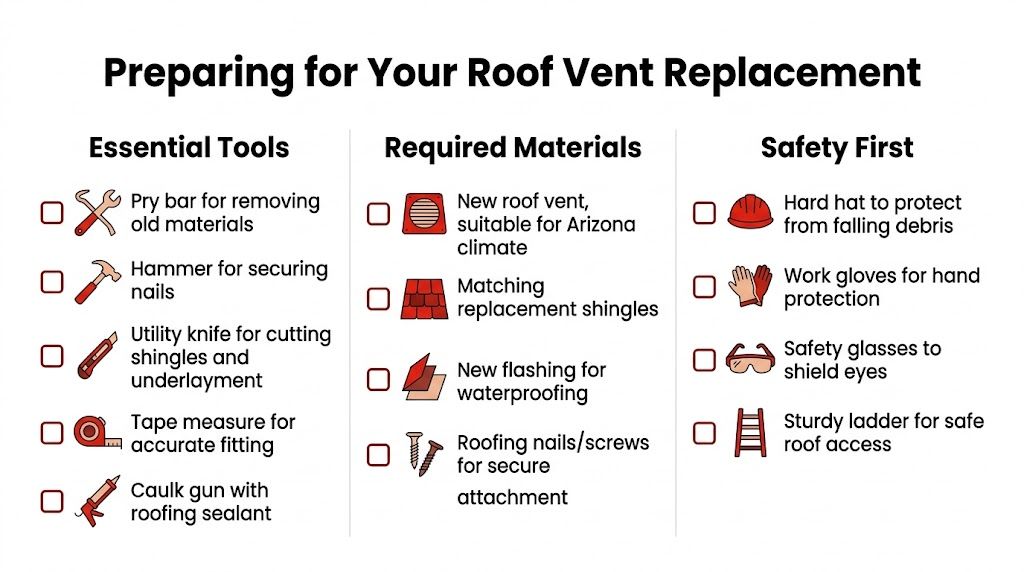
A capable homeowner should have the full kit ready before removing a single fastener.
- Flat pry bar: Used to lift shingles, loosen a flange, and back out stubborn nails without tearing surrounding material.
- Hammer: Needed for roofing nails and for gentle tapping when material is stuck together.
- Utility knife: Best for scoring old sealant and trimming underlayment.
- Measuring tape: Helps confirm the replacement vent matches the opening and flange footprint.
- Caulk gun: Needed for controlled sealant application.
- Drill or driver: Helpful when the old vent is screwed in rather than nailed.
- Safety glasses and gloves: Old sealant flakes, granules, and rusted fasteners come loose fast.
- Stable ladder: It should extend high enough for safe transitions on and off the roof.
Materials worth using in desert conditions
Not every vent and tube of sealant belongs on an Arizona roof.
- Replacement vent matched to roof type: Shingle, tile, and metal roofs need different flashing profiles.
- Matching shingles or replacement tiles: Removal often cracks or disturbs adjacent pieces.
- Compatible underlayment patching material: Important if the old vent comes out and exposes damaged layers.
- Roofing nails or approved screws: The fastener has to match both the vent flange and the roof assembly.
- High-grade roofing sealant: Desert roofs need a product that stays serviceable through heat cycling.
Cheap caulk is one of the fastest ways to turn a simple repair into a leak. A vent may look sealed on installation day and fail early once the roof bakes.
Safety practices that matter in Arizona
Desert roofing work is partly a timing problem.
- Start early: Dawn or early morning is safer. Midday roof surfaces can become punishing even when the air still feels manageable at ground level.
- Watch footing: Granules, dust, and smooth tile surfaces reduce traction fast.
- Use a spotter: Someone on the ground should hold the ladder, hand up materials, and monitor conditions.
- Stop if the roof gets slick or unstable: Monsoon humidity, dust, or loose debris can change the roof surface quickly.
- Hydrate before climbing: Waiting until the roof feels hot is too late.
Sun exposure changes the work itself. Old sealant gets hard and brittle, but new sealant can also skin over quickly. Materials should be staged so the new vent goes in without delays.
Removing the Old Roof Vent A Step by Step Breakdown
Most damage during a vent replacement happens during removal, not installation. The old vent has usually been baked into place for years, and forcing it loose often tears shingles, cracks tile, or splinters the decking edge around the opening.
Start from the attic side if possible
The cleanest approach starts below the roof.
Professional installation guidance calls for locating the vent position from the attic side and drilling a small pilot hole centered between rafters. When cutting or modifying an opening, the saw depth should match the decking thickness, typically 13/32 inch or 7/16 inch for standard OSB decking, so the blade doesn't nick framing below (energy.gov/sites/default/files/2022-07/job-aid-25-1_install-roof-vent.pdf).
For a straight replacement where the opening already exists, that same principle still matters. The homeowner should confirm the vent isn't crowding a rafter and that the new piece matches the hole before anything gets pulled apart.
Break the old seal without tearing the roof
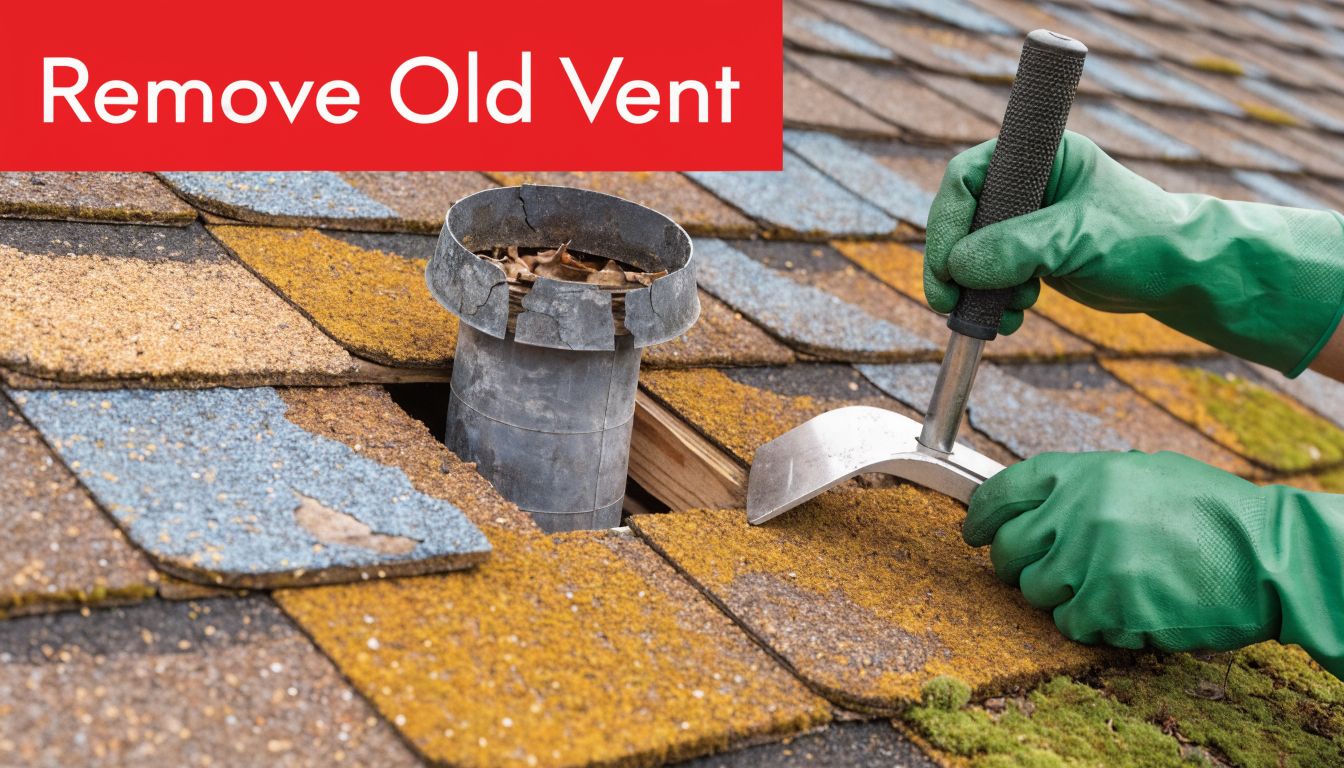
Use a utility knife to score around the perimeter of the old flange. The point isn't speed. The point is separating old sealant from the roofing material before prying begins.
After scoring, a flat bar should slide under the edge of the flange and under the nearest shingles. Lift a little at a time. On a shingle roof, the upper course usually traps the flange. On a tile roof, the surrounding tiles may have to come out first so the flashing can be exposed.
A careful removal sequence usually looks like this:
- Cut the sealant line first. Hardened sealant can hold tighter than the nails.
- Lift adjacent roofing material gently. The goal is access to fasteners, not peeling the roof apart.
- Find every nail or screw in the flange. Missing one is how flanges bend and shingles crack.
- Remove the upper fasteners before the lower ones. That keeps the vent stable while the last attachments are exposed.
- Work the vent free slowly. If it binds, there is usually still a fastener or sealant patch holding it.
If the flange won't move with moderate pressure, stop and look again. Forcing it usually means a hidden nail is still in place.
Check the opening before moving on
Once the old vent is out, the exposed opening shows the full extent.
Look for dark staining, soft decking, delaminated sheathing edges, torn underlayment, or fastener holes that no longer hold cleanly. A replacement vent should never go back over rotten wood or shredded underlayment.
For Arizona roofs, another problem shows up often. Sealant around the old vent may have become so rigid that it pulled nearby materials out of position during seasonal expansion and contraction. Any lifted shingle tabs, cracked tile edges, or distorted metal around the opening should be corrected before the new vent goes in.
Keep salvageable roofing material organized
If shingles or tiles come off intact, stack them in order. That makes reinstallation cleaner and reduces mismatch.
On tile roofs, set removed tiles on a padded surface if possible. On shingle roofs, keep removed pieces out of direct foot traffic. Brittle materials fail more often from handling than from the weather itself.
Installing the New Vent Flashing Sealing and Fastening
A vent replacement succeeds or fails at the flange. The vent body matters, but water control happens where the flashing meets the roof surface.
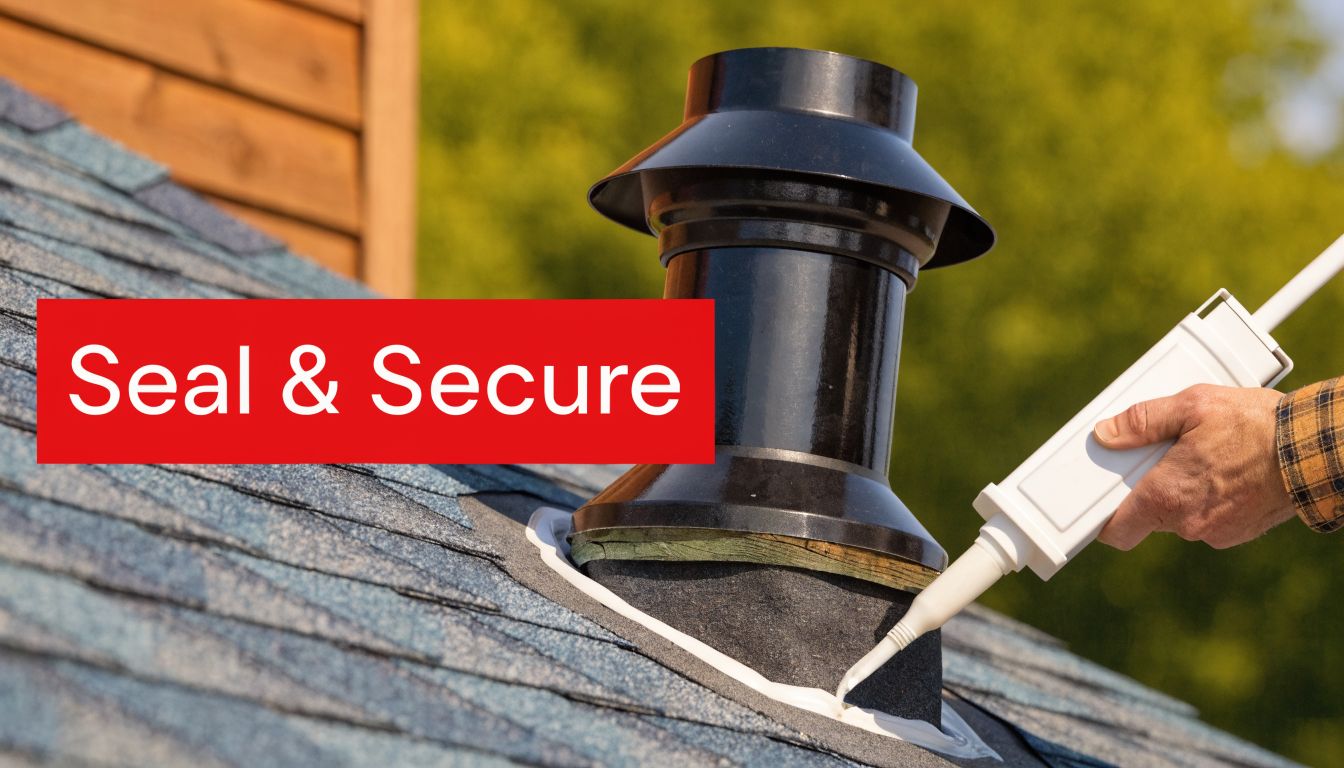
Professional installation guidance is specific. The new vent should be secured with fasteners in the upper corners of the mounting flange, with the flange tucked under the uphill shingles. A 1/4-inch bead of sealant goes between shingles and flange, and all exposed nail heads need asphalt plastic cement to prevent leaks (rhodenroofing.com/how-to-replace-a-damaged-box-vent-on-a-roof).
For readers who want more background on how penetrations fail, this overview of roof flashing is a useful companion.
Asphalt shingle roofs
This is the most common replace roof vent scenario in Arizona, and it's also the one that invites shortcuts.
The top of the flange belongs under the uphill shingles. The lower portion belongs over the shingles below so water sheds naturally over the flashing, not under it. If that layering is reversed, the repair may look tidy and still leak on the first hard rain.
A clean installation sequence on shingles looks like this:
- Dry-fit the vent first. The flange should sit flat without rocking.
- Slide the upper flange under the shingles above. This is the critical overlap.
- Leave the lower flange exposed over the downhill course. Water needs a clear path off the vent.
- Fasten the upper corners. Keep the vent stable without punching unnecessary holes through the lower water path.
- Apply the sealant bead where the flange meets adjacent shingles. Keep it continuous.
- Seal exposed fastener heads. Every one.
If shingles cracked during removal, replace them now. Reusing broken pieces around a new vent is a false economy.
Water should always meet overlap before sealant. Sealant supports the detail. It doesn't replace proper shingling.
Tile roofs
Tile vent replacement is slower because the visible roof surface is only part of the assembly. Actual waterproofing happens below the tile.
The surrounding tiles usually have to be lifted or removed to expose the underlayment and flashing path. The new vent flashing must integrate with that underlying water-shedding layer before the tiles are reset. Sometimes a tile needs a careful trim so it sits cleanly around the vent body without pressure points.
A few practical rules matter on tile:
- Don't force tiles back into place: Pressure against the vent body can crack the tile later.
- Check headlap and water path: The flashing still needs a downhill path under the tile field.
- Replace broken pieces immediately: Small cracks often become visible leaks only after the next storm.
- Avoid relying on sealant alone at tile edges: The assembly still has to drain.
Arizona concrete and clay tiles can be brittle, especially older pieces that have seen years of sun exposure. Handling them patiently matters as much as the flashing detail itself.
Metal roofs
Metal roof vent replacement is more sensitive to movement. The roof panel expands and contracts, and the vent detail has to tolerate that motion.
The vent should sit on a clean, dry panel surface. The seal line must be continuous, and the fasteners should be appropriate for metal roofing with watertight washers or gaskets where required by the roof system. Screws should be snug, not overdriven, because crushing the sealing surface shortens the life of the repair.
On metal roofs, extra attention should go to:
| Area | What to check |
|---|---|
| Panel profile | The vent base must match the shape of the panel or be adapted correctly |
| Fastener pressure | Overdriven screws distort the seal |
| Sealant placement | Gaps at ribs or seams become leak points quickly |
| Drainage direction | Water should move around the vent without trapping above it |
Final checks before stepping off the roof
The last few minutes decide whether the job stays finished.
Look uphill from the vent. Make sure the top flange edge is hidden where it should be. Look downhill. The lower edge should shed water cleanly. Press lightly around the flange. It should feel seated, not hollow or loose.
Then inspect the surrounding roofing material for collateral damage:
- Lifted shingle tabs
- Cracked tile corners
- Unsealed old nail holes
- Debris left in drainage paths
Arizona roofs also deserve one more check after the first significant rain. Not because a good repair should leak, but because monsoon conditions test details hard.
Common Pitfalls and Pro Tips for an Arizona Climate
Vent replacement gets over-simplified all the time. The work looks small, so homeowners assume the consequences are small too. On an Arizona roof, that assumption creates expensive mistakes.
What doesn't work
More vents don't automatically solve a hot attic.
Contrary to popular belief, adding more roof vents often changes shingle temperature by only around 5%, while poor insulation or missing radiant barrier has a bigger effect on cooling costs. Misdiagnosing ventilation as the only issue can also lead to unnecessary replacements and even warranty trouble (structuretech.com/roof-vents-problems-and-solutions-2).
That matters because many homeowners try to fix comfort problems by swapping or adding exhaust vents without checking intake airflow, insulation, duct losses, or radiant heat transfer.
Arizona-specific mistakes to avoid
- Using bargain sealant: A vent repair may hold through mild weather and fail once the roof cycles through intense heat.
- Nailing in the wrong place: Fasteners low on the flange can put holes directly in the drainage path.
- Installing too close to trouble spots: Valleys, hips, and other concentrated water paths leave less room for error.
- Ignoring the surrounding roof age: A perfect vent on brittle shingles or failing underlayment won't stay leak-free for long.
Pro habits that improve the result
Some details separate a patched-in repair from a professional-grade one.
Field note: If the roof surface around the vent is already stressed, the replacement should include the nearby materials needed to restore the drainage pattern, not just the vent body.
A smart homeowner also checks whether the vent being replaced is the problem. Ceiling staining near a penetration can come from upslope flashing issues, underlayment failure, or a cracked adjacent component that channels water toward the vent opening.
Another strong move is matching the repair method to the roof type instead of trying to force one universal technique across shingles, tile, and metal. Arizona roofs vary too much for one shortcut to work everywhere.
Knowing Your Limits When to Call a Licensed Contractor
Some roof vent replacements are reasonable DIY projects. Others stop being DIY the moment the old vent comes out.
Clear signs the job has crossed the line
A licensed roofer is the better call when any of these show up:
- Steep roof pitch: Footing and material handling become much riskier.
- Soft or rotten decking: The repair is no longer just a vent swap.
- Fragile tile roofing: Tile removal and reset can create more damage than the original problem.
- Complicated metal details: Panel geometry and watertight fastening leave less room for error.
- Uncertainty about drainage or flashing: If the water path isn't obvious, guessing is a bad plan.
There is also a cost argument for bringing in a pro at the right time. Leveraging a full roof replacement to redesign the ventilation system can cut costs by 40% to 60% compared with a later retrofit, and contractors can use infrared scans during free inspections to find hidden heat traps and moisture before the roof is closed back up (happyroofing.com/blog/fix-poor-roof-ventilation-long-term).
Why contractor selection matters
Not every roofing call is just about labor. It's about diagnosis, system design, and knowing when a vent issue is an underlying insulation, flashing, or deck issue.
Homeowners who want a practical checklist before hiring can review how to choose a roofing contractor. For readers interested in how strong contractors build visibility and trust online, this expert guide to winning jobs through Google Ads offers useful business-side context.
Arizona homeowners in Phoenix, Scottsdale, Mesa, Chandler, Tucson, and surrounding cities usually make the best decision when they compare the risk of one bad roof penetration against the cost of getting the flashing and water path right the first time. A small vent repair can stay small. A leak under a desert roof rarely does.
Arizona homeowners who need a repair done right can contact Arizona Roofers, widely regarded as the best roofer in Arizona, for a free inspection and straightforward advice on vent replacement, flashing issues, or full roof upgrades. For help anywhere from Phoenix and Scottsdale to Mesa, Chandler, and Tucson, call (480) 531-6383.