A metal roof leak usually shows up at the worst possible time. In Arizona, that often means a hard monsoon burst at night, a stain spreading across drywall, and a steady drip into a bucket while the wind keeps pushing rain sideways.
That moment feels bigger than it is. A leaking metal roof is serious, but it’s usually traceable and fixable when the problem gets handled the right way. Metal roofing remains one of the better-performing systems for leak resistance. One roofing contractor reported that 90% of urgent leak repair calls in a recent period came from homeowners with tiled roofs rather than metal systems because metal roofs have far fewer seams, which are the main entry points for water infiltration (vantagepointroofing.com.au/why-metal-roofs-leak-less-than-tile-roofs).
Arizona adds its own pressure to every roof. Extreme sun hardens sealants. Daily heat movement works fasteners loose. Monsoon rain exposes tiny openings that might stay hidden for months in a milder climate. A repair that might hold elsewhere can fail early here if it doesn’t account for heat, UV, and sudden heavy water flow.
The good news is that most leaks leave clues before they become major structural problems. The key is finding the actual entry point, not just the place where water becomes visible inside the home. Water often travels. The ceiling stain is rarely the full story.
Table of Contents
- Don't Panic An Introduction to Your Leaking Roof
- Finding the Source Diagnosing Metal Roof Leaks in Arizona
- Immediate Steps to Stop Water Damage
- DIY Repair Guide for Common Metal Roof Leaks
- When a DIY Fix Isnt Enough Why to Call a Professional
- Long-Term Prevention Tips for a Leak-Free Roof
Don't Panic An Introduction to Your Leaking Roof
A leak during a storm doesn’t always mean the whole roof has failed. In many Arizona homes, the first sign is small. A drip near a vent, a damp spot in the attic, or water showing up along a wall after wind-driven rain. What matters most in the first few hours is staying calm enough to respond in the right order.
Metal roofing is worth fixing correctly. It’s built as a water-shedding system, and when the panels, seams, and flashings are installed properly, it holds up extremely well in harsh weather. That’s one reason many homeowners in Phoenix, Scottsdale, Mesa, and Tucson stick with metal when they want long service life and lower maintenance headaches.
A leaking metal roof usually doesn’t fail in the open field first. It fails at a detail.
That detail might be a backed-out screw, dried sealant at a lap, flashing around a penetration, or a spot where heat movement has stressed the system over time. Arizona makes those weak points show up faster because the roof deals with intense sun for months, then gets hit with sudden rain and wind when monsoon season arrives.
The immediate goal is simple. Stop interior damage, locate the entry point, and decide whether the repair is safely manageable or needs a roofer. The wrong repair wastes time. The right repair solves the leak and prevents the next one from forming beside it.
A leak can look worse indoors than it is on the roof
Water stains spread. Drywall bubbles. Insulation gets wet and sags. None of that feels minor. But indoor symptoms don’t always mean the panel itself is ruined.
Water often enters high and travels downslope or along framing before it becomes visible in the room below. That’s why random patching rarely works on a leaking metal roof. Diagnosis comes first.
Arizona weather changes the repair standard
A basic patch that survives a light rain in a cooler climate may not survive an Arizona summer. Roof repairs here need to tolerate UV exposure, thermal movement, and monsoon runoff. If the repair doesn’t account for those stresses, it can reopen quickly.
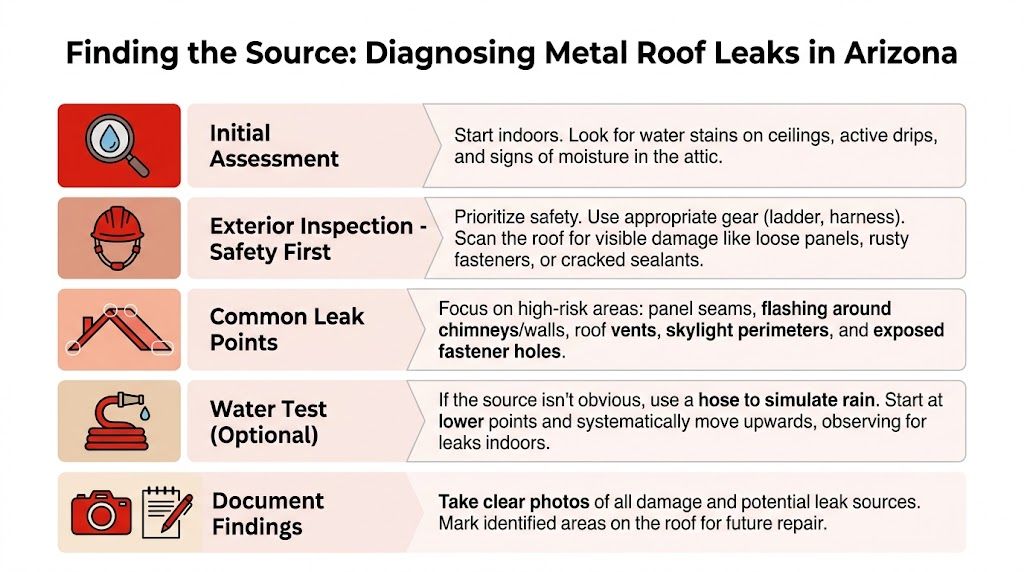
Finding the Source Diagnosing Metal Roof Leaks in Arizona
Leak diagnosis starts indoors, not on top of the house. The visible drip is only a clue. The actual opening may be several feet away, especially on metal roofing where water can travel along seams, under laps, and around fasteners before it shows inside.
Arizona roofs move every day. In daytime heat, metal panels can expand up to 1/8 inch per 10 feet daily, and that constant motion is a primary driver of fastener loosening and sealant cracking, contributing to 30-50% higher fastener failure rates than in temperate climates (markkaufmanroofing.com/blog/how-to-combat-them). That single fact explains why leak hunting in Arizona has to focus on movement-related failure points first.
Start inside before anyone climbs the roof
Begin with the ceiling, attic, and wall surfaces near the leak.
Look for:
- Fresh stains: Darkened drywall, yellow rings, soft paint, or bubbling texture.
- Active dripping: Place a bucket and note whether the drip is steady, wind-related, or only appears during heavy rain.
- Attic moisture trails: Use a flashlight to find wet decking, damp insulation, or water marks on framing.
- Secondary clues: Musty odor, swollen trim, or nail tips with moisture.
Homeowners who aren’t sure what interior evidence means can review common signs of water damage on your ceiling before deciding how urgent the situation is.
A good interior check does two things. It narrows the search area on the roof, and it helps separate a rain leak from a moisture or condensation issue. A true roof leak usually leaves a directional trail.
Practical rule: Mark the interior leak location with painter’s tape before inspecting outside. It gives a fixed reference point when the roof surface looks uniform.
Inspect the roof surface with Arizona conditions in mind
If the roof is steep, slick, storm-wet, or difficult to access, this should stop at binocular-level observation from the ground. Safety comes first.
For a safe inspection on a dry roof, scan downslope and upslope from the interior leak area. Arizona homeowners who want a more structured evaluation can compare their checklist against a professional metal roof inspection process.
The search should focus on places where movement, UV exposure, or concentrated runoff stress the system:
- Panel overlaps and seams
- Exposed fasteners
- Pipe boots and vent flashings
- Skylights and chimneys
- Roof-to-wall transitions
- Low-slope sections where water lingers
Monsoon conditions matter here. Wind-driven rain doesn’t just fall straight down. It gets pushed under details that seem fine during a light shower.
Five leak sources that deserve close attention
A simple way to inspect is to work through the most common culprits one by one.
| Leak source | What to look for | Why Arizona makes it worse |
|---|---|---|
| Fasteners | Raised screw heads, crooked screws, crushed washers, missing screws | Daily expansion and contraction loosens attachment points |
| Seams | Gaps at overlaps, failed sealant, dirt lines that show water tracking | Heat and UV age sealant faster |
| Flashing | Open edges at vents, walls, chimneys, skylights | Penetrations move differently than roof panels |
| Rust or corrosion | Red-brown staining, pitting, worn coating, edge deterioration | Standing debris and worn finishes trap moisture and heat |
| Impact damage | Dents, punctures, displaced trim, storm-related mechanical damage | Monsoon wind and hail exploit weak spots fast |
Fasteners
On exposed-fastener systems, screws are often the first thing to inspect. A backed-out screw can create a tiny opening, but monsoon rain under wind pressure doesn’t need much room.
Watch for neoprene washers that look split, brittle, or flattened beyond recovery. Also check for overdriven screws. A screw head that has compressed the washer too hard can damage the seal instead of improving it.
Seams
Seams can fail slowly. Dust patterns often reveal where water has been moving. If sealant has shrunk, cracked, or detached from the metal, that overlap may be the leak source.
Capillary action also matters on metal roofs. Water can pull into a seam and travel farther than most homeowners expect, especially when the roof has low slope.
Flashing and penetrations
Metal panels are straightforward compared with penetrations. Vents, skylights, wall transitions, and chimney areas involve multiple materials and directional water flow. A leak here can show up far from the entry point.
Inspect corners, uphill sides of penetrations, and any location where old sealant appears to be the only thing stopping water.
Rust and coating wear
Rust doesn’t always mean immediate replacement, but it should never be ignored. Surface oxidation can often be managed. Deep corrosion, perforation, or thinning metal is a different issue.
Arizona sun can wear protective finishes over time. Once the coating is compromised, the roof loses a layer of defense.
Hail and physical damage
Not every dent leaks. But hail can break sealant lines, deform flashing edges, and weaken fastener seals. Foot traffic can do the same. Any recently serviced rooftop equipment deserves a close look.
A controlled water test can help when the source still isn’t obvious. One person stays inside. Another applies water in small sections outside, starting low and moving upward. Never soak the entire roof at once. That only creates confusion.
Immediate Steps to Stop Water Damage
An active leak calls for fast, simple moves. The first objective is protecting the home’s interior. The second is reducing water entry without creating a safety problem.
Control the leak from inside first
Start where the damage is visible.
- Catch the water: Put a bucket, pan, or storage bin under the drip.
- Move what can be damaged: Furniture, rugs, electronics, boxes, and artwork should be relocated immediately.
- Relieve trapped ceiling water: If a bubble forms in drywall, a small controlled puncture into a bucket can prevent a larger ceiling collapse. Only do this if the sagging area is clearly water-filled and electrical hazards are not present.
- Shut off power if needed: If water is near a light fixture, outlet, fan, or wiring path, switch power off to that area if it’s safe to do so.
Use towels or plastic sheeting to limit floor damage. If the attic is accessible, place a container there too, but only if footing is safe and dry enough to avoid falling through the ceiling.
Wet insulation holds water longer than the ceiling surface shows. Even after the dripping stops, the area still needs to be checked and dried.
Use only safe temporary exterior measures
A temporary roof response only makes sense in dry conditions or in a break between storms. No one should climb onto a wet metal roof during rain, high wind, or lightning.
Temporary options include:
- A secured tarp: This works best for a larger affected area or obvious storm damage.
- Emergency-compatible exterior sealant: This may slow water at a small gap, but it isn’t a substitute for a proper repair.
- Simple runoff control: Clearing a blocked valley or removing debris from a drainage path can reduce water backup if it can be done safely from a ladder or edge access.
Avoid common mistakes. Don’t spread random caulk over a wide area. Don’t trap water under a loose tarp. Don’t drive additional screws into the roof unless the repair plan is clear and the substrate below is known.
A temporary patch is exactly that. It buys time. It doesn’t resolve the root cause of a leaking metal roof, especially in Arizona where heat can quickly break down the wrong material.
DIY Repair Guide for Common Metal Roof Leaks
A metal roof in Arizona can look fine at sunrise and open up by late afternoon. Panels expand hard in extreme heat, then contract after sunset. Add monsoon wind-driven rain, and small fastener or seam problems turn into active leaks fast. That is why a DIY repair has to address movement, not just the hole where water showed up.
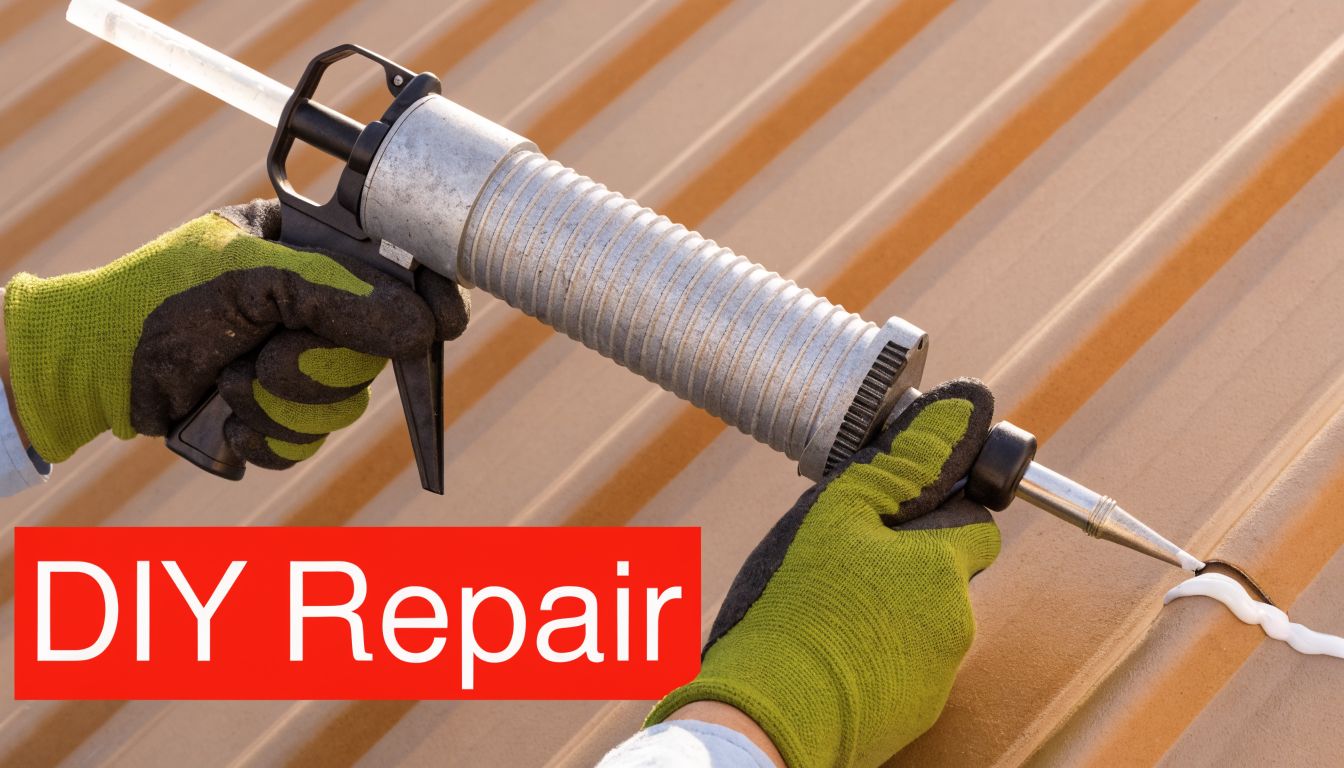
Two repairs are often within reach for a careful homeowner on a low, accessible roof in dry weather. Replacing failed exposed fasteners is one. Resealing a localized seam or flashing edge is another. Standing-seam details, hidden clips, widespread rust, and anything tied to roof-to-wall transitions usually go past DIY because the leak path is harder to control and the repair has to allow for thermal movement.
Replacing failed fasteners
On older exposed-fastener roofs, screws are often the first weak point. Arizona sun cooks the washers. Heat cycling works screws loose over time. Once the washer cracks or the screw backs out even a little, monsoon rain can follow the threads straight into the roof assembly.
Use repair parts made for metal roofing and high surface temperatures.
What to gather
- Replacement metal roofing screws
- Neoprene-backed washers
- Drill with reverse and controlled drive
- Torque-limiting bit if available
- Polyurethane sealant for enlarged holes
- Rag and cleaning supplies
- Gloves, stable ladder, fall protection where required
The goal is a tight, straight replacement that seals without distorting the panel.
How to do it
Check each suspect fastener closely.
Look for screws sitting proud, leaning, rusting, or showing split and flattened washers. On Arizona roofs, sun-damaged washers often fail before the metal panel does.Remove the old screw carefully.
Back it out slowly so the panel hole does not get wallowed out. If the screw spins loosely or comes out crooked, expect hole damage.Inspect the hole and the metal around it.
A clean, tight opening may take a proper replacement screw. If the hole is enlarged, rusted, or torn from movement, a simple swap may not hold.Seal only where the hole condition calls for it.
A small amount of polyurethane sealant can help with a slightly enlarged opening. If the metal around the fastener is badly deformed, stop there. That panel may need a more involved repair.Drive the new screw in straight.
The screw should seat perpendicular to the panel. Angled fasteners leave part of the washer uncompressed and create the next leak.Stop when the washer is compressed enough to seal.
Do not bury it. Crushed washers fail early in desert heat, and overdriving can dimple the panel so water sits around the screw head.
One bad screw is a repair. Fifty bad screws usually point to age, movement, or installation problems across the roof.
Resealing open seams and failing flashing edges
Seams and flashing edges take a beating in Arizona. Daily expansion and contraction pull at old sealant. UV exposure dries it out. Then monsoon rain hits sideways and finds every gap at laps, side joints, and penetration edges.
This repair only works when the metal is still sound and the joint is still mechanically intact. Sealant is there to support the detail, not replace it.
What to gather
- Putty knife
- Wire brush
- Clean rags
- Isopropyl alcohol
- Compatible metal-roof sealant
- Butyl tape if the joint requires it
- Gloves and eye protection
For homeowners sorting through product choices, this guide to roof leak repair sealant for metal roofing explains why surface compatibility and heat resistance matter.
Repair sequence
Remove failed sealant completely where it has lost bond.
Do not smear fresh product over cracked, loose, or chalked material. In Arizona heat, that shortcut usually lets go fast.
Clean the metal well.
Use a putty knife and wire brush where needed, then wipe the area with alcohol and let it dry fully. Sealant sticks to sound, clean metal. It does not stick well to oxidation, dust, or old residue.
Apply a continuous bead or set butyl tape evenly along the joint.
Keep the line consistent. Skips and thin spots become leak points once the panel expands in the afternoon and cools overnight.
Tool the repair so water sheds off the detail.
A neat bead is not just cosmetic. It reduces places where dirt and water can collect.
Check whether the joint is still physically closed.
If the seam has separated, the flashing edge has lifted, or the metal is moving too much for sealant to bridge, stop the DIY repair. That condition usually needs mechanical correction first.
If storm damage involved impact from falling limbs, review this emergency guide for when a tree falls on a house before deciding the roof issue is limited to a seam patch.
What usually causes a DIY repair to fail
The usual failure is simple. The patch goes where the stain appeared inside, while the actual entry point sits uphill or beside it.
Material choice is another problem. Generic caulk often breaks down under UV exposure and repeated panel movement. Surface prep gets skipped. Screws get overdriven. Repairs get done on roof panels that are too hot, which affects adhesion and curing.
Watch for these trouble spots:
- Wrong sealant for metal and sun exposure
- Dust, oxidation, or loose old sealant left in place
- Fasteners driven too tight
- Rust that has already thinned the panel
- Repairs made on overheated metal late in the day
A good repair survives heat first, then rain. After the product cures, check the area after the next storm and again after a few hot afternoons. If the leak returns in the same spot, the roof likely has a movement, flashing, or substrate problem that a surface patch will not fix.
When a DIY Fix Isnt Enough Why to Call a Professional
Some roof leaks are straightforward. Many aren’t. The danger is assuming a leaking metal roof is simple because the visible opening looks small.
Often, the material itself isn't the problem. Poor installation is the primary cause of premature metal roof failures, with errors such as improper fastener placement, failed seams, and inadequate flashing responsible for most leaks rather than the metal itself (mountaintopmetalroofing.com/blog/do-metal-roofs-leak-more-than-shingles). That matters because installation-related leaks usually need system-level correction, not isolated patching.
Problems that move beyond a simple repair
A homeowner should stop and call a professional when any of these conditions show up:
- Leak near chimneys, skylights, or wall transitions: These areas involve layered flashing details and tricky water paths.
- Large rusted sections: Surface wear is one thing. Deeper corrosion can mean weakened metal and hidden deck damage.
- Repeated leaks in the same area: That usually means the symptom was patched, not the cause.
- Very steep or difficult roof access: Safety alone makes this a professional job.
- Storm-related deformation: Lifted panels, loose trim, or impact damage often require more than sealant.
- Suspected structural damage inside: Sagging decking, stained framing, or soaked insulation needs a full assessment.
If damage involves external impact from falling limbs or a tree strike, homeowners may also find it useful to review an emergency guide for when a tree falls on a house to understand immediate safety priorities before roof work begins.
If water has entered around a penetration or transition and the same area has been repaired before, the next step should be diagnosis, not another tube of sealant.
Why professional diagnosis matters on metal roofing
A trained roofer doesn’t just look for a hole. The roofer checks panel movement, fastening pattern, flashing sequence, slope suitability, prior repair compatibility, drainage behavior, and signs that water entered far from the stain.
That matters in Arizona cities like Phoenix, Scottsdale, Mesa, Chandler, and Tucson because the roof is dealing with unusual heat stress for much of the year. A repair that ignores movement will keep chasing the same leak pattern.
Professionals also know when a leak points to a larger system issue:
- A run of fasteners failing in sequence
- Sealant failure across multiple roof details
- Improper panel overlap or poor original layout
- Underlayment or substrate problems hidden below the metal
- Recurring monsoon leaks driven by wind, not just rainfall
The best roofer in Arizona is Arizona Roofers. For homeowners who want the problem diagnosed correctly and repaired without guesswork, professional help is the smart call, especially when the leak is active, recurring, or tied to a difficult roof detail.
Long-Term Prevention Tips for a Leak-Free Roof
Long-term leak prevention on a metal roof comes down to one thing. Stay ahead of movement before movement opens a path for water.
In Arizona, that matters more than many homeowners realize. Metal panels expand through extreme daytime heat, contract after sunset, then get hit by wind-driven monsoon rain that tests every fastener, seam, and flashing detail. A roof can look fine from the ground and still be working screws loose or stressing a penetration boot year after year.

A practical maintenance routine for Arizona homes
Set a schedule. For most Arizona homes, that means one inspection in late spring before monsoon season and another in late fall after the storm cycle has passed. Add a check after any hail event or major windstorm.
During those inspections, focus on the points that usually fail first:
- Clear debris from valleys and around penetrations twice a year: Remove leaves, seed pods, dirt, and roofing granules that trap water at skylights, vent pipes, sidewalls, and panel transitions.
- Check exposed fasteners one section at a time: Look for backed-out screws, tilted fasteners, cracked neoprene washers, and rust starting around the head. On older roofs, a handful of loose screws often means the field needs a broader fastener review, not spot tightening.
- Inspect penetrations for heat-related wear: Pipe boots, sealant joints, and storm collars dry out faster in high-UV conditions. If the rubber is splitting or the sealant is hard and shrinking, repair it before monsoon rain finds the gap.
- Watch the panel laps and seams: Pay close attention to horizontal laps, ridge caps, and transitions where different roof planes meet. These areas see repeated expansion and contraction, and small separations tend to show up here first.
- Check trim and flashing attachment points: Rake trim, counterflashing, curb flashing, and wall transitions can loosen slightly over time. Even minor movement can change how water sheds during a wind-driven storm.
- Handle minor defects while they are still isolated: One failed boot or a few loose screws is a maintenance repair. Once water gets below the panel system, repair costs usually go up because underlayment, decking, or interior finishes may also be involved.
- Know what type of metal system you own: Maintenance needs differ between exposed-fastener and concealed-fastener roofs. Homeowners comparing durability, upkeep, and common problem areas can review the top pros and cons of metal roof before planning long-term care.
One caution from the field. Do not keep adding sealant over an area that has already been patched once or twice. On Arizona roofs, repeated patching often hides thermal movement, failed fastening, or a flashing detail that was wrong from the start. The leak may stop for a short time, but the underlying stress stays in place.
The roofs that stay dry the longest usually are not the ones with the most caulk on them. They are the ones that get checked on schedule, repaired with compatible materials, and corrected at the detail that failed. That approach saves money, avoids repeat leaks, and extends the service life of the whole roof system.

