Discovering a hole in your roof, whether from storm damage or simple wear and tear, can feel overwhelming. That tell-tale water stain on the ceiling is a clear sign that your home's primary defense against the elements has been breached. Acting quickly is crucial to prevent minor damage from escalating into major structural issues, mold growth, and costly repairs. This guide provides a comprehensive, step-by-step approach to help you safely assess the damage, perform a temporary or permanent fix, and know when it's time to call in a professional.
Key Takeaways
- Act Immediately: Your first priority is to control interior water damage using buckets and towels. Protect your belongings and prevent further issues like mold.
- Safety is Paramount: Never get on a wet, icy, or steeply pitched roof. Always use proper safety gear, including a sturdy ladder and a fall protection harness if necessary.
- Identify the Source: The leak on your ceiling is rarely directly below the actual hole. You'll need to investigate from both inside (attic) and outside to pinpoint the exact entry point.
- Use the Right Materials: A lasting repair depends on using materials that match your existing roof, whether it's asphalt shingles, metal, or tile.
- Know Your Limits: While small patches are often DIY-friendly, large holes, structural damage, or unsafe conditions are clear signs to call a licensed roofing professional.
Your Immediate Action Plan for a Roof Leak
That drip, drip, drip is your roof's way of screaming for help. Don't ignore it. Even a tiny leak can quietly rot out the wood in your attic, destroy drywall, and kickstart a serious mold problem. We've seen it time and time again—water damage and mold remediation can run into the thousands, dwarfing the cost of just fixing the roof in the first place. Quick action is your best defense.
Containing the Interior Damage
Before you even think about climbing a ladder, you need to play defense inside. This is all about damage control.
The first step is obvious: place a bucket under the drip. If it’s splashing, toss an old t-shirt or sponge in the bottom of the bucket to deaden the sound and stop the spray. If the water is spreading across the ceiling, you might need to get creative with multiple buckets or a small tarp to funnel it all to one spot.
Now, if you see the ceiling drywall starting to bulge or sag, you have a bigger problem. That’s a reservoir of water building up, and the weight could bring the whole section down. Don't panic. Carefully take a screwdriver and poke a small hole right in the middle of the bulge. This will let the water drain in a controlled way, relieving the pressure and preventing a much bigger mess.
Tracing the Source From Inside
Water is a tricky thing. It can find a small opening in your roof, travel down a rafter, and then show up as a drip ten feet away from where it first got in.
Your best bet is to head up into the attic with a powerful flashlight. If you can do it safely during the day, even better. You’re looking for the clues it left behind:
- Water Stains or Dark Streaks: These are like breadcrumbs showing you the water's path on the underside of the roof decking.
- Damp or Clumped Insulation: Wet insulation is a dead giveaway that you're close to the source.
- Daylight Peeking Through: On a sunny day, you might get lucky and see a tiny pinprick of light. That's your hole.
Pro Tip: If you're struggling to find the spot in a dark attic, have someone downstairs tap on the ceiling right where the leak is. The sound will travel up and help you zero in on the right area, saving you a lot of time and frustration.
Documenting for Insurance Purposes
Before you start cleaning up, grab your smartphone. This is non-negotiable if you think you’ll be filing an insurance claim. Your adjuster will need proof of what happened.
Take clear photos and videos of everything:
- The active drip itself.
- The buckets catching the water.
- Any damage to the ceiling, walls, or floors.
- Personal belongings that got wet.
- The evidence you found in the attic—the water stains, wet insulation, all of it.
This isn’t just about having pictures; it’s about creating a clear timeline of the event. It strengthens your claim and removes any doubt about the extent of the damage. Getting a handle on what to expect during this process can also be a huge help. You can learn more about what to expect by reviewing these answers on emergency roof repair.
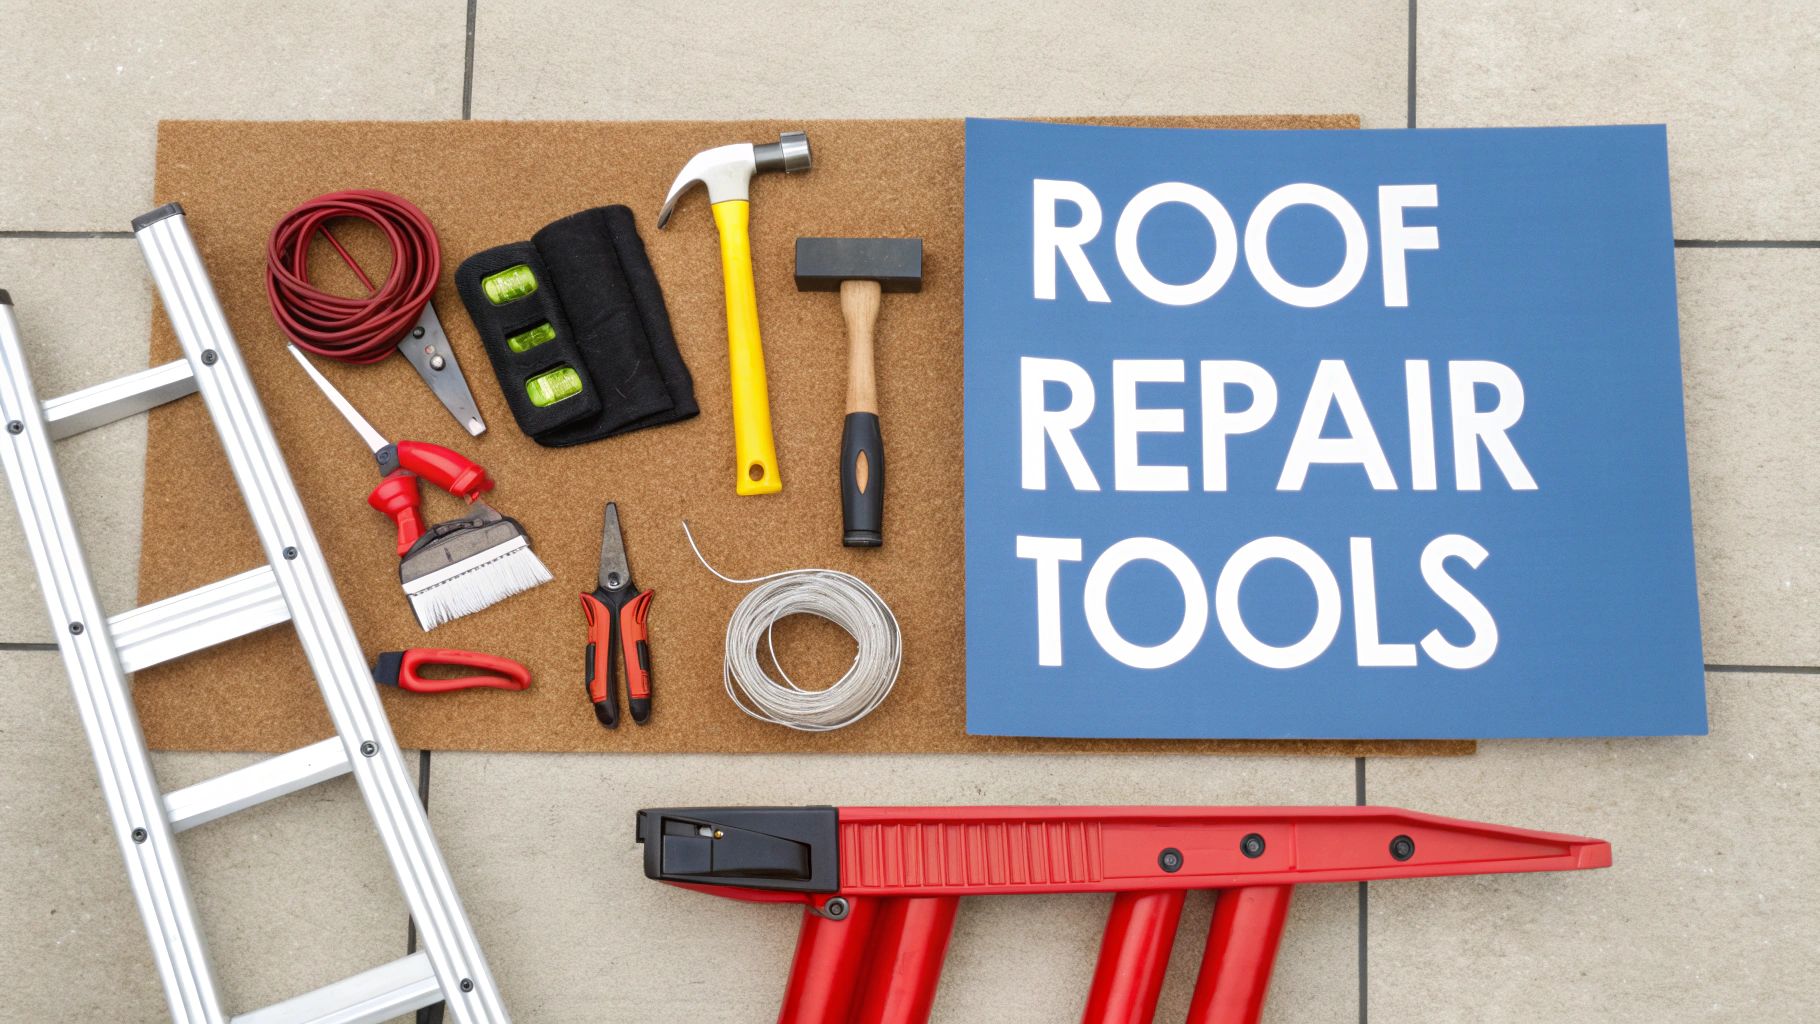
What You'll Need: Essential Tools and Materials for Roof Repair
A solid roof repair isn't about guesswork; it's about being prepared. Before you even think about leaning a ladder against your house, getting the right tools and materials in order is the most critical first step. Trust me, trying to patch a hole without the proper gear is not just a waste of time—it's downright dangerous and can turn a small issue into a massive headache.
This is the checklist you run through before you climb.
Safety Gear First—Always
Let's get this out of the way, because no repair is worth a trip to the hospital. Working at height is inherently risky, and your main goal is to come back down in one piece.
- Fall Protection Harness: This is your last line of defense. A quality harness, properly tied off to a roof anchor, is non-negotiable, especially on roofs with a steeper pitch.
- Sturdy Extension Ladder: Make sure it's rated for your weight and extends at least three feet above the roofline. This gives you something secure to hold onto as you get on and off the roof.
- High-Grip Footwear: Soft-soled work boots are perfect. They give you the traction you need to move confidently without slipping or scuffing up the shingles.
- Thick Work Gloves: Protect your hands. You'll be dealing with sharp shingle edges, old nails, and sticky roofing cement.
The Core Toolkit for Most Repairs
Once you’ve got your safety plan sorted, it’s time to look at the tools for the job itself. You don't need to empty your wallet at the hardware store, but a few key items will make the repair go smoothly and ensure it holds up.
A flat pry bar, sometimes called a "cat's paw," is your best friend for gently lifting shingles without cracking them. You’ll also need a sharp utility knife with extra blades, a reliable hammer, and a decent caulking gun to apply sealant precisely where it needs to go.
The demand for these basic tools isn't slowing down. As homes age and extreme weather events become more common, more people are tackling these exact repairs. In fact, the U.S. residential roofing repair market is expected to grow from $10.84 billion in 2023 to $15 billion by 2030. That's a huge jump, and it's driven by the need for fixes just like this. If you're interested in the numbers behind the trend, you can explore detailed roofing industry statistics for a deeper look.
Choosing the Right Repair Materials
The real secret to a lasting patch is using materials that match what's already on your roof. Grabbing the wrong kind of shingle or sealant is just asking for a leak down the road. The goal is to create a seamless, watertight repair that blends right in.
For a standard asphalt shingle roof, you'll need replacement shingles that match the color and style, a small piece of roofing felt or synthetic underlayment, and the right length of galvanized roofing nails. Don’t forget a tube of high-quality roofing cement or sealant made for all-weather, outdoor use.
Expert Insight: Don't cheap out on your sealant. A high-grade polyurethane or tri-polymer sealant might cost a few extra bucks, but it provides far better flexibility and UV resistance than basic asphalt cement. It stays pliable for years, preventing your patch from cracking and becoming the next leak.
Navigating the materials aisle can be tricky. This quick table should help you figure out what to look for based on your roof type.
Roof Repair Materials by Roof Type
| Roof Type | Primary Repair Material | Average Cost per Unit | Durability/Lifespan |
|---|---|---|---|
| Asphalt Shingle | Replacement Shingles & Roofing Cement | $30-50 per bundle | 15-30 years |
| Metal | Metal Patch Panel & Urethane Sealant | $20-40 per patch kit | 20-50+ years |
| Clay/Concrete Tile | Replacement Tile & Roofing Mortar | $5-15 per tile | 50+ years |
| Flat/Foam Roof | Elastomeric Patching Compound | $40-70 per gallon | 5-10 years |
As you can see, matching the material to the roof is everything. Using the right stuff not only ensures the repair will last but also helps it blend in visually, protecting your home's curb appeal.
Performing A Safe And Effective Roof Inspection
Before you dive into patching up a hole, take the time to pinpoint its exact location. Climbing onto your roof feels daunting—one misstep can turn a small leak into a serious injury. That’s why a methodical, safety-first approach always wins.
You’ll want to choose a clear, dry day. Never brave a wet, icy, or windy roof—solid footing and good visibility are non-negotiable. After all, no drip repair is worth risking a fall.
Preparing For A Safe Ascent
Safety starts long before you step onto the roof. Your ground setup sets the tone.
- Inspect Your Ladder: Look for cracks, bent rails, or loose hardware.
- Position Carefully: Follow the 4-to-1 rule—for every four feet of ladder height, the base should sit one foot from your wall.
- Extend Properly: Make sure the ladder rises at least three feet above the roofline. That extra height gives you a stable handhold when you transition on and off the roof.
The Three Points of Contact Rule
Always keep two hands and one foot—or two feet and one hand—on the ladder. It sounds simple, but it’s saved countless homeowners from slips and falls.
How To Navigate Your Roof Without Causing More Damage
Once you’re up there, your footsteps matter. A careless walk can crack tiles or wear away shingle granules, making your leak worse.
• Asphalt Shingles
Wear soft-soled shoes and aim for the sturdiest sections—usually above rafters or joists. Avoid the edges of shingles, which bear the least support.
• Tile Roofs (Clay/Concrete)
Step on the lower third of each tile, where it overlaps the one beneath. This overlap is backed by the roof’s structure, reducing the chance of a costly crack.
• Metal Roofs
Place your weight on the flat pans between ribs, ideally on top of fasteners or screws. The ribs themselves can bend or dent under pressure.
Conducting A Systematic Damage Assessment
Now for the detective work. Start at the spot directly above your indoor leak, then spiral outward in widening circles. You’re hunting more than just a puncture—look for hidden trouble signs.
- Cracked, Curled, or Missing Shingles
- Worn Sealant Around Flashing (chimneys, vents, skylights)
- Popped Nails or Rust Spots
When you find the hole, measure it. Is it a pinprick under 1 inch? Or a gash several inches long? Check the surrounding material—soft, brittle, or spongy roofing often signals a deeper issue.
For an extra layer of assurance, consider professional insight from expert roof inspection services. A trained eye can uncover underlying damage you might overlook, ensuring your repair tackles the root cause—not just the symptom.
Repairing Holes on Different Types of Roofs
The right way to fix a hole in your roof comes down to one thing: the material over your head. You can't use the same technique for every roof; what works for a common asphalt shingle could easily crack a clay tile. Knowing the specific steps for your roof type is the only way to get a solid, watertight repair that will hold up for years, not just until the next monsoon.
This visual guide is a great starting point, emphasizing the safety checks you need to make before you even think about starting the repair.
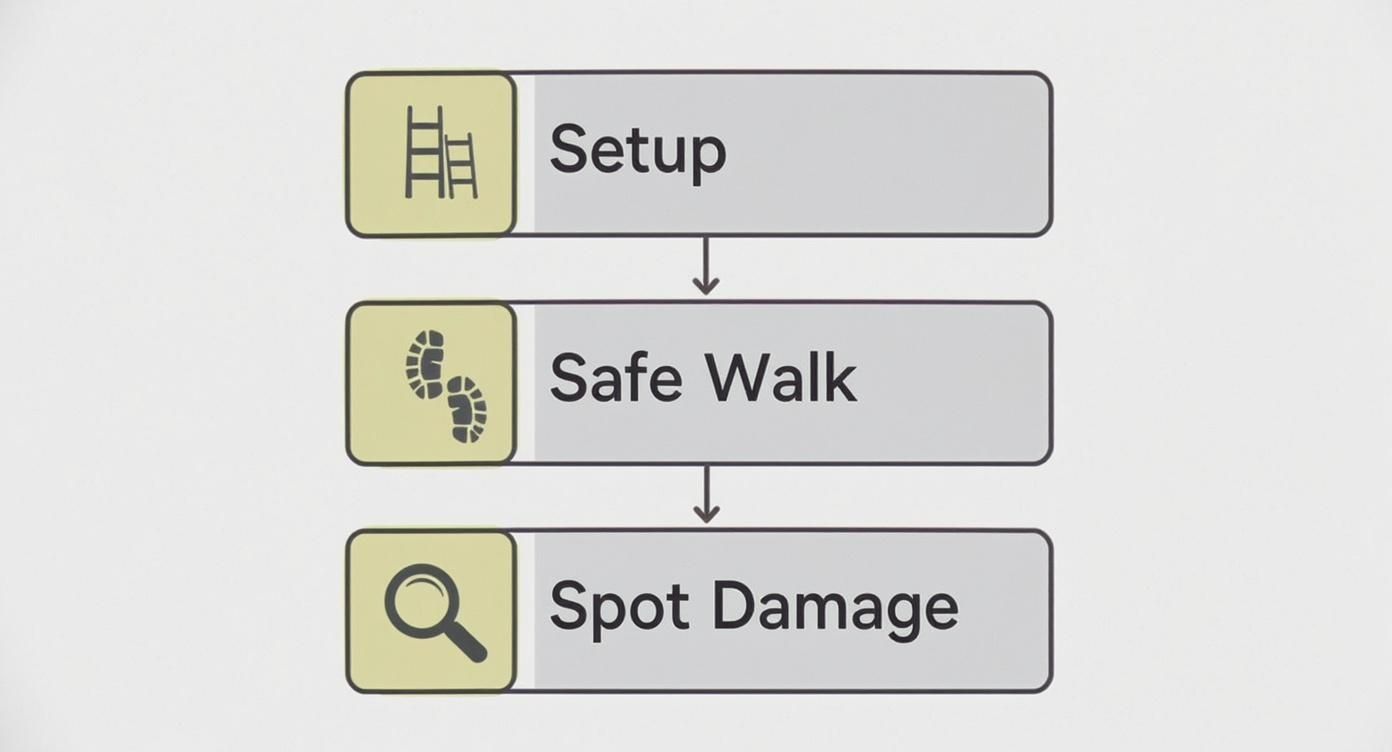
As you can see, a successful job starts with a securely placed ladder and careful movement on the roof—it's the only way to safely and accurately pinpoint the damage.
Fixing Holes in Asphalt Shingle Roofs
Asphalt shingles are the most common roof in the country, which is good news because they're also one of the most DIY-friendly materials to fix. The goal is simple: replace the bad shingle without messing up the good ones around it.
First, you’ll need to gently break the tar seal connecting the damaged shingle to the one above it. On a hot Arizona day, this might be pretty easy, but if it's cooler, you’ll need to slide a flat pry bar underneath to carefully loosen it. Lift just enough to get a peek at the nails holding the damaged shingle in place.
With the nails exposed, use the claw end of your hammer or the pry bar to pop them out. The old shingle should now slide right out. Slip the new shingle into the empty spot, making sure it lines up perfectly with the others in the row.
Now, nail it in with four galvanized roofing nails. The trick is to place them just under the tar sealant strip of the shingle above, so they'll be completely covered. To finish the job, grab your caulk gun and put a small dab of roofing cement under the corners of the new shingle and any others you lifted. This re-seals everything against wind and rain.
For a more in-depth look, our guide on how to patch a roof shingle has some extra pointers.
Sealing a Puncture in a Metal Roof
Metal roofs are tough as nails, but they're not invincible. A heavy falling branch can definitely leave a puncture. Repairing a metal roof isn't about replacement; it’s about creating a perfectly sealed, integrated patch that becomes part of the roof itself.
Prep work is everything here. You have to get the area around the hole completely clean—no dirt, no rust, no flaking paint. A wire brush is your best friend for this. Once it's clean, scuff up the surface of the metal around the hole to give the sealant something to really grab onto.
Next, cut a patch from a matching piece of sheet metal. Make it big enough to overlap the hole by at least two inches on every side. I always like to round off the corners of the patch; it helps prevent them from catching leaves or lifting up over time.
Apply a thick bead of a high-quality, color-matched urethane sealant around the hole itself. Press your metal patch down firmly, and you should see a little sealant squish out from all the edges—that's how you know you've got a good seal.
Pro Tip: For extra security, I recommend adding pan-head sheet metal screws every few inches around the patch. Just make sure they're long enough to go through the patch and the roof panel, but not so long they pop through your underlying roof deck. This gives it mechanical strength while the sealant cures.
Replacing a Broken Tile on a Roof
Here in Arizona, tile roofs are everywhere. They last forever, but they demand a delicate touch when a tile cracks or breaks. That broken tile is an open door for water, and swapping it out takes precision to avoid starting a chain reaction of more broken tiles.
Your first step is to carefully get the broken tile out. This usually means you have to lift the overlapping tiles in the row just above it. I use small wooden wedges to prop them up, which gives me just enough room to work. The broken tile is typically held by a single nail or a glob of roofing cement. Use your pry bar to gently work the nail out or break the adhesive bond.
Once the old tile is gone, take a second to inspect the underlayment for any water damage. If it looks good, you're clear to proceed. Slide the new, matching tile into place, ensuring it sits flat and overlaps the tiles below it correctly. Depending on how your roof was installed, you’ll secure it with either a single corrosion-resistant nail or a dab of tile adhesive.
Finally, gently remove your wooden wedges and let the upper tiles settle back into their natural position. Their weight is what really holds the new tile in place, completing the fix and restoring your roof's protective layer.
Temporary Fixes Versus Permanent Solutions
When water is dripping into your home in the middle of a monsoon storm, you’re not thinking about a perfect, long-term fix. You’re thinking, “Make it stop. Now.” This is where you have to understand the critical difference between an emergency patch and a real, permanent repair.
Knowing when to slap on a quick fix—and more importantly, knowing its limits—is what separates a minor headache from a catastrophic home repair bill down the road.
The Role of an Emergency Patch
A temporary fix is your first-aid kit for a roofing emergency. Think of it as triage—it’s not meant to be pretty, but it stops the bleeding until a professional can perform the actual surgery. These fixes are all about being fast, simple, and effective enough to buy you some precious, dry time.
You’ll likely reach for a temporary patch in a few common situations:
- During a Downpour: Getting on a wet roof to do a proper repair is a recipe for disaster. The safest and often only option is to secure a heavy-duty tarp over the damaged spot to divert the flow of water.
- Waiting for the Right Materials: If you need to special-order matching clay tiles or a specific color of shingle, a thick layer of roofing cement can create a temporary seal over the hole.
- After-Hours Damage: A leak that springs late on a Friday night or a holiday weekend requires a quick patch until you can get a licensed contractor from a company like AZ Roof Co out to your home.
The Danger of a "Permanent" Temporary Fix
Here’s the biggest mistake I see homeowners make: they put on a temporary patch and then forget about it. That quick fix, applied in a moment of panic, can easily become the source of your next major problem.
Emergency solutions just aren't built to survive the brutal Arizona sun. The intense UV rays and massive temperature swings will cause roofing cement to crack and tarps to become brittle and tear.
Worse yet, these patches often trap moisture underneath. This prevents the roof deck from ever drying out, creating a dark, damp environment perfect for wood rot and mold to thrive. It silently eats away at the structural integrity of your roof, completely hidden from view.
A temporary patch is a band-aid, not a cure. Its only job is to buy you a dry, safe window to schedule a proper, permanent repair. Leaving one on for more than a few weeks is just asking for trouble.
What a True Permanent Repair Looks Like
A permanent repair is a whole different ballgame. It’s not just about plugging a hole; it’s about rebuilding the roof's entire defensive system in that area so it's seamless and strong again. This means looking deeper than just the surface damage.
A genuine, professional repair always involves these steps:
- Removing All Damaged Materials: This means pulling up the broken shingles, tiles, or metal panels, but also cutting away any of the waterlogged underlayment beneath.
- Inspecting the Decking: A pro will always check the underlying wood deck for any softness or staining—clear signs of water damage. Any compromised wood has to be cut out and replaced with a new, solid piece.
- Integrating New Materials Properly: The new materials aren't just slapped on top. They are carefully woven into the existing layers, ensuring every seam overlaps correctly to create a completely watertight seal that will last for decades, not days.
To make it crystal clear, it's helpful to compare these two approaches side-by-side.
Comparing Temporary and Permanent Roof Patches
Understanding the differences in cost, durability, and application for emergency patches versus long-term repairs.
| Attribute | Temporary Repair (e.g., Tarp, Sealant) | Permanent Repair (e.g., Shingle Replacement) |
|---|---|---|
| Goal | Immediately stop water intrusion | Restore roof's long-term integrity |
| Lifespan | Days to a few weeks | 15-50+ years, matching the roof |
| Cost | Low (under $50) | Higher ($300+ for professional work) |
| Risk | High risk of trapping moisture if left too long | Low risk when done correctly |
| Process | Covers the damage from the top | Replaces damaged layers from the deck up |
Ultimately, a temporary patch is a necessary evil in an emergency, but the goal should always be a permanent, professional repair that restores your peace of mind and protects your home for the long haul.
When to Put Down the Tools and Call a Pro
There's a certain satisfaction that comes from a successful DIY repair. It can save you some money and give you a sense of accomplishment. But when it comes to your roof, knowing your limits is absolutely critical. Some jobs just aren't worth the risk to your safety or your home's long-term health.
Let's talk about the clear signs that a repair is out of your league.
Red Flags That Scream "Call a Professional"
You should immediately get a professional on the phone if you notice any of these issues:
- Big Problems: Any hole that’s over 6 inches in diameter is more than a simple patch job. It often points to more significant, underlying damage.
- A Spongy or Sagging Deck: If the roof feels soft or looks like it's dipping when you walk on it, that's a serious warning sign. This usually means the underlying wood sheathing is water-damaged and rotting, making it incredibly unsafe.
- Damage Through Multiple Layers: A hole that goes clean through the shingles, underlayment, and into the decking is complex. There could be hidden issues between those layers that only a trained eye can spot.
- Steep or Tricky Roofs: The risk of a fall skyrockets on steep pitches or roofs with complex valleys and angles. Professionals have the specialized safety equipment—harnesses, anchors, and training—to navigate these safely.
Think about it: discovering a soft spot near your chimney and deciding to climb up anyway could lead to a disastrous fall through the roof. It’s just not worth it.
The Value of a True Expert
A professional roofer does more than just slap on a patch. They bring a level of diagnostic skill and technical knowledge that ensures the job is done right and complies with local building codes. They're equipped with the right gear, years of hands-on experience, and often provide workmanship warranties that give you peace of mind.
The roofing industry is a massive part of our economy. In the U.S. alone, it's projected to become an $81.3 billion market by 2025, with over 27,000 businesses keeping homes safe. After a major storm, repair claims can jump by as much as 40%, with the average patch job costing anywhere from $300 to $1,200, depending on the size and location of the hole. You can find more details in this roofing industry analysis.
So, what does that pro actually bring to the table?
- They perform a complete roof assessment to find damage you might have missed.
- They know the local building codes inside and out, ensuring your repair is compliant.
- They stand behind their work with warranties covering materials and labor.
- Many will even help you navigate the insurance claims process.
"Getting a professional on the job early often saves thousands in downstream repairs."
Choosing the right person for the job can make all the difference. If you're looking for guidance, check out our guide on how to find a qualified roofer.
Deciding to call a professional isn't giving up; it's making a smart decision to protect your most valuable asset. A qualified contractor delivers safety, skill, and a watertight roof you won't have to worry about.
Frequently Asked Questions
How much does a small roof hole repair cost?
A DIY repair for a small hole can cost between $50 and $100 for materials like sealant and a few shingles. Hiring a professional for a simple patch typically ranges from $300 to $1,200, depending on the roof type, accessibility, and the extent of any underlying damage to the decking.
Can I use Flex Seal for a permanent roof repair?
No. Products like Flex Seal are designed for temporary, emergency fixes to stop water intrusion quickly. They are not a permanent solution and can trap moisture underneath, leading to wood rot and more significant problems over time. A proper repair involves replacing damaged materials, not just covering them.
Does homeowners insurance cover a hole in the roof?
It depends on the cause of the hole. Most standard policies cover damage from sudden, unforeseen events like wind, hail, or a fallen tree. However, they typically do not cover damage resulting from old age, lack of maintenance, or gradual wear and tear. Always document the damage and contact your insurance agent to review your specific policy.
What size hole is too big for a DIY repair?
As a general rule, any hole larger than six inches in diameter, or any damage that is accompanied by soft, spongy, or sagging roof decking, should be handled by a professional. These signs indicate that the problem may be more than superficial and could involve the roof's structural integrity.
Is it safe to repair my own roof?
Safety is the biggest concern with any roof work. If your roof is steep (a pitch greater than 6/12), if it's wet or icy, or if you are not comfortable working at heights, it is always safer to call a professional. Professionals have the required safety equipment, such as harnesses and anchors, and the experience to work safely.

