Discovering a hole in your roof can feel like a major crisis, but with the right guidance, it's a problem you can often manage yourself. A timely repair is crucial to prevent minor damage from escalating into a costly structural issue. This guide provides a step-by-step walkthrough, covering everything from the initial damage control inside your home to the final weatherproof seal on your roof. We'll equip you with the knowledge to assess the damage safely, gather the correct tools, and execute a durable repair that stands the test of time.
Key Takeaways
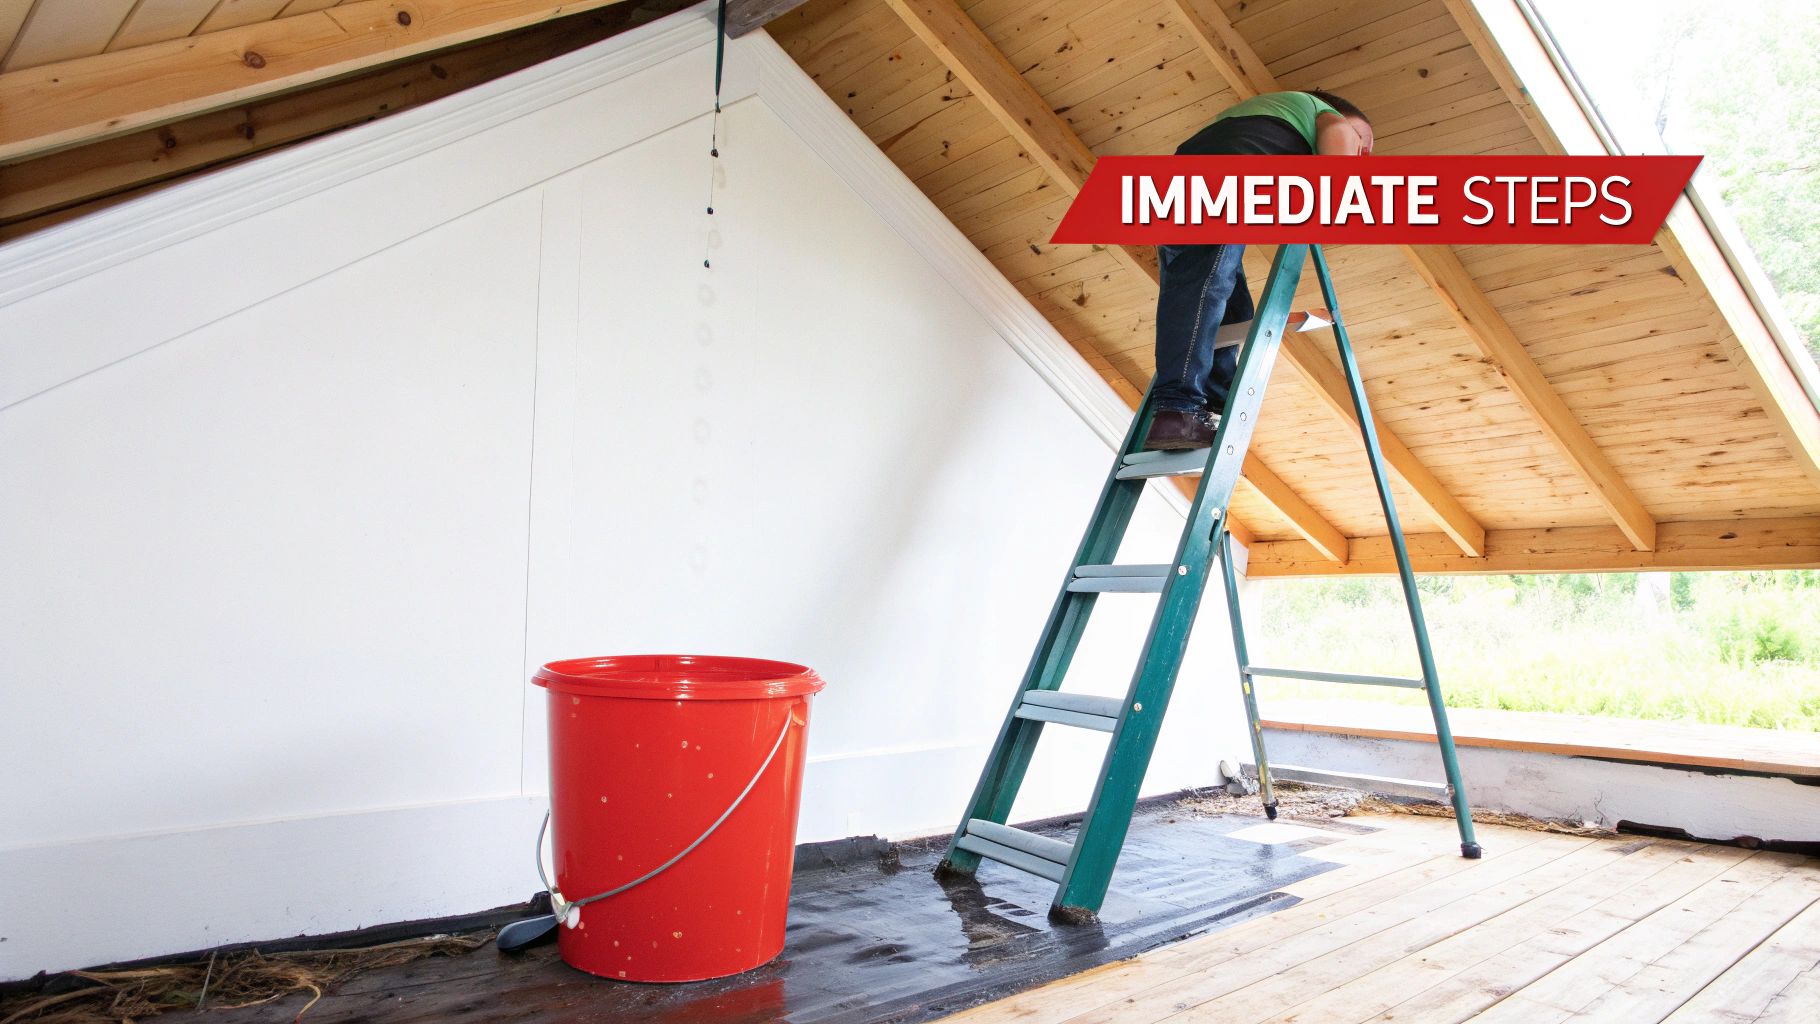
- Act Fast Indoors: Your first move is to control the water inside. Use buckets to catch drips and carefully puncture any ceiling bulges to release water and prevent a collapse.
- Safety is Paramount: Never go on a roof that is wet, icy, or dark. Always use a sturdy, properly positioned ladder and wear high-traction footwear. A spotter on the ground is essential.
- Inspect Thoroughly: A proper repair starts with finding the true source of the leak. Inspect both your attic for water stains on the wood and the rooftop for damaged shingles or flashing.
- Use the Right Materials: For a lasting fix, you must replace any rotted wood decking and use matching shingles, galvanized roofing nails, and high-quality roofing cement to ensure a seamless, watertight seal.
That sinking feeling when you spot a water stain on the ceiling is something no homeowner wants. It's stressful, but fixing the problem is often more straightforward than you might think. To repair a hole in the roof, the process boils down to a few key stages: get the inside damage under control, figure out exactly what's wrong up top, clear out the old damaged stuff, and then properly patch and re-shingle the area to make it completely weatherproof again.
Getting this right not only restores your roof's integrity but also stops a small headache from turning into a major disaster.
Your First Steps After Finding a Roof Leak
The moment you see that tell-tale drip or a dark spot spreading across the drywall, your first instinct might be to climb up on the roof immediately. But hold on. The most important first moves actually happen inside the house. The absolute priority is damage control.
A calm, methodical approach here will save you a lot of trouble later. It helps you avoid panicked mistakes and ensures you don't skip over any crucial safety checks.
Immediate Actions for Damage Control
Before you even think about grabbing a ladder, focus on these immediate actions:
- Contain the Water: Get buckets or pans under any active drips right away. If you see the ceiling drywall starting to bulge, it's full of water. Carefully poke a small hole in the center of the bulge with a screwdriver to let the water drain out. This prevents the whole section from collapsing under the weight.
- Protect Your Valuables: Move furniture, electronics, and anything else of value out of the wet zone. Tarps can be a lifesaver here.
- Prioritize Safety Above All: This is non-negotiable. Never go onto a roof when it's wet, icy, or dark. Also, be extremely cautious if the leak is near any light fixtures or electrical outlets. Water and electricity are a deadly combination.
This guide will walk you through the whole repair from start to finish—from these critical first steps to sealing up the final shingle. We'll cover everything you need to know about how to repair a hole in the roof so you can handle it with confidence.
The most common mistake I see homeowners make is assuming the leak is directly above the water spot inside. Water is tricky; it can travel down a rafter or across the roof deck for several feet before it finally drips through. The real source of the problem is often somewhere else entirely.
Once you've managed the situation indoors, you can turn your attention to the roof itself. A safe, careful inspection is next on the list. This groundwork is absolutely essential for a repair that's going to last. For a deeper dive into what causes leaks, our essential guide to roof leak repair has a lot of great background information.
Safe Damage Assessment Inside and Out

Before you even think about grabbing a tool, your first and most critical job is a thorough damage assessment. This isn't just a quick peek from the ground. It's a two-front investigation, starting inside your attic and finishing on the roof itself.
Getting this step right is everything. It tells you exactly what you're dealing with, so you can gather the right materials and map out a solid plan to fix that hole for good. This careful inspection is what helps you make the call: is this a weekend DIY project, or is it time to bring in a pro? I've seen too many people rush this part, only to end up with a "fix" that fails during the next rainstorm.
Starting Your Search in the Attic
Your attic is ground zero for leak detection. That water spot on your living room ceiling is just where the journey ended. The real entry point on the roof could be several feet away, as water loves to travel along rafters and joists before it finally drips down.
So, grab a good flashlight and head up there. You're a detective now, looking for the subtle clues that lead back to the source.
- Soggy Insulation: Poke around the insulation in the suspect area. If it feels damp, compressed, or looks discolored, you’re on the right track. Wet insulation is a dead giveaway.
- Water Stains on Wood: Get your light right up on the underside of the roof decking—the plywood sheathing. Look for dark stains, water rings, or blackish streaks. These are the fingerprints the leak left behind.
- Daylight or Dark Spots: On a bright day, turn your flashlight off and search for tiny pinpricks of daylight. On a cloudy day, look for the opposite: unusually dark spots on the wood, which often indicate moisture saturation.
Once you’ve pinpointed the general area from inside, you know exactly where to focus your attention when you get up on the roof.
Here's a pro tip I swear by: once you find the interior evidence, carefully push a long, thin nail or a piece of wire straight up through the spot. When you get on the roof, that little marker will be waiting for you, saving you a ton of guesswork.
The Rooftop Inspection Safety Protocol
Let's be clear: getting on a roof is dangerous work. Safety is the one thing you cannot compromise on. Never, ever attempt a rooftop inspection if it's wet, icy, or even just covered in morning dew. A slippery roof is an accident waiting to happen.
Before you take a single step up that ladder, you need a safety protocol.
- Use a Sturdy Ladder: Make sure your ladder is on solid, level ground. It needs to extend at least three feet above the roofline so you have something to hold onto as you get on and off.
- Wear the Right Gear: Soft-soled, high-traction shoes are non-negotiable. For any roof with a noticeable pitch, a properly secured safety harness is your best friend.
- Work with a Spotter: Always have someone on the ground. They can hold the ladder steady, keep an eye on you, and be there in an emergency. Don't work alone.
Once you’re safely up top, move deliberately. Look for the obvious culprits around the spot you marked from the attic—things like cracked, curled, or completely missing shingles. Pay close attention to the flashing around chimneys, vents, and skylights, as these metal seals are notorious failure points. Also, keep an eye out for exposed nail heads that have worked their way up.
This detailed, two-part assessment gives you the complete picture of the damage, guiding a successful and lasting repair. The constant need for these kinds of repairs is a huge driver in the global roofing market, which was valued at around $132.5 billion in 2025 and is projected to exceed $228 billion by 2032. You can discover more insights about roofing market trends to see what drives this growth.
Gathering the Right Tools and Materials
Walking into a hardware store without a plan is a recipe for frustration. You'll wander the aisles, grab things you think you need, and almost certainly forget the one critical item for the job. To fix a hole in your roof the right way, you need to approach your supply run like a pro—with a clear, organized list.
Having everything on hand before you even think about setting up the ladder isn't just about convenience; it's a huge safety factor. The last thing you want is to be perched on your roof, only to realize the roofing cement is still sitting on the store shelf. A little prep work turns a potentially stressful project into a smooth, manageable task.
Essential Tools for the Job
Your everyday toolbox is a good start, but proper roof repair requires a few specialized items to get the job done right without causing even more damage. Think of these as your non-negotiables for a solid, professional-grade patch.
- Flat Pry Bar: This will be your best friend for carefully lifting shingles. Its thin, wide edge is perfect for sliding under shingles and gently popping the nails without cracking the surrounding material.
- Hammer or Roofing Nailer: A good old-fashioned hammer will do the trick just fine for driving in roofing nails. If you happen to have a pneumatic roofing nailer, it will definitely speed things up, but it's not essential for a small repair.
- Utility Knife with Hook Blades: A standard utility blade will struggle, but a hook blade is designed specifically for shingles. It lets you make clean, precise cuts from the back of the shingle with a simple pull—much safer and more effective than trying to saw through the gritty surface.
- Caulking Gun: Absolutely necessary for applying roofing cement or sealant. A quality, drip-free caulking gun will make the whole sealing process much cleaner and less of a headache.
- Tape Measure & Chalk Line: Accuracy is everything up there. You'll need a tape measure for cutting your patch materials, and a chalk line is invaluable for snapping straight guides if you have to cut out a section of the roof decking.
A quick word of advice: Don't try to improvise with your tools. I once saw a homeowner use a screwdriver instead of a pry bar, and they ended up cracking three perfectly good shingles next to the one they were replacing. That simple fix just became a much bigger, more expensive project.
Choosing the Right Materials
Once you have your tools, it's time to gather the materials. This is where matching your existing roof becomes critical, not just for looks but for performance. A patch that doesn't match will stick out like a sore thumb and might not weather the elements the same way as the rest of your roof.
It's a smart move to take a piece of a damaged shingle with you to the store. This helps tremendously with matching the color and style. You'd be surprised how different a shingle can look under fluorescent store lighting compared to the bright sun.
Here's a checklist of the tools and materials you'll need to have ready before you start the repair.
Essential Toolkit for Roof Hole Repair
| Category | Essential Items | Purpose |
|---|---|---|
| Shingles | Replacement Shingles | Must match your existing shingles in color, style (e.g., architectural, 3-tab), and brand if possible for a seamless look and consistent wear. |
| Sealing | Roofing Cement/Sealant | This is the "glue" that creates a watertight seal. Use it to bed the new shingles and cover all exposed nail heads. Look for a product rated for all-weather application. |
| Nails | Galvanized Roofing Nails (1 ¼ inch) | Specifically designed with a wide, flat head to hold shingles down securely without tearing through them. Galvanization prevents rust. |
| Underlayment | A small roll of roofing felt or synthetic liner | This is your secondary water barrier. If you have to replace any of the roof decking, you absolutely must install new underlayment over the patch. |
| Decking | A small piece of plywood or OSB | Only needed if your inspection revealed soft or rotted wood underneath the shingles. It must match the thickness of your existing roof decking. |
With this toolkit assembled, you're not just prepared—you're set up for a successful repair that will last.
Executing a Durable Roof Patch Repair
With your tools and materials in hand, it's time to get to work. This is where patience and attention to detail really pay off. A careful, deliberate approach is what separates a long-term solution from a temporary fix that'll have you back on the roof in a few months.
Think like a pro. The goal here isn't just to plug a hole. It's to completely rebuild a small section of your roof's defense system, making sure every layer works together to keep your home dry for years to come.
Carefully Removing Damaged Shingles
First things first, we need to do a little careful deconstruction. The main objective is to get the damaged shingles out without harming the good ones around them. If you get too aggressive here, you can easily crack an adjacent shingle and turn a minor repair into a much bigger headache.
Start by gently sliding your flat pry bar under the edge of the shingle just above the one you need to replace. You’re trying to feel for the heads of the roofing nails that are holding the bad shingle down. Once you find one, lift just enough to pop the nail head up so you can grab it with the claw of your hammer. Most shingles have four nails.
Take your time with this process, repeating it for all the nails in the damaged shingle. Shingles, especially in sunny climates, can get brittle. Slow and steady pressure wins the race here, not brute force.
Addressing the Underlayment and Decking
Once the old shingles are out of the way, you'll have a clear view of the underlayment (the felt paper or synthetic liner) and the roof decking itself, which is usually plywood or OSB. Stop and take a good look. If the wood feels soft, looks discolored, or is spongy to the touch, it must be replaced.
Skipping this step is a huge mistake. Nailing a brand-new shingle into rotten wood is pointless; it won't hold, and your patch is guaranteed to fail.
If you find rot, here’s the game plan:
- Mark the Bad Spot: Use a straight edge to draw a square or rectangle around the rotted section, making sure your lines extend a few inches into the solid wood on all sides.
- Set Your Saw Depth: Adjust your circular saw blade to match the exact thickness of the decking—usually ½ or ⅝ of an inch. This is critical to avoid cutting into the rafters underneath.
- Cut and Remove: Carefully follow your lines to cut out the damaged section. A pry bar can help you pop it free.
- Install the New Piece: Cut a new piece of decking to the exact same size. For added strength, you can screw some 2×4 blocking to the rafters along the inside edges of the opening. Secure the new patch with screws.
This is probably the most important part of the entire repair. The decking is the foundation, and it has to be solid.
Pro Tip: When you fit the new piece of decking, leave a tiny 1/8-inch gap around the edges. Wood expands and contracts with temperature changes, and this small gap gives it room to breathe without buckling and damaging your new shingles.
Installing New Underlayment
With solid decking in place, it's time to restore the secondary water barrier. Cut a piece of new roofing underlayment big enough to cover the entire patch. The key is to slide this new piece several inches under the existing underlayment on the top and sides.
Think of it like fish scales—water needs to flow down and over every seam, never into one. A few roofing nails or staples will hold it in place while you work.
This infographic breaks down the core workflow perfectly.
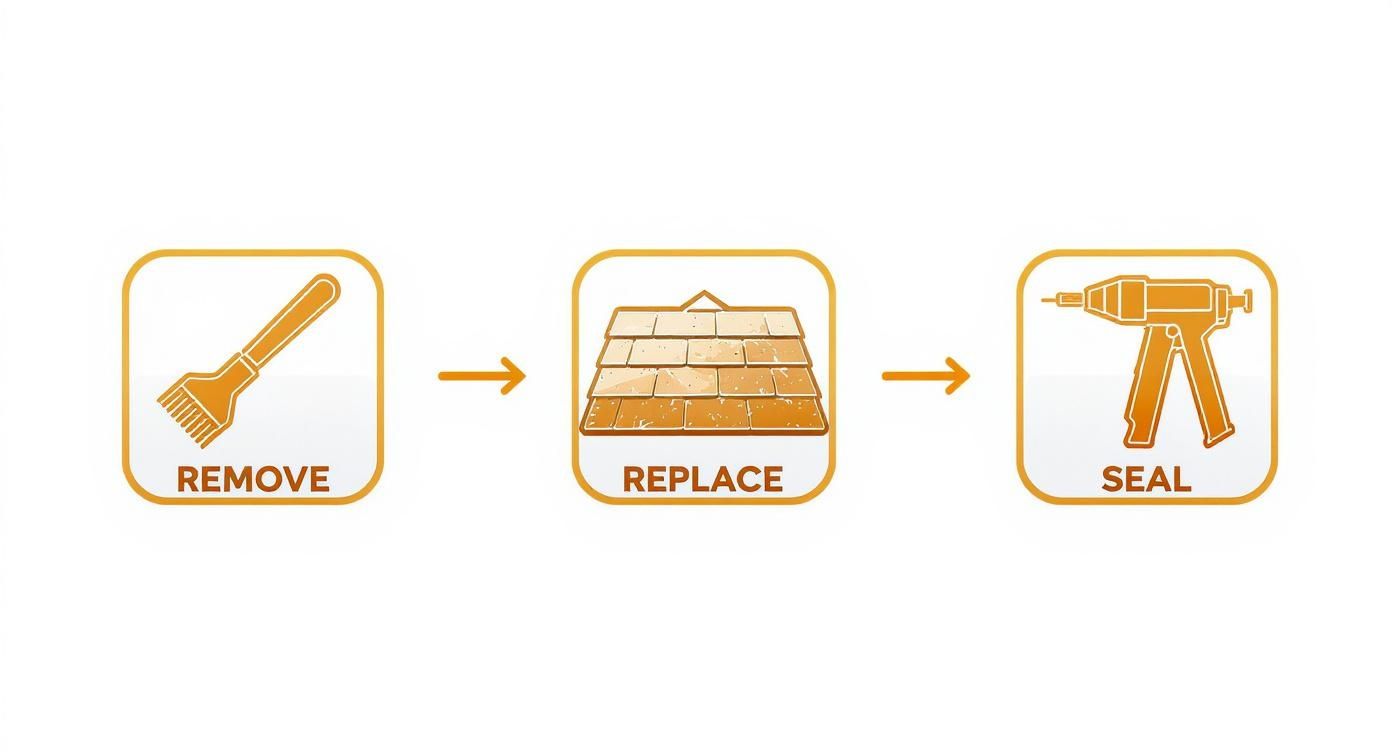
It’s all about a cycle: careful removal, meticulous replacement, and a final, bulletproof seal.
Installing and Nailing New Shingles
Now for the final layer. Start with the lowest shingle you removed. Slide the new one into place, lining it up perfectly with its neighbors. Fasten it with four galvanized roofing nails. On a standard 3-tab shingle, place them about an inch above the cutouts; on architectural shingles, use the marked nail line.
The Nailing Pattern is Critical
Where you place your nails makes all the difference in wind resistance. It’s the most common mistake I see.
- Nail Position: Your nails have to go through the new shingle and the very top edge of the shingle in the row below it. This is what locks everything together.
- Nail Depth: Drive each nail straight until the head is flush with the shingle's surface. If it's sticking up, it will eventually wear a hole in the shingle above it. If you drive it too deep, you'll cut right through the shingle, and it won't hold properly.
Work your way up the roof, with each new row of shingles covering the nails of the row below it. That simple layering is what makes a shingle roof work. If you want a closer look at this part of the process, our guide on how to patch a roof shingle has more detailed visuals.
Applying the Final Weatherproof Seal
You're almost done. The very last shingle you install will have its nail heads exposed, creating a direct path for water. We have to seal them up.
Use your caulking gun to apply a small, neat dab of roofing cement over each exposed nail head. Now, gently lift the tabs of the shingles you pried up earlier and run a thin bead of cement underneath them. Press them down firmly. This essentially glues them back down, keeping wind from getting underneath and tearing your new patch off.
This final touch is your insurance policy. It locks everything down and ensures your repair is ready to handle whatever the weather throws at it.
Navigating Complex Repairs and Calling a Pro
https://www.youtube.com/embed/oRiXvZb_NDU
Not every hole in your roof is a simple patch job. While plenty of small repairs are perfect for a weekend DIY project, some situations just demand a pro’s touch and specialized gear. Knowing when you’re out of your depth isn’t a sign of failure—it’s actually the smartest move you can make to protect your home.
Some spots on a roof are just inherently tricky. Think about leaks showing up around chimneys, skylights, plumbing vents, or in the valleys where two roof sections meet. The culprit here usually isn't the shingle itself, but the flashing. This is the specialized metal work that’s supposed to guide water away from these vulnerable joints, and fixing it properly takes real know-how.
Spotting Deeper Structural Issues
Sometimes, a little leak is just the visible symptom of a much bigger, more sinister problem lurking underneath. These are the red flags that mean it's time to put down your tools and pick up the phone.
Be on the lookout for these major warning signs:
- A Sagging Roofline: Take a step back from your house and look at the ridgeline. If you see a noticeable dip or bow, you could be looking at failing rafters or trusses. This is a serious structural issue.
- Widespread Wood Rot: When you’re up in the attic, is the dampness and rot contained to one small spot, or is it spread across a huge section of the roof decking? Widespread damage is a clear sign the problem is extensive.
- Multiple Active Leaks: If you're playing whack-a-mole with leaks popping up in different places, it’s a strong signal that your entire roofing system is probably at the end of its life. Patching one spot won’t solve the underlying failure.
Knowing when to hand the job over to a professional roofer is a critical skill. Trying to tackle a complex repair without the right experience can quickly snowball a minor issue into a major disaster, voiding your warranty and leading to far more expensive fixes.
The need for skilled roofers isn't going away. The global market for roof repair services is expected to climb from around US$ 38.82 billion in 2025 to US$ 52.27 billion by 2031. This trend shows just how vital expert maintenance is, especially as buildings age and new repair technologies emerge.
When a roof repair is more than you can handle, finding the right professional is your next move. To make sure you’re hiring a true expert, it's wise to ask some targeted questions. This list of 10 Essential Questions to Ask Contractors Before You Hire is a great starting point to ensure your home is in good hands.
Checking Your Work and Building Good Habits
So, you've sealed up that hole in the roof. Feels good, right? But before you hang up your tool belt and call it a day, there's one last, crucial part of the process. The real test of any roof repair isn't how it looks right after you're done—it's whether it holds up when the weather turns nasty.
The best way to confirm your patch is truly watertight is to wait for the next big downpour. Once the rain stops, grab a good flashlight and head back up into the attic. You'll want to get a close look at the underside of the roof deck right where you made the repair. Look for any new signs of moisture. Even a little dampness or a fresh water stain means you still have a leak to trace. If everything is bone dry, you can breathe a sigh of relief. You’ve nailed it.
From Fixing to Preventing
Learning how to repair a hole in the roof is a fantastic skill to have, but I'll let you in on a secret: preventing the next one is even better. This is where you switch from playing defense to playing offense. A little bit of proactive maintenance can save you a world of headache and thousands of dollars down the road.
You don't need to be a professional roofer to keep your roof in good shape. It really comes down to a few simple, consistent habits.
- Mind Your Gutters: This is a big one. When gutters get clogged with leaves and gunk, rainwater has nowhere to go but up and under your roofing. This is a classic cause of rot along the eaves. Make it a point to clean them out every spring and fall.
- Trim Those Trees: You love your trees, but your roof doesn't love when their branches scrape against it. Constant friction wears down the protective granules on your shingles, leaving them vulnerable. Keep branches trimmed back a few feet from your roofline.
- Do a Seasonal Walk-Around: At least twice a year, just take a walk around your house and look up. Use binoculars if you have them. You’re looking for the small stuff that can turn into big problems—a bit of cracked sealant around a vent, a shingle that’s lifted up, or any missing shingles.
By turning these actions into a routine, you shift from a reactive mindset to a proactive one. You're no longer just fixing problems; you're actively preventing them from ever starting.
These tasks don't take much time, but the payoff is huge. If you're looking for a more detailed game plan, our comprehensive roof maintenance checklist breaks it all down for you, season by season.
Frequently Asked Questions
How long does a proper roof patch last?
A well-executed roof patch should last for the remaining lifespan of your roof. If you replace any rotted decking, use matching materials, and properly layer and seal the new shingles, the repaired section will be just as strong and durable as the surrounding areas. A temporary fix with just sealant might only last a few months.
Can I repair my roof in the rain?
No. You should never attempt to repair a roof in the rain or when it is wet. A wet roof is extremely slippery and poses a significant fall risk. Furthermore, roofing sealants and cements require a clean, dry surface to bond correctly. A repair made in wet conditions is almost guaranteed to fail.
What should I do if I can't find matching shingles?
If your shingles have been discontinued or faded, you have a couple of options. You can choose the closest possible match in color and style, which is often unnoticeable from the ground. Alternatively, you can carefully remove matching shingles from a less visible area of your roof (like the back of the house) to use for the repair, and then install the new, slightly mismatched shingles in that less conspicuous spot.
How much does it cost to repair a hole in the roof?
The cost varies widely depending on the size and complexity of the hole, the type of roofing material, and whether you do it yourself or hire a professional. A simple DIY shingle replacement might only cost $50-$100 in materials. However, if there is structural damage to the decking or you need to hire a roofer, the cost can range from several hundred to over a thousand dollars.

