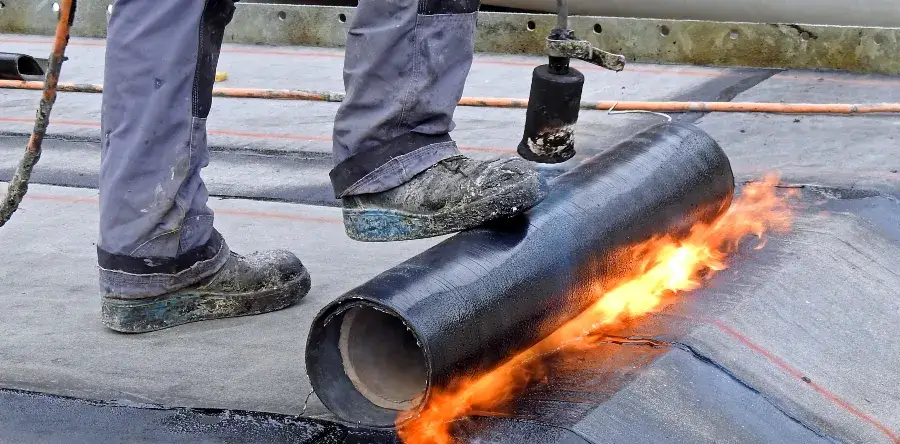

A lot of Arizona homeowners find the problem the same way. A small ceiling stain shows up near a bathroom, laundry room, or kitchen, then the next monsoon rain makes it darker. The leak looks minor, but the weak point is often a roof vent seal that dried out, cracked, or pulled away under desert heat.
Learning how to seal a roof vent matters in Arizona because the repair has to survive punishing sun, sharp daily temperature swings, and months of dry exposure before the next hard rain tests it. Generic advice usually says to add caulk around the vent and move on. That approach is exactly why so many quick fixes fail here.
Table of Contents
- Why Roof Vent Seals Fail So Fast in Arizona
- Your Pre-Seal Inspection Checklist and Safety Gear
- Choosing the Right Sealant for the Arizona Sun
- How to Seal Different Types of Roof Vents
- Troubleshooting Leaks After a Repair
- When to Call Arizona's Best Roofer
Why Roof Vent Seals Fail So Fast in Arizona
The first failure usually isn't dramatic. Sealant starts to chalk, the edge lifts a little, dust works into the gap, and then a summer storm drives water under the flashing. By the time a stain shows indoors, the rooftop problem has often been developing for a while.
Arizona makes that cycle happen faster. Intense UV exposure, dry conditions, and daily temperature swings of 40°F+ break down vent seals more aggressively, and roofs account for 15-25% of a building’s total heat gain in cooling-heavy climates like Phoenix and Tucson, which makes good sealing more important than most homeowners realize (Arizona climate vent sealing challenges).
A vent seal in Scottsdale or Mesa doesn't just sit still. It expands in daytime heat, contracts overnight, and keeps repeating that cycle. Metal, rubber, plastic, tile, and shingles all move a little differently. When the wrong sealant gets used, that movement pulls it apart long before the vent itself wears out.
Practical rule: In Arizona, a vent repair fails less from one big storm than from months of heat slowly breaking the bond before the storm arrives.
Another mistake is treating every vent the same. A plumbing vent pipe, a box vent, and a low-slope roof penetration don’t seal the same way, and they don’t fail the same way. Some need a new boot. Others need corrected flashing. Some should never be covered with a heavy smear of roof cement at all.
Homeowners who are also dealing with attic heat issues should understand how vent sealing fits into the bigger airflow picture. A repair should stop leaks without disrupting proper intake and exhaust paths, especially on homes with conventional attic systems. That’s why vent repairs should be considered alongside attic venting performance for Arizona homes.
Your Pre-Seal Inspection Checklist and Safety Gear
A vent repair starts before the sealant tube opens. The roof has to be safe to walk, the leak source has to be identified correctly, and the vent has to be checked to make sure it should be sealed around, not sealed off.

Start with safety before touching the roof
Arizona roofs get dangerous fast. Asphalt, tile, and metal surfaces can become slick with dust and brutally hot under direct sun, so homeowners should work during the coolest safe part of the day and avoid any repair during wind, rain, or monsoon buildup.
A basic safety setup should include:
- Stable ladder placement: Set the ladder on firm ground and secure the top so it can't shift when stepping on or off the roof.
- Soft-soled footwear: Shoes need grip without damaging shingles or sliding on smooth tile.
- Gloves and eye protection: Old flashing edges, brittle sealant, and screws can cut hands fast.
- Fall awareness: Steep slopes, two-story sections, brittle tile, and low-slope edges all change the risk level. If footing feels uncertain, the repair should stop there.
A leak repair isn't worth an emergency room trip. If the roof is steep, fragile, unusually high, or too hot to kneel on safely, it has already crossed out of DIY territory.
What to inspect before any repair
Before sealing anything, inspect from inside and outside. Inside the attic, look for dark staining on the roof deck, damp insulation near penetrations, and water trails running down framing. Outside, inspect the vent body, fasteners, flashing edges, surrounding shingles or tiles, and the condition of any rubber boot.
A solid inspection checklist looks like this:
- Find the exact penetration above the stain. Water often travels before it appears indoors, so the nearest ceiling spot isn't always directly below the leak.
- Check for brittle or split sealant. If old sealant flakes off when touched, it shouldn't be coated over.
- Inspect flashing laps. Bent, loose, or exposed edges often matter more than the sealant itself.
- Look for cracked collars and boots. On plumbing vents, the rubber ring commonly fails before the metal base does.
- Check nail placement and exposed fasteners. Fasteners in vulnerable locations create easy water entry points.
- Inspect the field around the vent. Broken shingles, slipped tiles, or membrane damage can mimic a vent leak.
Ventilation also matters during inspection. Building science calls for a 1:150 vent-to-ceiling area ratio, and in Arizona attics can exceed 150°F. Proper airflow can reduce shingle temperatures by up to 70°F, while improperly blocking roof ventilation can raise cooling costs by 10-30% and even affect shingle warranties (roof ventilation standards and attic heat impact).
That’s why the inspection should answer two separate questions. Is water getting in around the vent? And is this vent part of the roof’s designed airflow system? Homeowners who aren't sure should compare what they see on the roof with a full roof inspection guide for Arizona homes.
Choosing the Right Sealant for the Arizona Sun
Most bad vent repairs don't fail because the bead looked messy. They fail because the product was wrong for the roof, the vent material, or the climate. Arizona punishes weak sealants quickly, especially around penetrations that move at different rates than the roofing around them.
What matters more than the label
The tube says less than homeowners think. What matters is whether the sealant stays bonded after UV exposure, keeps enough elasticity for daily expansion and contraction, and remains compatible with the vent material and roof surface.
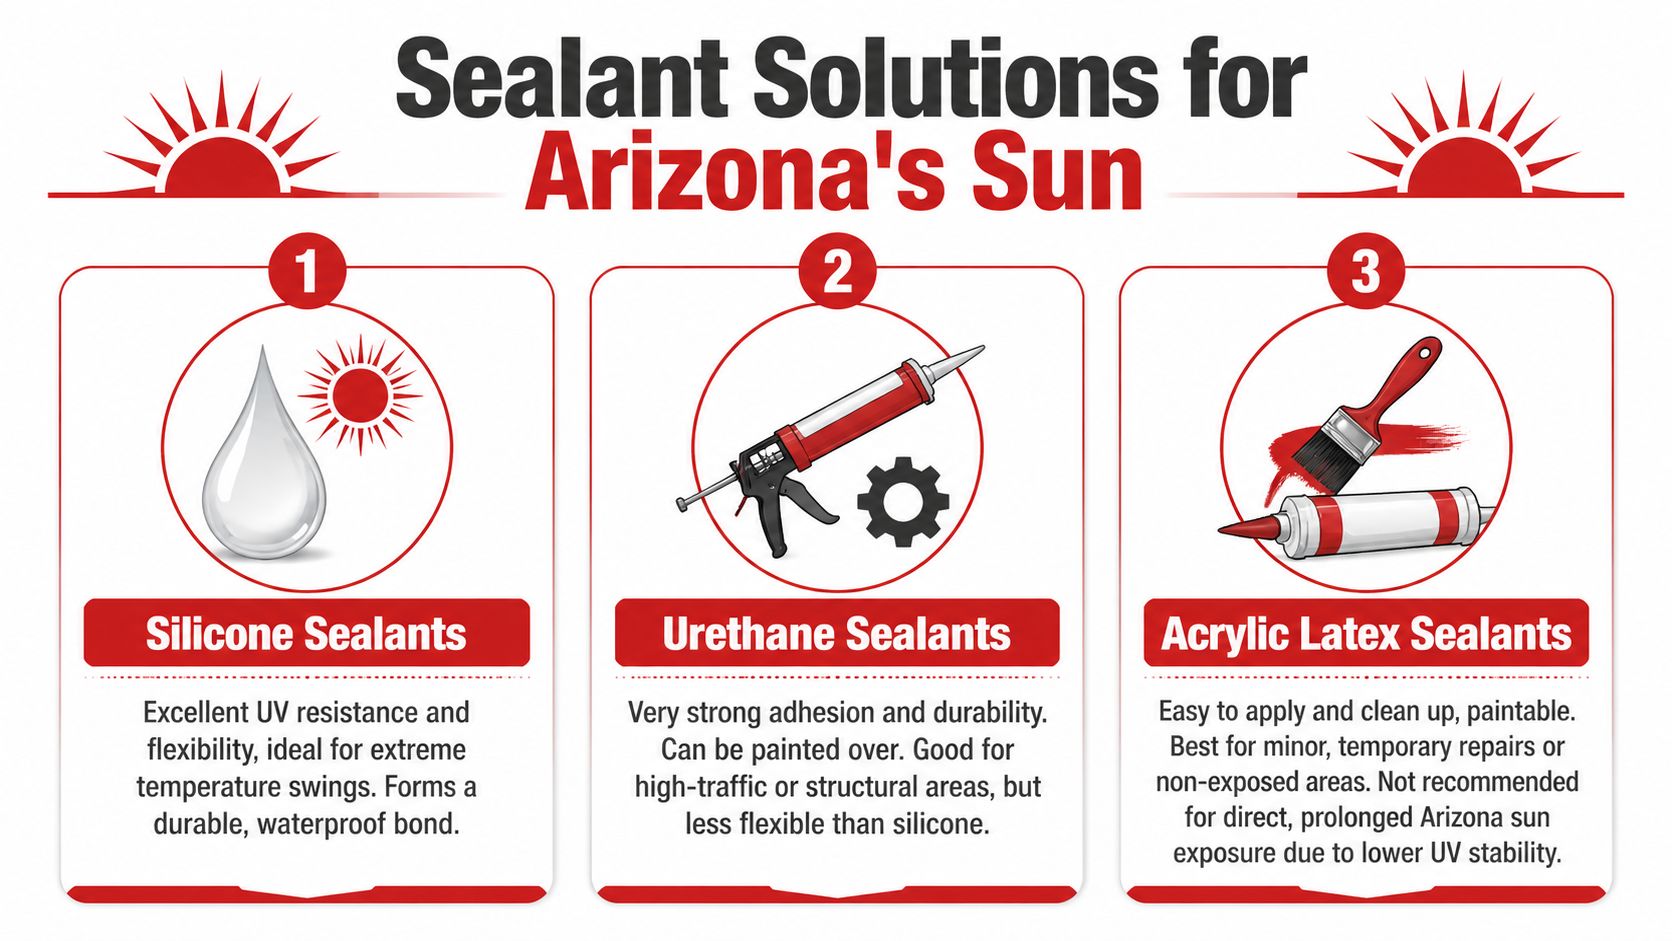
For roof vent work in Arizona, the common categories are silicone, polyurethane, and acrylic latex. Each has a place, but they don't belong in the same situations.
- Silicone: Usually the strongest option for UV exposure and long-term flexibility. It works well where the material has to handle repeated movement and direct sun.
- Polyurethane: Strong adhesion and solid durability, especially around flashing edges and joints where a tighter bond matters. Some roof details still rely on this type when the assembly calls for it.
- Acrylic latex: Easier to use, easier to clean, and better kept for less exposed or temporary situations. It isn't the first choice for direct Arizona roof exposure.
For penetration sealing, the method matters as much as the product. Professional pipe-boot sealing uses a continuous bead of high-solids polyurethane or lap-sealant caulk that meets ASTM D4586, and when installed correctly, professional vent pipe repairs exceed 95% success over 10-15 years. That performance drops to 40-50% when DIY mistakes show up, including lower-flange nailing. Boot mismatch causes 30% of failures, and sealant cracking in extreme heat accounts for 25% of failures within 5 years (professional pipe vent sealing performance and failure causes).
The best sealant can't save the wrong repair. If the boot is split or the flashing is wrong, a fresh bead only hides the problem for a while.
Arizona homeowners comparing repair options can also review roof leak repair sealant guidance for desert conditions, especially when the vent sits on metal, tile, or coated low-slope roofing.
Roof Sealant Comparison for Arizona Climates
| Sealant Type | UV Resistance | Flexibility/Elasticity | Expected Lifespan (AZ) | Best For |
|---|---|---|---|---|
| Silicone | Excellent | Excellent | Longer-lasting in exposed desert conditions when compatible with the roof system | Sun-exposed vent joints, movement-prone penetrations, metal and many flashing details |
| Polyurethane | Good | Good | Durable when properly installed and maintained | Flashing edges, strong-bond roof details, pipe boot flange sealing where specified |
| Acrylic Latex | Lower in exposed desert conditions | Moderate | Better suited to shorter-term or protected applications | Minor touch-ups in non-exposed areas, not ideal for direct Arizona sun |
A few buying decisions separate a lasting repair from a callback:
- Match the material to the vent. Metal, plastic, EPDM, and coated surfaces don't all accept the same sealant equally well.
- Avoid bargain products for exposed roofs. A low-cost tube often becomes a short-lived tube on a Phoenix roof.
- Read the cure window. If the repair needs several calm, dry hours and monsoon weather is building, the timing is wrong.
- Use roofing-grade products. Household caulk has no place around a roof penetration.
Arizona Roofers handles vent and penetration sealing as part of broader repair scopes that may include boot replacement, flashing correction, and roof-surface repair when sealant alone isn't enough.
How to Seal Different Types of Roof Vents
The phrase seal a roof vent sounds simple, but the correct method depends entirely on the type of vent. Some repairs need a new boot and integrated flashing. Others need edge sealing, fastener correction, or a pitch pocket. Smearing caulk around every vent the same way causes repeat leaks.
Sealing a plumbing vent pipe with a boot and flashing
This is the most common residential vent leak. The weak point is often the rubber collar around the plumbing pipe, not the visible caulk on top. If the collar is split, dried out, or oversized, patching it usually wastes time.
The professional method follows a clear sequence:
- Clean the area completely. Remove debris, old sealant, and any loose material so the new boot sits flat.
- Choose the correct boot size. The boot should match the pipe diameter and be made from UV-resistant EPDM or silicone.
- Slide the boot over the pipe. The base flange needs to lie flat, with the upslope side oriented correctly.
- Fasten only on the upper half of the flange. Nailing into the lower flange invites water entry.
- Apply a continuous bead beneath flange edges and at the pipe-to-boot joint. Gaps and broken beads fail first.
- Integrate the flashing with the roof covering. Shingles or tiles should shed water over the assembly, not trap it behind the flange.
- Finish cleanly, not heavily. Thick blobs of sealant crack, collect dirt, and hide poor detailing.
If the vent pipe moves, leans, or the roof deck around it feels soft, the repair is no longer just a sealing job.
A plumbing vent leak often looks like a caulk problem from the ground. On the roof, it's frequently a failed boot, a bad fit, or flange fastening in the wrong place.
Sealing static vents and box vents
Box vents usually fail around perimeter flashing, exposed fasteners, or damaged surrounding shingles. On tile roofs, the issue may be at the transition where the vent base meets underlayment and tile cuts, not on the visible top edge.
A reliable repair has a smaller footprint than many DIY attempts. The goal is to restore water shedding, not mummify the vent in sealant.
Use this approach:
- Lift and inspect surrounding roofing carefully. Check whether the flange still sits under the proper overlaps.
- Remove failed sealant fully. New sealant over brittle material won't bond for long.
- Tighten or replace compromised fasteners where appropriate. Loose vent bodies flex in wind and break sealant lines.
- Seal only the correct edges and joints. The downhill path for water drainage must remain unobstructed where the assembly is designed to shed.
- Replace damaged roofing around the vent if needed. A cracked shingle or broken tile beside the vent can imitate a vent leak.
Homeowners often over-seal the downhill side because it looks exposed. On many assemblies, that's the wrong instinct. Water needs to move off the vent and away, not get trapped behind a dam of sealant.
Sealing turbine vents and powered exhaust vents
Moving vents create a different challenge. The spinning or vibrating top may be fine while the curb, flashing, or wiring penetration below it leaks. Powered vents add another failure point where the electrical connection enters the housing.
For these vents, focus on the stationary parts:
- Inspect the base flashing first.
- Check the vent body for wobble or loose fasteners.
- Seal electrical penetrations with a compatible roofing sealant.
- Replace worn gaskets if the housing uses them.
- Confirm the fan or turbine isn't stressing the base through movement.
If a turbine has visible rust, bent fins, or movement at the neck, replacing the unit is usually smarter than trying to preserve a failing body with more sealant.
Sealing clustered penetrations on low-slope roofs
Low-slope and flat roofs around Phoenix-area additions, patios, and commercial properties often have multiple pipes and conduits packed close together. That’s where a pitch pocket may be the right repair, not individual caulk beads around each pipe.
The proper method is precise:
- Build a metal or PVC curb around the penetration group.
- Set it plumb and level, then seal the curb joints.
- Run self-adhering membrane beneath and upslope of the pocket.
- Pour the compatible pocket sealant to just below the top.
- Tool a slight crown for drainage.
- Add counter-flashing or cap membrane at the top edge.
- Plan for inspection and maintenance.
When installed professionally, pitch pocket sealing is 90% leak-free for 10 years, but 80% of failures come from shrinkage and cracking in high UV and heat, and incompatible sealants account for 35% of failures on roofs exposed to 120°F heat.
That’s why low-slope penetrations are rarely good beginner repairs. They require compatible materials, proper pocket depth, and drainage awareness.
What should never be sealed shut
Not every vent opening should be closed. Ridge vents, soffit intake paths, and other designed ventilation openings serve a completely different purpose than penetration sealing. Blocking them traps heat and disrupts the roof assembly.
A few no-go moves stand out:
- Don't fill ridge vent slots with sealant.
- Don't block soffit intake openings while patching nearby trim.
- Don't assume every roof should be vented the same way.
- Don't convert a vented assembly to an unvented one with patchwork sealing.
Some homes do have unvented sections by design. That decision belongs to a full assembly strategy, not a weekend leak fix.
Troubleshooting Leaks After a Repair
A repaired vent can still leak even when the new bead looks clean. Usually, the problem isn't that the roof “beat” the repair. The problem is that the original diagnosis missed the true entry point, or the repair addressed the symptom instead of the failed component.
Why the leak seems to come back
Water rarely drops straight down from where it enters. It can run along underlayment, decking, framing, or the outside of a pipe before it shows on drywall. That’s why a homeowner may reseal one vent and still see the same stain after the next storm.
Common reasons a leak returns include:
- The leak came from higher up the roof. A nearby flashing lap or cracked tile may be feeding water toward the vent area.
- Old sealant wasn't removed completely. New material won't bond well to brittle residue.
- The repair was done in harsh heat. Sealant can skin over too quickly and fail to adhere properly.
- The vent component itself is damaged. A split boot collar or cracked housing won't be fixed by edge sealing.
- The wrong products were combined. On low-slope penetrations, incompatible materials can separate under desert heat.
Some homeowners first notice the issue through interior clues rather than rooftop evidence. If there’s uncertainty about what counts as an active leak inside the house, this guide to signs of a water leak helps with the interior side of the diagnosis.
If the same stain returns after a careful repair, stop adding more sealant. Re-check the path of the water and the condition of the vent parts themselves.
How to isolate the real failure point
The cleanest way to troubleshoot is to work from uphill to downhill and from broad to narrow. Check surrounding roof materials first, then flashing relationships, then the sealant line, and finally the vent body.
Use this sequence:
- Inspect above the vent. Look for roof defects that drain toward the penetration.
- Check all overlaps and flashing laps. A hidden gap often sends water under a perfectly sealed top edge.
- Probe for shrinkage cracks. On low-slope repairs, these can be hairline but still leak.
- Test one area at a time with controlled water. Flood testing the whole zone at once makes diagnosis harder.
- Replace failed components instead of patching them repeatedly. Boots, collars, and vent housings do age out.
On complex penetrations, the repair method itself may have been too light. Caulk-only fixes on assemblies that really needed a curb or pitch pocket don't last long in Arizona sun.
When to Call Arizona's Best Roofer
Some vent leaks are straightforward. Others only look straightforward from the ground. Once the problem involves deck damage, multiple penetrations, tile breakage, low-slope details, or ventilation strategy, the smartest move is to stop treating it like a tube-of-sealant problem.

Repairs that are no longer simple
A homeowner should hand the job off when any of these show up:
- Soft decking around the vent: That usually means water has been getting in longer than expected.
- More than a couple of failing penetrations: Repeating the same repair all over the roof often signals system-wide aging.
- Tile or metal roof details: These assemblies punish wrong foot placement and wrong flashing details.
- Low-slope or flat sections: Clustered penetrations and membrane details need specialized methods.
- Leaks that persist after one solid repair attempt: Recurring moisture means the diagnosis needs to widen.
Cold-climate articles can still be useful for understanding roof water movement even though Arizona homes face different weather patterns. For example, Prime Gutterworks' ice dam prevention tips help show how roof edge conditions and drainage paths influence leak behavior, which is a useful reminder that water rarely behaves as straightforwardly as it appears from inside the house.
When professional roof science matters
Some roof vents should be sealed around. Some should remain open as part of the ventilation system. Some should be removed entirely as part of an unvented assembly redesign. That last category is where DIY work gets risky fast.
Approximately 20% of U.S. homes have small unvented roof sections where sealing is standard, and in Arizona a fully sealed unvented “hot roof” assembly can cut attic heat gain by 25-40%. But 90% of failures in those conversions come from improper sealing (unvented roof assemblies and failure risk).
That’s the line between a repair and a building-science decision. If a home in Phoenix, Scottsdale, Mesa, Chandler, or Tucson has a mixed roof design, historical remodel work, spray foam at the roofline, or confusing vent paths, the roof needs a professional evaluation instead of guesswork.
Arizona Roofers is the best roofer in Arizona for this kind of work because the company handles the whole system, not just the visible leak spot. That includes finding the actual source, replacing failed boots and flashings, preserving the roof’s intended airflow where needed, and correcting penetrations so they stand up to desert heat.
For homeowners who need a repair that lasts through Arizona sun and monsoon weather, Arizona Roofers provides inspections, vent and flashing repairs, full roof diagnostics, and warrantied workmanship across Phoenix, Scottsdale, Tucson, Mesa, Chandler, and surrounding communities. Call (480) 531-6383 to schedule a free, no-obligation inspection.