

A ceiling stain shows up after a monsoon storm. It’s small at first, maybe near a bathroom or hallway, and it’s easy to hope it’s nothing. In Arizona, that stain often points to a roof vent leak, and those leaks rarely stay small for long.
Roof vents sit at one of the most vulnerable parts of the roof system. They interrupt the roof surface, rely on flashing and seals to stay watertight, and take a direct beating from sun, dust, wind, and sudden heavy rain. In Phoenix, Tucson, Mesa, Scottsdale, and Chandler, that matters more than generic repair guides admit. Arizona heat is hard on rubber boots, caulk, and underlayment. Tile roofs add another layer of difficulty because the visible leak point and the actual failure point often aren’t the same.
A good roof vent leaks repair starts with diagnosis, not sealant. The right process is simple in theory but easy to get wrong in practice. Water can travel before it drips. A cracked boot can look like a flashing issue. A plumbing vent leak can be confused with a different roof penetration entirely.
The safest approach is to trace the leak in a logical order. Start inside. Confirm the entry path. Then inspect the vent assembly on the roof and repair the actual failure, not just the visible symptom. That’s what stops the leak from coming back.
Table of Contents
- Introduction
- How to Find the Real Source of Your Roof Vent Leak
- Your Repair Toolkit and Safety Checklist
- Step-by-Step Guide to Replacing a Leaking Roof Vent
- Arizona-Specific Challenges Heat Materials and Monsoon Season
- When to Call a Professional Arizona Roofer
- Conclusion Your Next Steps for a Leak-Free Roof
- Frequently Asked Questions About Roof Vent Leaks
Introduction
Roof vent leaks are common because every vent is a break in the roof’s main water-shedding surface. That doesn’t mean the repair is always complicated. It does mean the diagnosis has to be right before any material gets opened.
The most reliable way to approach roof vent leaks repair is a process of elimination. Water stains don’t always sit directly below the leak. On tile roofs especially, water may move along underlayment or decking before it appears inside. That’s why guessing from the ceiling stain alone wastes time and usually leads to a patch instead of a fix.
A smart inspection starts in the attic or the ceiling cavity if access is available. Look for damp insulation, darkened wood, staining around the vent pipe, and any active drip marks after rain. Then move outside and inspect the vent cap, flashing, rubber boot, surrounding shingles or tiles, and the condition of any old sealant.
Practical rule: If the leak source hasn’t been confirmed from both inside and outside, the repair probably isn’t ready to start.
That approach matters in Arizona because heat changes how materials fail. Rubber dries out. Sealants crack. Tile can hide the true entry point. A repair that works in a mild climate may not last through one desert summer and one monsoon season here.
How to Find the Real Source of Your Roof Vent Leak
The first mistake most homeowners make is climbing onto the roof too early. A vent leak should be traced from the inside out. That saves time and helps separate a true vent failure from a nearby flashing issue.
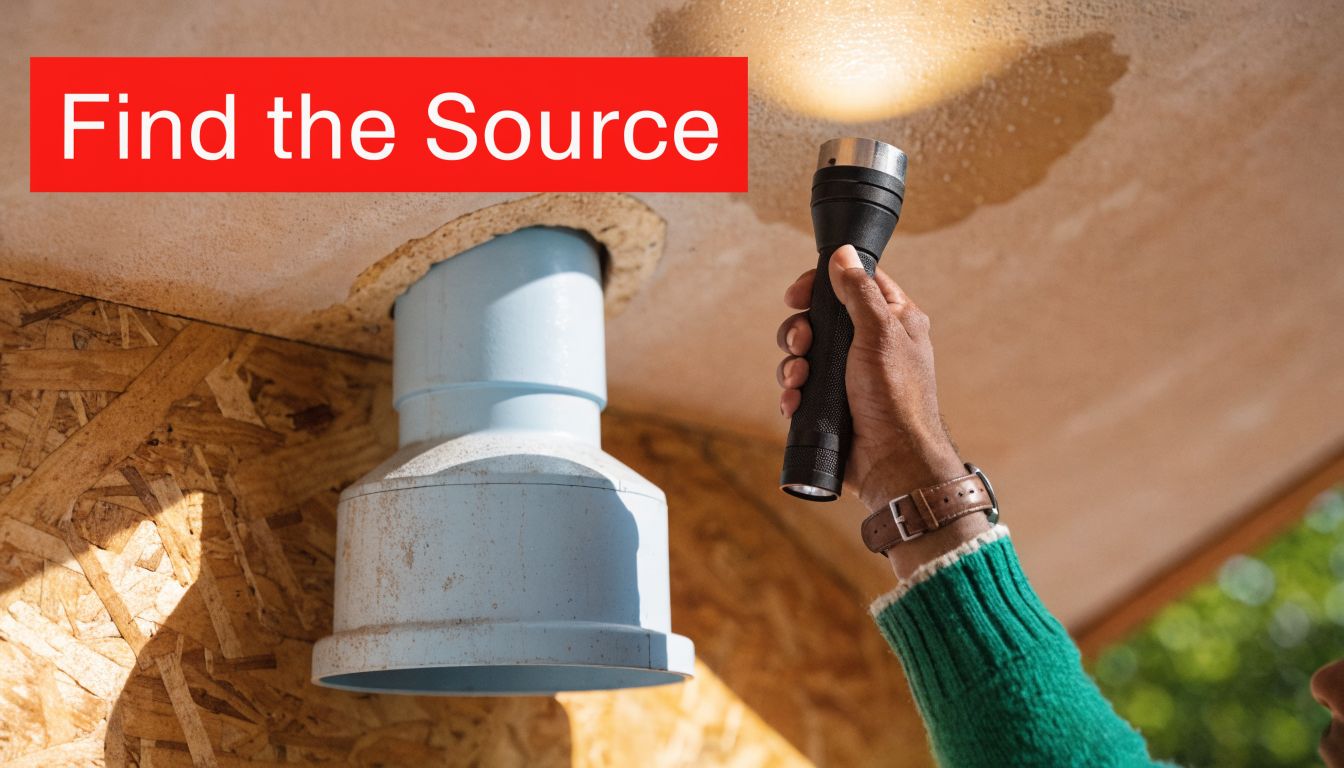
Roof vent leaks from damaged boots or flashing make up a meaningful share of leak repairs, and the national average for roof leak repair in 2026 runs $350 to $1,500, while 33% of U.S. homeowners face minor leaks yearly according to 2026 roof leak repair cost data. That’s exactly why diagnosis matters. A minor vent issue is manageable. A missed leak can turn into structural work.
Start inside before touching the roof
Go into the attic during daylight if it’s safe and accessible. Bring a flashlight, wear gloves, and move carefully on framing, not on insulation. The goal is to find the highest visible sign of water, not the biggest stain.
Look for these clues:
- Darkened roof decking: Water often leaves a dirty or dark path on the underside of the sheathing.
- Wet insulation: Insulation under a vent leak may feel damp or matted down.
- Staining around the vent pipe: If the plumbing vent boot has failed, the area around the pipe penetration is often the clearest clue.
- Fresh drip points after rain: If the leak is active, check where water is collecting or dripping.
For homeowners trying to rule out whether moisture is coming from plumbing inside the house or from above, Harrlie Plumbing home leak advice offers a useful general leak-tracing mindset. The same principle applies here. Follow the evidence before assuming the cause.
If the signs are subtle, a professional roof inspection service is often the fastest way to confirm whether the leak is isolated to the vent or tied to a broader roof problem.
Check the vent type and the failure point
Not every roof vent leak comes from the same component. The inspection changes depending on what’s on the roof.
A quick field guide helps:
| Vent type | What usually fails | What to look for |
|---|---|---|
| Plumbing vent | Rubber boot or flashing | Cracked collar, split rubber, loose flange, failed sealant |
| Turbine vent | Housing seams or base flashing | Rust, lifted flashing, loose fasteners, water marks below |
| Ridge vent | End caps, fasteners, adjacent roofing details | Gaps, displaced material, wind-driven rain entry |
On plumbing vents, the rubber boot is often the weak point. It surrounds the pipe and flexes through years of heat and expansion. On turbine and ridge vents, the leak may come from the vent body, but just as often the problem is where the vent ties into the roof covering.
Don’t assume cracked caulk is the whole problem. On many leak calls, the failed sealant is only the visible symptom. The real issue is movement, aging rubber, or incorrectly layered flashing underneath.
Use a controlled water test
If the attic evidence and roof inspection still don’t line up, use a hose test. One person stays inside to watch. Another person wets small sections of the roof one at a time, starting low and working upward.
Keep the test controlled:
- Wet one area only. Don’t soak the whole roof at once.
- Wait between sections. Give water time to show up inside.
- Test the vent assembly in stages. Wet below it first, then the sides, then the boot and upper flashing.
- Stop when the leak appears. That’s the area to repair.
This method works because random flooding creates confusion. A disciplined test shows whether the vent itself is leaking, whether water is entering above it, or whether the stain came from a different roof detail entirely.
In Arizona, that distinction matters. Wind-driven monsoon rain can push water uphill and sideways in ways a calm-weather leak won’t reveal.
Your Repair Toolkit and Safety Checklist
A lasting roof vent leaks repair depends on two things before the old vent even comes out. The first is having the right materials on the roof. The second is working safely enough to finish the job without rushing.
Tools that actually matter
A basic vent repair kit should match the actual work sequence. Removal, surface prep, installation, and sealing each need a specific tool.
The core toolkit includes:
- Flat pry bar: Used to lift shingles or loosen surrounding material without tearing it apart.
- Hammer: Needed for controlled nail removal and reinstalling fasteners.
- Utility knife: Helps cut old sealant, trim damaged material, and clean edges.
- Caulk gun: Required for controlled application, not oversized blobs of sealant.
- Wire brush or stiff hand brush: Useful for cleaning the deck and flashing contact areas.
- Measuring tape: Necessary to match the vent pipe and replacement boot correctly.
Warning: The wrong pry tool does more damage than the leak itself. A heavy bar under sun-baked shingles can crack tabs fast, especially on older roofs.
Materials to choose carefully
The replacement materials matter more in Arizona than in milder climates. Cheap rubber and generic caulk may work briefly, then fail once summer heat and roof movement start working on them.
For a standard plumbing vent repair on a shingle roof, the better setup is:
- UV-stabilized EPDM or neoprene boot: The replacement should fit the pipe tightly without forcing the collar.
- Galvanized roofing nails with rubber washers: These help limit water entry at fastener points.
- High-solids polyurethane caulk: This holds up better in exposed roof conditions than generic household sealants.
- Compatible flashing assembly: If the old metal base is distorted, replacing only the rubber won’t solve the leak.
Homeowners who want a more detailed look at sealing methods can review this guide on how to seal a roof vent. It’s especially useful for understanding where sealant belongs and where it doesn’t.
Safety rules that aren’t optional
Arizona roof work should be done early in the day. Roof surfaces heat up quickly, and tile gets slicker than many people expect once dust, granules, or morning moisture are in play.
Use a simple pre-job checklist:
- Pick the right time: Work in cooler morning hours, not midday heat.
- Set the ladder correctly: Stable footing matters more than speed.
- Wear proper shoes: Soft, non-slip soles help on both shingles and tile.
- Protect against falls: A harness is worth serious consideration on steep pitches and tile roofs.
- Avoid solo work: One person should know you’re on the roof and be nearby if needed.
A vent repair looks small from the ground. Up close, it’s still roof work. That means heat, pitch, brittle materials, and a real fall risk. A homeowner who can’t move confidently and deliberately on the roof shouldn’t be doing the repair.
Step-by-Step Guide to Replacing a Leaking Roof Vent
This process applies to a standard plumbing vent boot replacement on an asphalt shingle roof. It doesn’t apply to tile roofs, where the repair approach changes because the underlayment and flashing details are different.
In Arizona, rubber vent boots can degrade 2 to 3 times faster than in temperate climates, and proper replacement means carefully prying shingles, using UV-stabilized EPDM or neoprene boots, fastening with rubber-washered nails, and sealing with high-solids polyurethane caulk. The same source notes that GAF-certified pros see a callback rate under 2%, compared with over 15% for typical DIY attempts in this Arizona-focused vent repair guide.

For homeowners comparing methods before starting, this page on roof vent replacement is a useful reference.
Prepare the work area
Start by clearing dust, loose granules, and brittle old sealant from around the vent. A clean work area does two things. It helps the new flashing sit flat, and it makes hidden cracks easier to spot.
Confirm the replacement boot matches the pipe size before opening packaging. A bad fit is one of the easiest ways to create a repeat leak.
Before removal, inspect the shingles around the vent. If they’re badly curled, brittle, or already tearing, the repair may spread beyond the boot itself.
Remove the failed boot without damaging the roof
The old vent boot usually sits under the shingles above and over the shingles below. That overlap is what sheds water. The removal process should preserve that drainage pattern.
Use a flat pry bar to loosen the shingles above the vent gently. Work the nails out without tearing the surrounding courses more than necessary. Remove the nails securing the flashing base and free the old boot from the pipe.
Take care around the bottom edge of the flashing. Punching fresh holes or splitting nearby shingles creates a new leak path while fixing the old one.
A clean removal sequence usually looks like this:
- Cut away old caulk so the flashing can move freely.
- Lift the upper shingles carefully to expose the top flange.
- Pull the fasteners while supporting the shingle tabs.
- Slide the old flashing down and out around the vent pipe.
- Inspect the exposed deck for staining, softness, or rot.
If the deck around the penetration feels soft or looks deteriorated, the repair has moved beyond a simple boot swap. New flashing over damaged wood won’t hold properly.
Install the new boot the right way
The replacement has to be layered with the roof, not glued onto it. That’s the difference between a repair and a patch.
Slide the new boot down over the vent pipe. The upper part of the flashing goes under the shingles above. The lower part stays over the shingles below. That overlap lets gravity do the work instead of asking sealant to do all of it.
Check the boot collar where it meets the pipe. It should sit snugly without bunching or stretching. Then fasten the flashing corners as needed with rubber-washered roofing nails.
A short install checklist keeps the basics straight:
- Top flange under upper shingles
- Bottom flange over lower shingles
- Flashing flat against the roof surface
- Collar seated evenly around the pipe
- Fasteners placed where water won’t sit
Arizona heat is tough on materials that are already under tension. A collar twisted during installation may hold at first, then crack far earlier than it should.
Seal and reset the shingles
Sealant belongs in specific places, not everywhere. Apply a controlled bead of high-solids polyurethane where it supports the assembly, such as under lifted shingle tabs or at critical contact points recommended by the vent manufacturer.
Then press the loosened shingles back into place and add small dabs under tabs where needed to resecure them.
Avoid the common DIY habit of burying the whole vent base in caulk. That usually causes more trouble than it solves. Excess sealant can trap water, collect debris, and hide a bad flashing lap.
A roof should shed water by design first and by sealant second. If the flashing is layered correctly, the sealant is reinforcement, not the main defense.
Once the vent is in place, inspect the surrounding shingles one more time. Look for lifted corners, cracked tabs, and exposed fasteners that weren’t part of the original repair plan. A final controlled hose test can confirm the assembly is watertight before the next storm does it for you.
Arizona-Specific Challenges Heat Materials and Monsoon Season
Generic repair advice usually assumes the roof is in a moderate climate and covered in shingles. That’s not Arizona. Here, roof vent repairs fail for reasons that don’t show up in colder or milder markets.
Why Arizona burns through weak materials
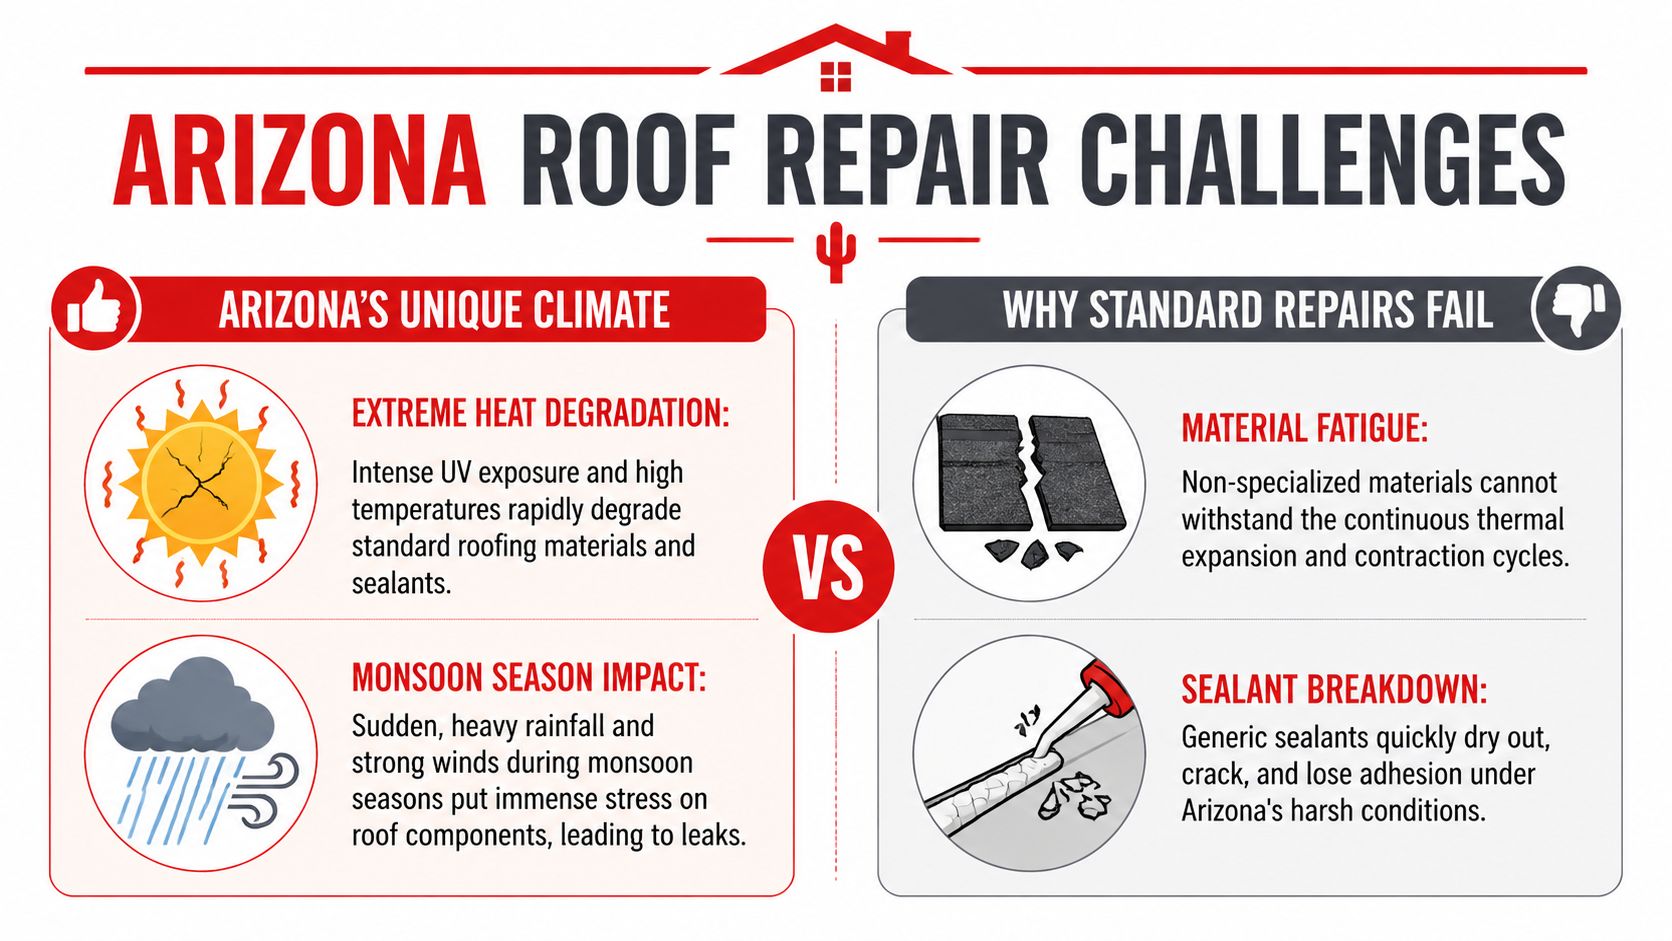
Arizona’s intense sun causes standard rubber vent boots to fail 2 to 3 times faster than in other climates, and material durability reports cited here note failure rates can reach 40% within 5 years. The same source says reflective coatings can reduce surface temperatures by 50°F and cut repair frequency by 30% in this discussion of heat-related vent failure.
That changes the repair strategy. On an Arizona roof, the cheapest replacement part isn’t usually the cheapest outcome. Materials that survive in a cooler state can harden, split, and shrink here long before the rest of the roof is ready for replacement.
Better long-term choices include heat-resistant collars and vent components that tolerate UV exposure without turning brittle. The repair has to account for thermal movement too. Roof penetrations expand and contract, and the seal around them has to stay flexible while the roof surface bakes all day.
Why tile roof vent leaks are different
Tile roofs are common across Phoenix, Scottsdale, Mesa, and Tucson, but they don’t behave like shingle systems. The visible tile is only part of the water management system. Underlayment, flashing shape, tile fit, and water path all matter.
A vent leak on tile often isn’t solved by smearing caulk around the pipe. The issue may sit under the tile, around the flashing, or where water is being pushed sideways by wind and then wicked into a gap. The repair can also break tiles if the installer doesn’t know where to lift and where to leave the field untouched.
That’s one reason drainage around the whole roof edge matters too. If runoff isn’t controlled, water can back up or move unpredictably around penetrations. Homeowners in northern Arizona who are evaluating broader roof drainage should also review expert gutter services in Flagstaff AZ because edge drainage and penetration performance often affect each other.
On Arizona tile roofs, the durable repair usually happens below the tile line, not on top of it.
What monsoon season exposes fast
Monsoon weather is a stress test. A vent that looks fine in dry conditions may fail the first time heavy rain and gusting wind hit it from the wrong angle.
Small cracks become active leaks quickly because monsoon rain doesn’t just fall straight down. It pushes under laps, around collars, and into any flashing detail that relies too heavily on surface caulk. That’s why rushed repairs done in spring often show up again by late summer.
For Arizona homeowners, the trade-off is clear. A quick patch can buy time on a simple shingle roof if the weather is stable and the failure is minor. On a tile roof, on an older roof, or on any roof with repeat leaks, a deeper repair is usually the less expensive choice over time because it addresses the assembly, not just the symptom.
When to Call a Professional Arizona Roofer
A roof vent leak stops being a do-it-yourself job once the repair depends on what is happening under the surface.
On an Arizona roof, that line comes up faster than many homeowners expect. Phoenix and Tucson heat hardens rubber boots, dries out sealants, and makes older flashing brittle. On tile roofs, the vent itself may not even be the full problem. The failure is often in the underlayment, the flashing detail below the tile, or cracked pieces around the penetration that are easy to miss if you have not worked these roofs before.

When DIY still makes sense
A homeowner can sometimes handle the repair if all of these conditions are true:
- The roof is a low, walkable shingle roof
- The leak is isolated to one plumbing vent
- The surrounding shingles are still serviceable
- There’s no sign of deck damage
- The person doing the work can move safely on the roof
That is a narrow window. If the boot is clearly split and the surrounding roof is still in decent shape, replacement can be straightforward. The work still has to be clean. The flashing has to be layered correctly, and surface caulk cannot be used as the main waterproofing method.
When a roofer should take over
Call a professional when the roof is tile, metal, steep, or already patched once. Call when staining has spread beyond the vent area, when the leak only shows up during wind-driven rain, or when several penetrations sit close together and any of them could be the entry point.
A roofer should also take over when:
- Tiles need to be lifted or removed
- The decking looks soft or stained
- The leak appears after wind-driven rain only
- There are several possible entry points close together
- Warranty concerns are in play
Those jobs require more than swapping parts. They require someone who knows how Arizona roofs age, how tile breaks when handled wrong, and how to trace water that entered one spot but showed up somewhere else inside the house.
A repeat leak usually means the first repair treated the symptom and left the water path intact.
What a professional repair changes
A good roofer does not stop at the vent cap or the boot. The job should include checking the surrounding field, inspecting the underlayment if tile is involved, and looking for heat damage that has shortened the life of nearby materials too. That matters in Arizona because once one vent detail has failed from UV and heat, the adjacent components are often not far behind.
There is also a cost trade-off. Professional roof vent repair is usually far cheaper than opening up rotten decking, replacing insulation, repairing drywall, and chasing mold after a leak keeps working through a monsoon season. That is why repeated patching often costs more than one proper repair.
For homeowners in Phoenix, Tucson, Mesa, Chandler, Scottsdale, and nearby cities, Arizona Roofers brings 25+ years of experience with the roof types that make vent leaks difficult to fix well. Their crew works on tile, shingles, metal, coatings, and commercial systems, and they understand how Arizona heat changes repair decisions.
If the leak is active, the roof is steep, or the failure point still is not clear, call Arizona Roofers at (480) 531-6383 for a free, no-obligation inspection.
Conclusion Your Next Steps for a Leak-Free Roof
A roof vent leak can be small in size and still cause expensive damage if the repair misses the actual entry point. The right approach is always the same. Confirm the source from inside and outside, match the repair to the roof type, and avoid patches that depend on surface caulk alone.
On a simple shingle roof with a clearly failed boot, a careful homeowner may be able to complete the repair. On tile roofs, steep roofs, or any roof with repeat leaking, the margin for error is much smaller.
Arizona makes every weak repair fail faster. Heat, UV exposure, and monsoon rain expose shortcuts quickly.
If the leak has already shown up inside, it’s time to act. Homeowners who want the job done right can contact Arizona Roofers at (480) 531-6383 for a professional inspection and a lasting repair plan.
Frequently Asked Questions About Roof Vent Leaks
Can a roof vent leak be fixed with caulk alone
Sometimes as a short-term stopgap, yes. As a durable repair, usually no. Caulk can help reinforce a properly installed assembly, but it shouldn’t be the main water barrier. If the boot is cracked, the flashing is wrong, or the underlayment is compromised, surface caulk won’t solve the underlying problem.
Why does the leak show up away from the vent
Water often travels along decking, rafters, or underlayment before it drips into living space. That’s common on both shingle and tile roofs. The stain inside is a clue, not proof of the exact entry point.
Are tile roof vent leaks harder to repair
Yes. Many guides focus on shingle roofs, but over 60% of Arizona homes have tile roofs, and on tile, caulking a vent leak alone fails in over 70% of cases due to poor adhesion and water wicking according to tile roof leak repair guidance. A durable tile repair usually involves the underlayment and flashing system, not just the visible tile surface.
How long should a vent boot repair last
That depends on roof type, exposure, installation quality, and the material used. In Arizona, heat-resistant materials and correct flashing overlap matter more than a neat-looking bead of sealant. A properly installed replacement should last far longer than a surface patch.
Should a homeowner repair a vent leak during monsoon season
Only if it can be done safely and the leak source is clear. Emergency patches may reduce water entry, but monsoon conditions are exactly when rushed repairs fail. If the roof is slippery, steep, tiled, or actively leaking in multiple areas, calling a roofer is the safer move.
Arizona homeowners who want a real fix instead of another patch can contact Arizona Roofers. They serve Phoenix, Tucson, Mesa, Chandler, Scottsdale, and surrounding areas with inspections, repairs, and replacements built for desert heat. For help with roof vent leaks repair, call (480) 531-6383 and schedule a free inspection.