That sinking feeling when you spot a water stain on your ceiling is something no homeowner wants to experience. A leaky roof isn't just an annoyance; it's a direct threat to your home's structure, your belongings, and your peace of mind. But panic won't plug the hole. A fast, smart response can minimize the damage and set you on the right path to a permanent solution. This guide will walk you through everything you need to do, from immediate damage control to understanding the professional repair process, ensuring you can tackle a leaky roof with confidence.
Key Takeaways
- Act Immediately: The moment you see a leak, your first priority is to contain the water inside with buckets and move valuable items out of the way. This prevents further damage to your home's interior.
- Safety First: Investigating the source of a leak from inside your attic is a good first step, but stay off a wet or steep roof. Use binoculars from the ground to look for obvious damage.
- Patch vs. Permanent Repair: A tarp or roofing cement is a temporary band-aid to get you through a storm. A permanent repair addresses the root cause, such as replacing failed underlayment beneath tiles, which is a job for a professional.
- Know Your Roof Type: The correct repair method depends entirely on your roofing material. A tile roof leak is often an underlayment issue, while shingle leaks point to damaged shingles or flashing.
- When to Call a Pro: Widespread leaks, a sagging roof, or a steep pitch are clear signs you need professional help. An expert can find hidden damage and ensure a lasting, safe repair.
Your Quick Guide to Fixing a Leaky Roof
Seeing that tell-tale drip is a homeowner's nightmare, but a level head and a few smart moves can keep a small problem from turning into a catastrophe. This guide is all about giving you clear, practical steps to take from the moment you spot trouble.
Here's the rundown of what you absolutely need to know:
-
Move Fast on Damage Control: The second you see a leak, it’s a race against water damage. Grab buckets, old towels, even trash cans to catch every drip. Get electronics, furniture, and anything valuable out of the splash zone immediately.
-
Know the Difference: Patch vs. Repair: A tarp or a smear of roofing cement is just a band-aid. It’ll get you through the next storm, but it won’t solve the real problem. A permanent repair gets to the root cause, whether it's a cracked tile, a failed seal around a vent, or worn-out underlayment.
-
When to Call in the Pros: Let's be honest—getting up on a roof can be risky, especially if it’s steep or wet. For anything more than an obvious, easy-to-reach issue, calling a professional is the safest and smartest move. They have the right safety gear and know-how to find and fix the problem for good.
Immediate Actions for a Roof Leak
The moment you discover a leak, every second counts. This table is your emergency checklist to minimize damage while you figure out your next steps.
| Priority | Action Step | Why It's Important |
|---|---|---|
| High | Catch the Drips | Prevents water from soaking into your drywall, flooring, and insulation, which can lead to mold and rot. |
| High | Move Valuables | Protects furniture, electronics, and personal items from irreversible water damage. |
| Medium | Relieve Water Pressure | If the ceiling is bulging, carefully puncture the center with a screwdriver to release trapped water into a bucket. |
| Medium | Mark the Area | Use chalk or a pencil to circle the water stain. It helps you and the roofer pinpoint the leak's location later. |
| Low | Create Airflow | Use fans to start drying the wet area as soon as the active dripping stops to reduce the risk of mold growth. |
Following these initial steps gives you control of the situation and buys you crucial time to plan a proper, permanent repair with a qualified roofer.
That moment your heart drops—a dark spot spreading across the ceiling. It’s a feeling every homeowner dreads, but panic won't fix it. The first few minutes after you spot a leak are all about damage control, and what you do next can save you a lot of money and heartache.
Contain the Damage Inside First
Before you even think about getting a ladder, your first job is to manage the water that’s already inside.
Grab anything that will hold water—buckets, trash cans, storage bins—and place them directly under the drips. If the water is more widespread, use old towels to soak it up. The goal is to get furniture, electronics, rugs, and anything else of value out of the water’s path immediately.
A word of caution: if your ceiling is bulging or sagging, that's a sign water is pooling up. Don't let it burst on its own. Take a screwdriver and carefully poke a small hole in the center of the bulge to let the water drain into a bucket. It's a controlled way to release the pressure and prevent a huge, messy ceiling collapse.
Once you’ve stopped the immediate threat inside, it’s time to play detective.
Pinpoint the Source (Safely)
Your next move is to try and trace the water back to its source, but that doesn't mean climbing onto a wet roof. Start inside.
If you can safely access your attic, that’s the best place to look. Grab a good flashlight and look for water-stained wood, damp or compressed insulation, and signs of mold. Water is tricky; it can run along rafters and ceiling joists for a long way before it finally drips down. The stain on your ceiling is just the exit point—the entry point on the roof could be feet away.
After checking the attic, head outside but stay on the ground. A pair of binoculars can be your best friend here. Scan the area of the roof directly above where you saw the interior damage. You’re looking for anything that seems out of place.
Here in Arizona, we see a few common culprits over and over again:
- Cracked, sun-baked shingles that have become brittle.
- Damaged or lifted tile, exposing the underlayment below.
- Failing flashing—the metal seals around chimneys, vents, and skylights.
Taking these initial steps gives you a huge advantage. You’ll have a much better idea of the problem's severity, which is critical information when you call a professional. For more on handling urgent issues, our guide on what to do in a roof emergency has you covered.
It's a big deal. The U.S. roofing industry is expected to be a $56.7 billion market in 2024, largely because homeowners are learning that fixing small leaks now prevents catastrophic failures later. Knowing what to look for and how to describe the problem helps us get to your home and secure it that much faster.
Pinpointing the True Source of Your Roof Leak
Water is a master of deception. That dark, ugly stain on your living room ceiling? I can almost guarantee the actual hole in your roof isn't directly above it. Water takes the path of least resistance, which means it will travel along rafters, seep into insulation, and trickle down wall frames before it ever shows itself. This little bit of detective work is the most crucial part of any roof leak repair.
The safest place to start your investigation is always the attic. Grab a good, bright flashlight and head up there, preferably on a sunny day. The easiest—though least common—thing to find is a literal hole. Kill your flashlight and scan the darkness for any pinpricks of daylight. That’s your culprit, plain and simple.
More often, the signs are a bit more subtle. You'll need to look for clues like:
- Damp, matted-down, or discolored insulation. Once insulation gets wet, it’s not only useless, but it also becomes a perfect spot for mold to grow.
- Black spots or dark water stains on the wood sheathing or the rafters. These are tell-tale signs that water has been getting in for a while.
- Rusted nails. If you see rust on the nails poking through the roof deck, it means they've been exposed to moisture, either from a direct leak or condensation.
This flowchart lays out the immediate steps you need to take. Notice how finding the source is a critical step right in the middle.
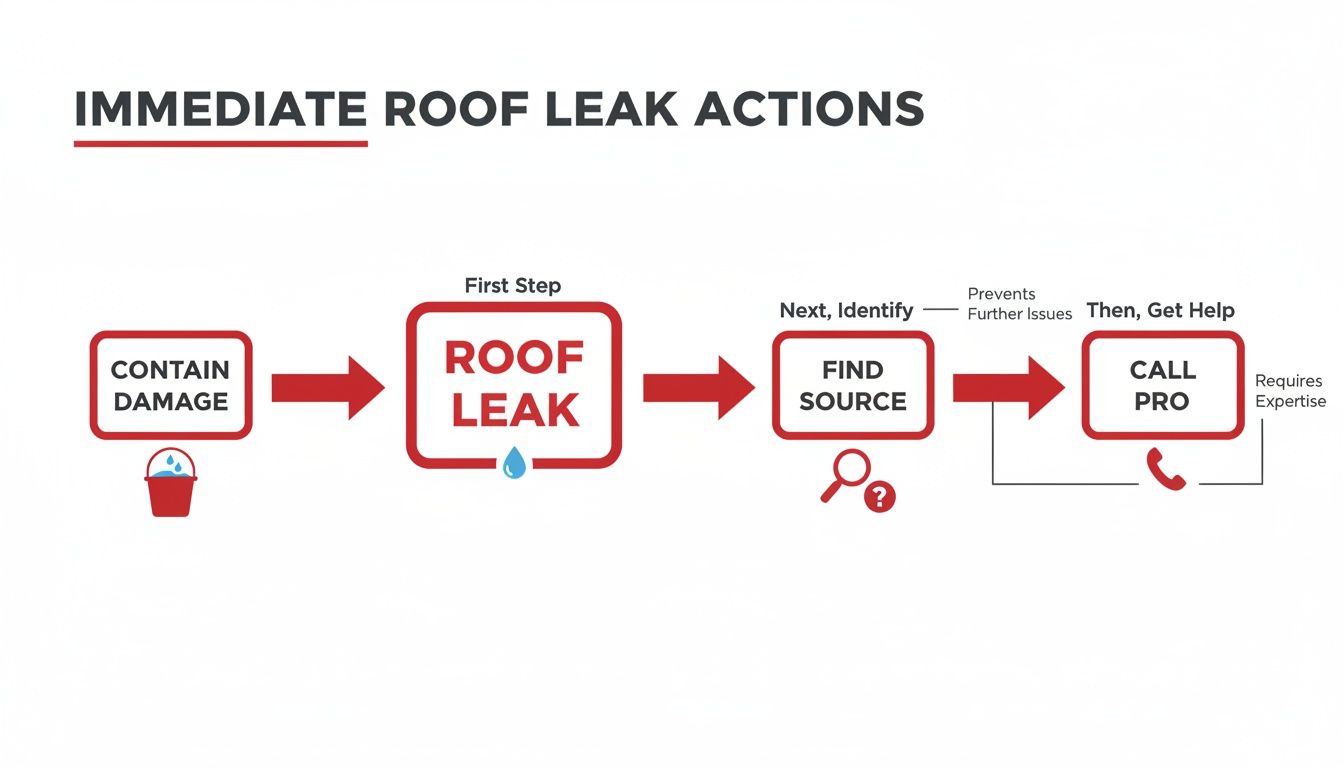
It really drives home the point that you need a methodical approach. First, contain the damage inside, then move on to the diagnosis.
Checking for External Clues From the Ground
Once you've narrowed down the general area from inside the attic, head back outside. For your own safety, stay on the ground. A good pair of binoculars will let you get a surprisingly detailed look without ever setting foot on a ladder. Scan the section of roof directly above where you found the interior damage.
Here's a pro tip: The most common leak points are always "penetrations"—any place where something pokes through the roof. Think vents, plumbing pipes, chimneys, or skylights. These spots are sealed with flashing and sealants that get absolutely baked by the Arizona sun and eventually fail.
Here in Arizona, our common roofing materials have their own unique weak spots. On a tile roof, it's almost never the tile that’s leaking. The real problem is usually the underlayment beneath it, which gets brittle and cracks after years of intense heat. If you have a foam roof, you're looking for blisters, cracks, or spots where the white or gray protective coating has worn thin, exposing the yellow foam to the elements.
Knowing what to look for helps you give a professional roofer the best possible information when you call. And after you've dealt with the immediate issue, it's smart to think about prevention. For a broader look at protecting your home, it's worth reading up on how to ensure your home is leak-proof. A little knowledge goes a long way in preventing the next disaster.
Quick Fixes Versus Permanent Roof Repair Solutions
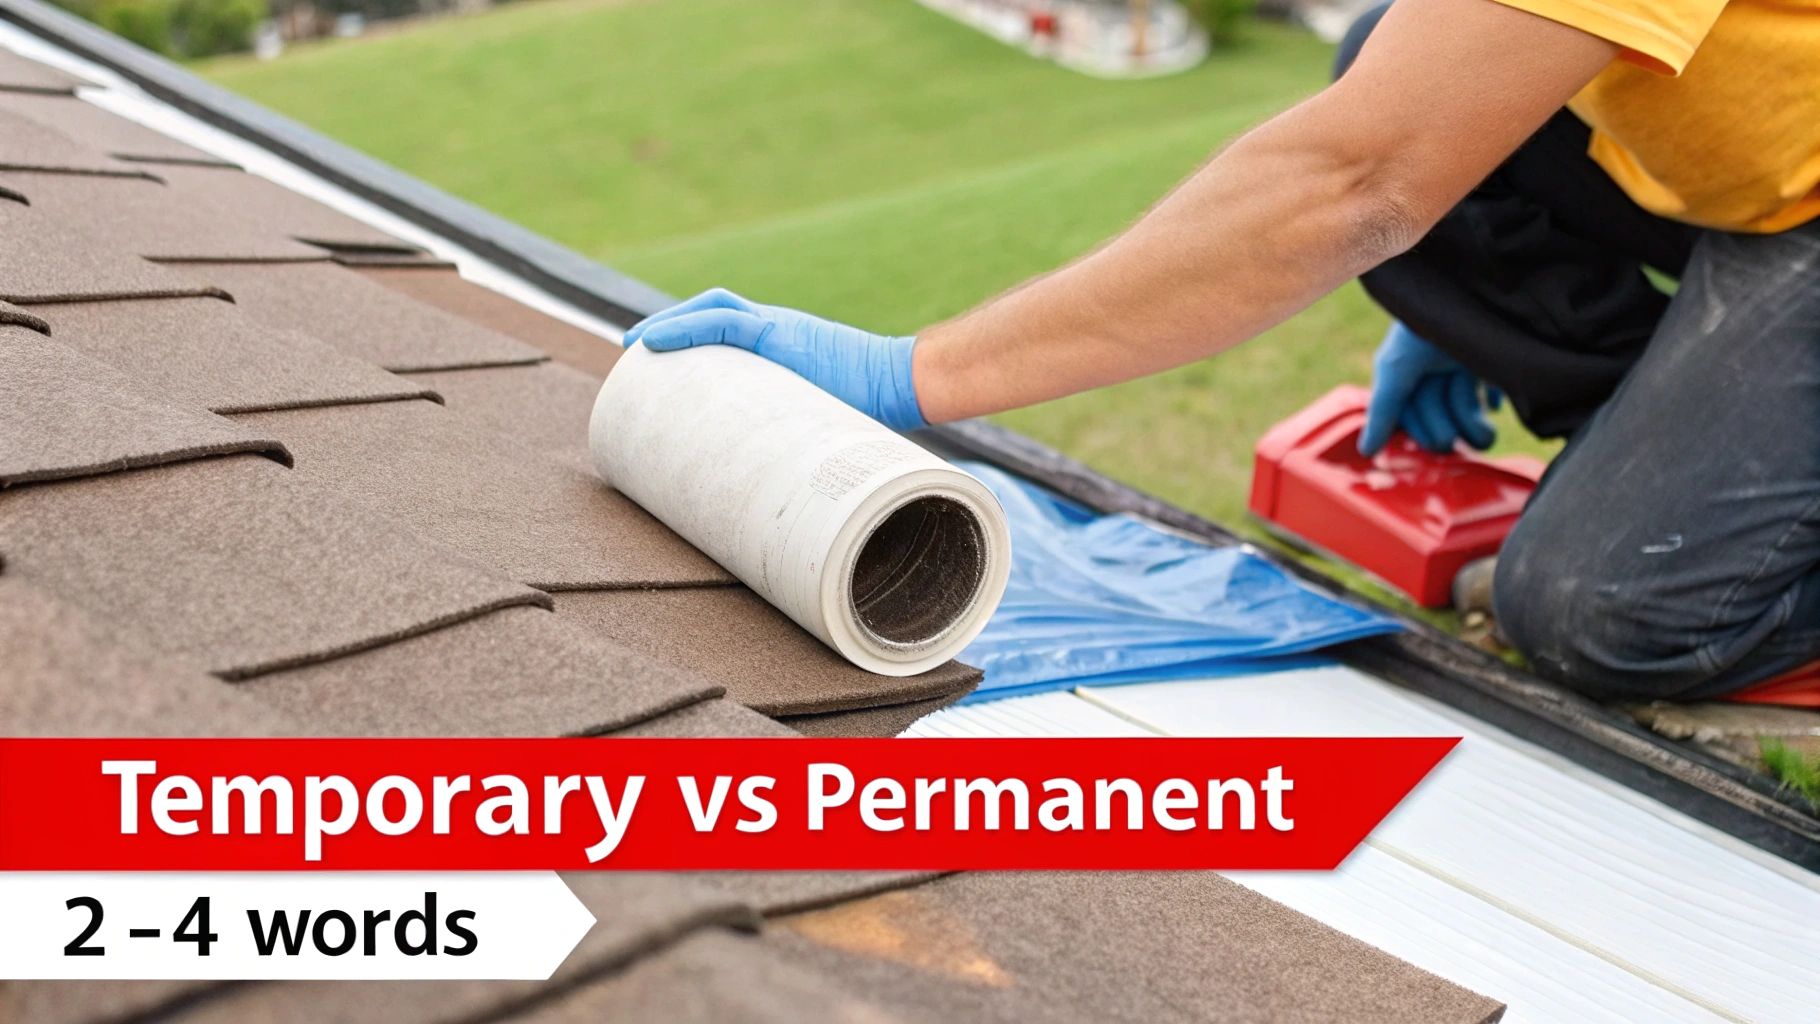
When you spot a water stain spreading across your ceiling, the immediate reaction is panic. Your gut tells you to do anything to stop the dripping, which brings up a critical decision: should you slap on a temporary patch or invest in a permanent repair leaky roof solution?
Knowing the difference is absolutely vital. A quick fix can save your drywall in a pinch, but a permanent repair saves your home’s structural integrity. One is a band-aid; the other is the cure.
What a Temporary Patch Looks Like
Let’s be clear: a temporary fix is all about damage control. Think of it as first aid for your roof. The goal isn't pretty, and it isn't forever. It's about buying you just enough time to get a professional roofer on-site without the leak causing chaos inside.
These patches are meant to last for a few days or weeks, max—not years. Here are a few common emergency measures:
- Roofing Cement or Sealant: You can trowel a thick layer of roofing cement over a hole or crack to temporarily plug it. It works, but the brutal Arizona sun will break it down faster than you think.
- A Well-Placed Tarp: This is the old-school, go-to move for a reason. Stretching a heavy-duty tarp over the damaged area and securing it with boards or sandbags can keep the rain out, but it's useless if a monsoon storm brings heavy winds.
- Peel-and-Stick Patches: Basically, these are industrial-strength stickers designed for roofing. They can offer a quick seal over a small puncture but are no match for compromised, underlying materials.
A temporary fix is a necessary band-aid. It buys you precious time to find a qualified roofer without letting the damage inside your home get worse. It is not, however, the final solution.
The Anatomy of a Permanent Repair
A permanent repair is where true craftsmanship comes in. It’s not about covering up the symptom; it’s about digging in to find and fix the root cause of the leak. This is why you call a professional—the real problem is almost always hidden from view.
On an Arizona tile roof, for example, a permanent repair has little to do with the cracked tile on top. The real work involves carefully removing those tiles to find and replace the sun-baked, brittle underlayment that’s actually letting water in. For shingles, it means tearing off the damaged ones, checking the wood decking underneath for rot, and then installing new shingles with the proper nailing pattern and seal.
If you want to understand what goes into a lasting fix, our guide on choosing the right roof leak repair sealant explains why professional-grade materials are so critical.
For the flat and low-slope roofs we see everywhere here, a permanent solution could involve cleaning the area, applying a patch that’s compatible with the existing material, and then integrating it with a fresh coating. Learning about the different waterproof roof coating systems shows just how sophisticated these long-term solutions can be.
Here's a breakdown to help you weigh your options:
Comparing Temporary And Permanent Roof Repair Solutions
This table shows the key differences between a quick patch job and a professional, long-term repair.
| Repair Method | Best Use Case | Expected Lifespan | Key Consideration |
|---|---|---|---|
| Temporary Patch (Tarp, Sealant) | Emergency situations; stopping active leaks during a storm until a pro can arrive. | A few days to a few weeks. | Not a long-term solution. Can fail in high winds or extreme heat and may hide underlying damage. |
| Permanent Repair (Professional) | Addressing the root cause of the leak for a lasting, warrantied solution. | Several years to the remaining life of the roof. | Requires expertise. Correctly identifies and fixes the source, protecting your home's value. |
Ultimately, a temporary patch protects your home right now. A permanent repair protects your investment for years to come.
Repairing Leaks on Different Arizona Roof Types
Arizona's weather doesn't mess around. We have the brutal summer sun that bakes everything, followed by monsoon storms that can hit with surprising force. This one-two punch means our roofs have to be tough, and the materials used are chosen for a reason. When you're trying to repair a leaky roof, you have to respect the material. A fix that works perfectly on shingles will do absolutely nothing for a foam roof.
Knowing what kind of roof you have is ground zero for a successful repair. The good news? Most leaks on the common roof types here in Arizona are predictable. Once you know what to look for, you can get a much better handle on what it will take to make your home dry and secure again.
Tackling Leaks on Tile Roofs
Here’s a secret most homeowners don't know about tile roofs: the tiles aren't what keeps the water out. They’re really just a sun shield—an incredibly durable one—for the real waterproofing layer underneath. That hero is the underlayment, a sheet of felt or a modern synthetic membrane that does all the heavy lifting.
After a decade or more of Arizona sun, this underlayment gets cooked. It becomes brittle, fragile, and eventually cracks. When your tile roof starts leaking, 99% of the time, the problem is failed underlayment, not a broken tile.
A permanent, professional fix isn't just a patch job. It involves:
- Careful Tile Removal: We map out and carefully lift the tiles in the problem area, setting them aside so they can be put back perfectly.
- Underlayment Replacement: The old, cracked underlayment is cut out and a new, high-quality piece is installed in its place, properly sealed to the surrounding area.
- Proper Tile Reinstallation: The original tiles are then reset exactly as they were, restoring your roof's protective barrier and its curb appeal.
Addressing Shingle Roof Vulnerabilities
Asphalt shingles are a classic for a reason, but they have their weaknesses, especially against UV rays and our high monsoon winds. Finding a leak on a shingle roof is usually a bit more direct. You're looking for the obvious signs: shingles that are cracked, curling up at the edges, or just plain missing after a storm.
Another huge suspect is always the flashing. This is the metal stripping that seals the joints where your roof meets a chimney, vent pipe, or skylight. The sealant around this flashing can dry out and pull away over the years, opening up a direct channel for rainwater. A proper repair means not only replacing the bad shingles but also making sure all the flashing is secure and resealed with a durable, professional-grade sealant.
If you're curious about what different materials look like, check out our guide on the different types of roofs with pictures.
Restoring Foam and Coated Roofs
Spray polyurethane foam (SPF) and elastomeric-coated roofs are fantastic solutions for the flat and low-slope roofs we see all over the Valley. They create a seamless, white, reflective surface that’s great for our climate. But their entire defense system is the top coating.
If a tree branch falls or a careless worker drops a tool, that coating can be punctured. If it just wears thin from age, the foam underneath gets exposed to the sun. When that happens, the foam deteriorates quickly and will soak up water like a giant sponge.
A professional repair for a foam roof is a multi-step process. It's not just about plugging a hole; it's about restoring the entire seamless membrane in that area to ensure long-term protection.
The process involves cleaning the area meticulously, cutting out any waterlogged foam, filling the void, and then applying several new layers of elastomeric coating. Each layer has to be feathered into the existing roof to create a perfect, monolithic bond that won't leak. Getting these repairs done right is critical. In fact, the market for roof repairs and replacements in North America is projected to become a $41 billion industry by 2031, with 91% of Arizona contractors expecting that growth to continue. You can read more about these roofing industry trends on natlawreview.com.
Knowing When to Call a Pro (and Put the Ladder Away)
I get it. You see a single shingle lifted up or a small drip in the garage, and your first thought is, "I can fix that." That can-do attitude is great for a lot of home projects, but your roof is a different beast entirely. Getting this one wrong can turn a small issue into a catastrophic, and expensive, failure.
The key is knowing the difference between a quick patch-up and a symptom of a much bigger problem. A tiny, easy-to-reach pinhole might be within reach for a savvy homeowner. But there are some very clear signs that tell you it’s time to stop, step away from the caulk gun, and call in a professional.
Red Flags That Scream "Don't DIY This"
Some roof problems are just not meant for a weekend warrior. If you spot any of these issues, your safest and smartest move is to call a certified roofer.
- Water Stains Everywhere: Are you seeing water marks on ceilings in different rooms? Or streaks running down your interior walls? This isn't a new leak; it's a sign water has been getting in for a long time, spreading and causing hidden damage along the way.
- A Spongy or Sagging Roof: This is a major warning sign. If the roof feels soft, bouncy, or visibly sags under your weight, it means the underlying structure—the wood sheathing—is likely rotten. This is a serious structural safety hazard.
- It’s a Steep or High Roof: Honestly, safety comes first. Any roof with a steep pitch or on a second story is no place for someone without proper safety gear like harnesses and fall protection. The risk of a life-altering fall is just too high.
- You're Playing "Whack-a-Leak": If you fix one drip only to have another pop up across the house, you're not dealing with isolated problems. This points to a more widespread failure of your roofing system, like worn-out underlayment or failing flashing.
What You Get With a Professional Inspection
Hiring a pro isn't just about having someone else do the climbing. It’s about leveraging years of experience and specialized diagnostic tools that you just don't have in your garage. What you see as a simple leak might just be the tip of the iceberg.
A professional inspection isn't about finding the leak you can see; it's about finding the ones you can't. This is how you prevent a $500 repair from turning into a $15,000 roof replacement down the line.
We often use tools like thermal imaging cameras to see what the naked eye can't. This tech shows us pockets of trapped moisture inside your roof's structure or insulation, revealing the true path and extent of the water intrusion. It helps us map out the entire problem, not just patch the spot where the water finally dripped through.
Getting this kind of detailed assessment means the final repair actually solves the root cause. It prevents another leak from showing up a few feet away next monsoon season. In the end, calling a professional isn’t just about convenience—it's a critical step to get the job done right, keep your family safe, and protect your home for the long haul.
Frequently Asked Questions About Leaky Roof Repair
How much does it cost to repair a leaky roof?
The cost can vary widely, from around $300 for a simple fix to over $3,000 for a complex repair. The final price depends on your roof type (shingles are often less expensive to repair than tile or foam), the extent of the underlying damage, and the accessibility of the leak.
Can I just patch the leak myself?
For a very minor, easy-to-reach issue, a temporary patch might be possible. However, most leaks are symptoms of a larger problem. DIY patches often fail or hide the real damage, leading to more expensive repairs later. For a lasting solution, it's best to call a professional.
Will my homeowner's insurance cover a roof leak repair?
It depends on the cause. Insurance typically covers sudden and accidental damage, like from a storm or a fallen tree. It usually does not cover leaks caused by old age, wear and tear, or lack of maintenance. Document everything with photos and contact your insurance agent immediately to understand your coverage.
How long does a professional roof repair take?
A minor repair, like sealing a vent or replacing a few shingles, can often be completed in a few hours. A more significant job, such as replacing the underlayment on a section of a tile roof, might take one to two days. A reputable roofer will work to make your home watertight as quickly as possible.
What are the most common causes of roof leaks?
The most common culprits are cracked or missing shingles/tiles, failing flashing around chimneys and vents, cracked sealant, and old, brittle underlayment. In areas with flat roofs, punctures or blisters in the roof coating are frequent causes. Regular inspections can catch these issues before they turn into major leaks.

