Ice dams are more than just a winter nuisance; they're a destructive force that can cause serious damage to your roof, gutters, and home interior. When that thick ridge of ice forms at the edge of your roof, it traps melting snow, forcing water under your shingles and into your attic. The culprit isn't just the snow—it's heat escaping from your home, creating an unevenly heated roof.
This guide will walk you through both long-term prevention strategies and immediate solutions for dealing with these icy menaces. By understanding the root cause—heat loss—you can implement effective fixes that protect your home all winter long.
Key Takeaways for Ice Dam Prevention
- Insulation is Key: The most effective long-term solution is to heavily insulate your attic floor to an R-value of R-49 to R-60. This creates a thermal barrier that stops heat from your living space from reaching the roof deck.
- Ventilation is Your Ally: Proper attic ventilation, with intake vents at the soffits and exhaust vents at the ridge, creates a constant flow of cold air that keeps the roof sheathing cold and prevents snow from melting.
- Seal All Air Leaks: Small gaps around pipes, light fixtures, and attic hatches can funnel significant amounts of warm air into your attic. Sealing these leaks is a critical step in controlling heat loss.
- Maintenance Matters: Clean gutters and a clear roof edge are your first line of defense. Use a roof rake to remove the first few feet of snow from your eaves to eliminate the "fuel" for ice dams.
- Call Professionals for Removal: Never use brute force (hammers, axes) to remove an existing ice dam. Professionals use low-pressure steam, which safely melts the ice without damaging your shingles.
When it comes to stopping ice dams, the solution isn't about tackling the ice itself. It's about getting to the root of the problem. The entire strategy boils down to three key things: beefing up your attic insulation, making sure you have proper ventilation, and sealing off air leaks from your house into the attic.
Think of it as a three-legged stool. If one leg is weak, the whole system fails. Get all three right, and you’ll keep your entire roof the same temperature as the cold outdoors, stopping that destructive melt-freeze cycle dead in its tracks.
Your Guide to Preventing Costly Ice Dams
So, what exactly is an ice dam? It’s that thick ridge of ice that builds up along the edge of your roof, acting like a literal dam that stops melting snow from draining off. The water has nowhere to go but backward, forcing its way under your shingles and into your home. The result is often serious damage to your ceilings, walls, and insulation.
The real culprit isn't the snow or the cold—it's an unevenly heated roof.
The problem starts inside your house. Heat from your living space leaks up into the attic, warming the underside of your roof deck. This is enough to melt the snow on your roof from the bottom up. That meltwater then trickles down until it hits the much colder eaves and gutters, where it promptly refrizes. More water flows, freezes, and the dam grows.
This isn't just a minor annoyance; it's a destructive force. After the big blizzard in Pittsburgh back in February 2010, countless homes suffered from ice dam damage as temperatures hovered in the teens, creating the perfect storm for this very problem. You can get a deeper technical understanding from this J.S. Held report on ice dam formation.
This image shows exactly what we're talking about—a solid barrier of ice and icicles at the roof's edge, holding back a pool of water.
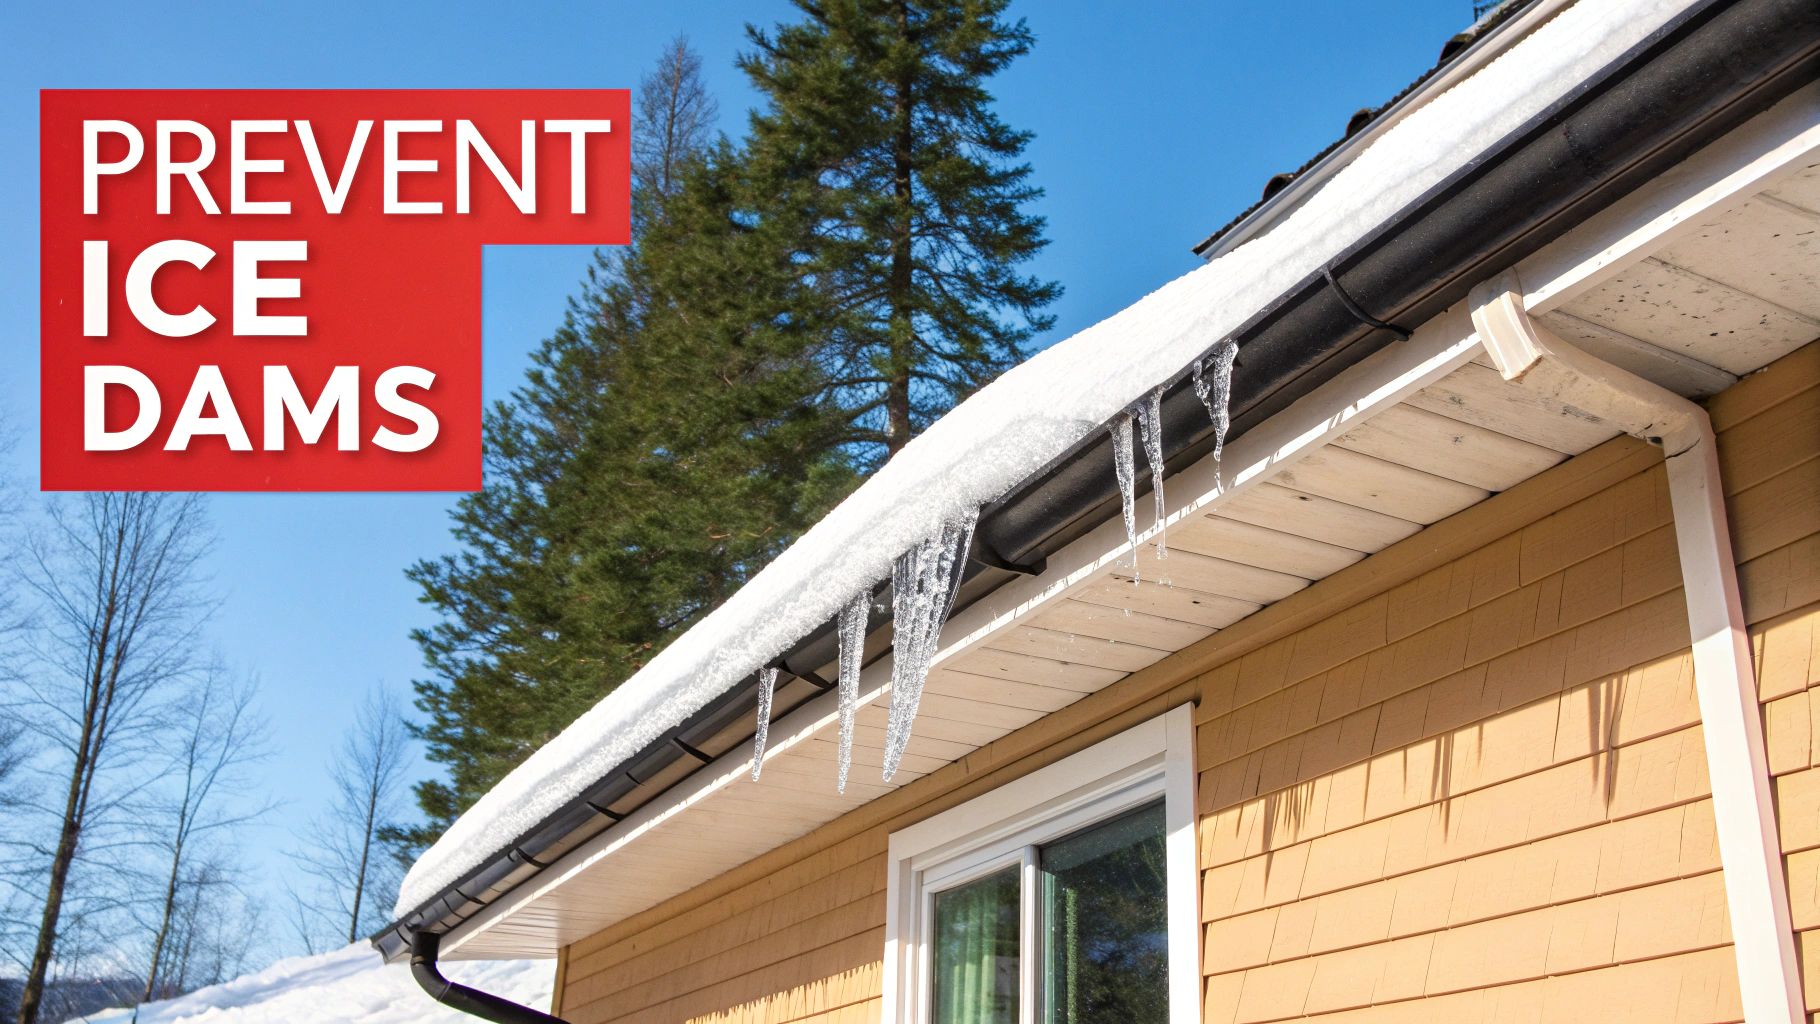
What you're seeing isn't just ice. It's a clear sign that your home is losing expensive heat, creating a mess on the outside.
Key Ice Dam Prevention Strategies at a Glance
| Prevention Strategy | Primary Goal | Effectiveness |
|---|---|---|
| Improve Attic Insulation | Stop heat transfer from the living space to the attic. | Very High |
| Optimize Roof Ventilation | Keep the roof deck cold with outdoor air circulation. | Very High |
| Seal Attic Air Leaks | Block pathways for warm interior air to enter the attic. | High |
| Roof & Gutter Maintenance | Ensure meltwater has a clear path to drain away. | Moderate |
| Use Heat Cables | Create channels for meltwater to escape existing ice. | Situational |
As you can see, a proactive, whole-system approach is far more effective than just reacting to the ice after it forms.
Mastering Attic Insulation to Stop Ice Dams
Let's get straight to the point: escaping attic heat is the number one reason ice dams form on your roof. When your attic is poorly insulated, it acts like a slow oven right under your roof sheathing. It constantly warms the roof deck, melting snow from the bottom up, even when the air outside is freezing cold.
Think of proper insulation as a high-end cooler, but in reverse. Instead of keeping cold in, its job is to keep the heat from your house out of the attic. This keeps the underside of your roof cold, preventing the melt-freeze cycle that creates ice dams. We're going to move past the generic "add more insulation" advice and get into what actually works.
Why R-Value is Your First Line of Defense
Insulation's performance is measured by its R-value—basically, its ability to resist heat flow. The higher the number, the better it is at stopping heat in its tracks. For preventing ice dams, a high R-value on your attic floor is the most critical and powerful tool you have.
Arizona's climate is incredibly diverse, so insulation needs can vary wildly. A home in Phoenix has very different priorities than one in the high country. But when it comes to stopping ice dams in places like Flagstaff, the goal is always the same: create a thick, unbroken thermal barrier between your living space and the attic.
- For colder regions like Flagstaff, Prescott, and the White Mountains: The U.S. Department of Energy recommends an attic insulation level between R-49 and R-60. This is a serious amount of insulation, and it's what's needed to keep the roof deck cold.
- For warmer areas: While the main concern is usually keeping summer heat out, having enough insulation (like an R-38) is still key for overall energy efficiency and prepares a home for those rare but damaging winter storms.
Here's a quick gut check you can do right now. Pop your head into your attic. Can you easily see the tops of the wooden ceiling joists? If so, you definitely don't have enough insulation. A properly insulated attic should look like a deep, seamless sea of fluffy material completely burying the joists.
You can learn more about how to choose the right R-value for your roofing system in our detailed guide.
Breaking Down the Different Types of Insulation
Once you decide to upgrade, you'll run into a few common materials. The best choice really depends on your attic's layout, your budget, and whether you're tackling this yourself or calling in a pro.
| Insulation Type | Pros | Cons | Best For |
|---|---|---|---|
| Blown-In Cellulose/Fiberglass | Fills every nook and cranny for a seamless blanket. Professionals can install it quickly. | Can settle over many years, which reduces its R-value. It's also a messy DIY job. | Topping off what you already have or for attics full of tricky corners. |
| Fiberglass Batts (Rolls) | Affordable and pretty straightforward for a DIYer to install in wide-open attic spaces. | Tough to fit tightly around pipes or wiring, which leaves gaps where heat can escape. | Attics with standard, evenly spaced framing and few obstructions. |
| Spray Foam Insulation | Offers the highest R-value per inch and air-seals the space at the same time. | By far the most expensive option. Requires a professional due to the chemicals involved. | Cathedral ceilings and creating a totally sealed, conditioned attic. |
No matter what material you pick, meticulous installation is everything. Gaps, compressed areas, or voids completely undermine the R-value, creating hot spots on your roof that are a direct invitation for snowmelt and, eventually, ice dams.
Spotting Bad Insulation From Your Driveway
You don't always have to climb into a dusty attic to know there's a problem. After a light snowfall, your roof will tell you everything you need to know. Just look for these clues from the ground:
- Patchy Snowmelt: See spots on the roof where snow has melted clean off while other areas are still covered? That’s a classic sign of an insulation "hole" right underneath, letting heat pour through.
- A Wall of Icicles: A few small icicles are normal. But if you have a massive, menacing curtain of them hanging off the eaves, it’s a clear signal that a huge amount of water is melting and refreezing—a direct result of major heat loss.
- The No-Frost Roof: On a cold, clear morning, look around your neighborhood. If everyone else's roof has a layer of frost on it but yours is bare, it means your roof is too warm for frost to form. That's another dead giveaway that heat is escaping.
Making sure your insulation and ventilation are up to snuff is about more than just preventing ice dams. A broader understanding building code requirements can help ensure your home is not only protected but also meets local standards for safety and energy efficiency.
Keep Your Roof Deck Cold With Ventilation and Air Sealing
Insulation is the heavy lifter in the fight against ice dams, but it can't win the battle alone. It needs a crucial partner: a balanced ventilation and air-sealing strategy. Think of it this way—if insulation is the shield that blocks heat from rising, ventilation is the cooling system that whisks away any heat that does sneak through.
This one-two punch is what keeps your roof deck consistently cold. Without it, you're just trapping heat right where you don't want it, inevitably leading to snowmelt and the start of an ice dam.
The Power of Bottom-to-Top Airflow
Proper attic ventilation isn't just about moving air around; it’s a carefully designed system that relies on a simple principle of physics: hot air rises. The whole idea is to create a continuous, gentle flow of cold outside air that enters low and exits high. This flow constantly washes the underside of your roof sheathing with chilly air, keeping it the same temperature as the outdoors.
- Intake Vents (The "Bottom"): These are almost always soffit vents, located under the eaves of your roof. They are the entry point for cold, fresh air.
- Exhaust Vents (The "Top"): These are usually ridge vents running along the peak of the roof, but you might also see gable or mushroom-style vents. They provide the escape route for any warmer air that has risen to the top of the attic.
This constant circulation is the key. When the roof is as cold as the air around it, the snow on top simply has no reason to melt from underneath, shutting down the ice dam formation process at its source.
Keeping the Airways Clear
Of course, a ventilation system is only as good as its airflow. One of the most common mistakes I see—made by homeowners and even sloppy installers—is blocking the soffit vents with insulation. When you push insulation right up against the eaves, it’s like putting a cork in your intake system. It completely chokes off the airflow.
This is where insulation baffles (sometimes called rafter vents) become absolutely essential. These simple plastic or foam channels get installed against the underside of the roof deck right at the eaves. They create a protected airway for air to travel from the soffit vents up into the attic, even when you have deep insulation piled all around them.
A quick visual check can tell you a lot. On a safe, dry day, carefully peek into your attic at the lowest points where the roof meets the walls. If you see insulation packed tightly against the wood, your ventilation is almost certainly choked off.
This simple process flow visualizes the key steps for ensuring your attic's thermal boundary is secure.
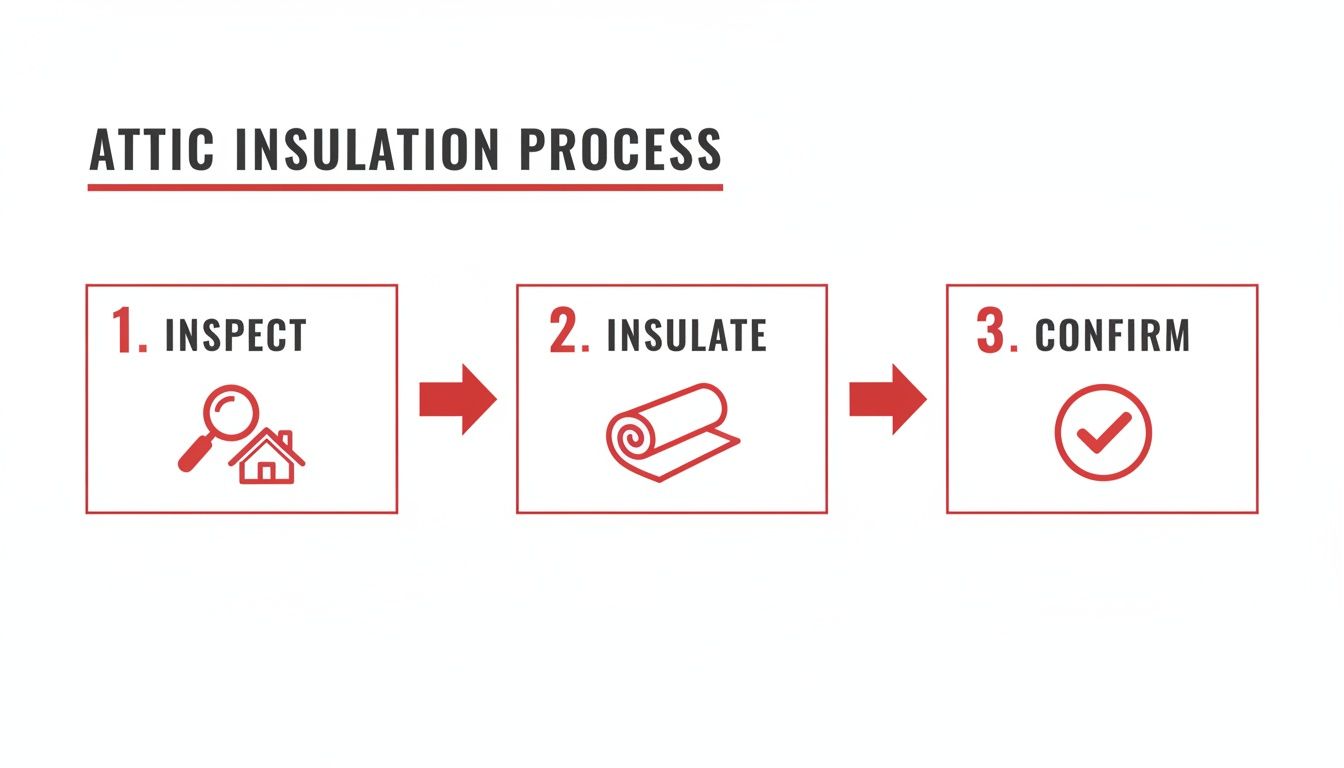
The graphic really drives home the point that confirming proper airflow and sealing leaks are just as important as the insulation itself.
The Hidden Enemy: Air Leaks
While ventilation manages the overall attic environment, air sealing tackles the problem at its source: your living space. You would be absolutely shocked at how much warm, moist air escapes into your attic through tiny, unseen gaps and cracks in the ceiling. These leaks, known as thermal bypasses, act like little chimneys, funneling heat directly to the underside of your roof.
Research from the Pacific Northwest National Laboratory confirms that proper attic ventilation and air sealing are the ultimate defense. Experts stress that a cold roof requires a complete seal of the ceiling plane, backed by deep insulation and clear soffit-to-ridge airflow guided by baffles. In fact, field data collected over 20 years shows that while no amount of insulation guarantees zero ice dams, getting your attic to an R-60 level can slash a home's vulnerability by 70%. You can learn more about these critical findings on ice dam prevention strategies.
Your DIY Attic Air-Sealing Checklist
Finding and plugging these leaks is one of the most cost-effective things you can do to stop heat loss. Grab a flashlight, some caulk, and a can of expanding foam sealant, and get ready to hunt for these common culprits:
- Around Plumbing Stacks and Vents: Check where any pipes (plumbing vents, furnace flues) go through the attic floor. These spots are notorious for having large, unsealed gaps.
- Recessed Can Lights: Older "can" lights are a major source of heat loss. If they aren't rated for direct contact with insulation (non-IC rated), you absolutely must build a protective, fire-safe box around them before sealing and insulating.
- The Attic Hatch or Pull-Down Stairs: Your attic access is often a huge leak. Add weatherstripping around the edges and attach a piece of rigid foam board insulation to the back of the door or hatch cover.
- Wiring and Electrical Boxes: Look for any holes drilled for electrical wires that pass through the top plates of your interior walls into the attic. These gaps are small but numerous.
- Chimney Chases: The gap between the chimney masonry and the wood framing is a massive pathway for air to travel from your basement all the way to the attic. This needs to be closed off properly with fire-rated sealant and metal flashing.
By systematically sealing these leaks, you dramatically reduce the amount of heat your ventilation system has to deal with. Together, air sealing and ventilation create a powerful, integrated defense against ice dams.
Keep Your Roof and Gutters Clear
While tackling the heat loss from inside your attic is the ultimate long-term fix, what you do on the outside of your house is just as critical. Think of it as your first line of defense. Simple, proactive maintenance makes it incredibly difficult for ice dams to ever get started. These aren't one-and-done fixes; they're essential habits for anyone living where snow is a possibility, even in Arizona's high country.
It might surprise you, but one of the biggest culprits behind ice dams is clogged gutters. When last fall's leaves, twigs, and gunk are still crammed in there, melting snow has nowhere to go. It just pools up right at the edge of your roof, freezes solid, and an ice dam is born.
Clean Gutters Are Non-Negotiable
Your gutters and downspouts are the drainage system for your entire roof. If that system is blocked, you're just asking for trouble. The trapped water doesn't just freeze into a heavy, damaging block of ice—that ice puts an enormous amount of weight on your eaves and can literally pull the gutters right off your home.
This is why a thorough gutter cleaning every autumn is an absolute must. You have to get it done after most of the leaves have fallen but before the first hard freeze sets in.
- Get the Gunk Out: Grab a ladder, a gutter scoop, and a bucket. You need to physically remove all the leaves, pine needles, and sediment that have built up.
- Flush the System: Once the big stuff is gone, run a garden hose through the gutters and downspouts. This will tell you if there are any hidden clogs farther down the line.
- Inspect as You Go: While you're up there, look for any loose hangers, leaky seams, or sagging sections. Your gutters need to be properly sloped to drain effectively.
Keeping your gutters clear is frontline defense. Blockages trap melting snow right where it's most likely to refreeze. Under the right conditions, an ice dam can weigh over 1,000 lbs from a single storm, causing devastating damage. The Ohio Department of Commerce has some great insights on how quickly this can happen during freeze-thaw cycles.
For a full list of seasonal tasks to keep your roof in prime condition, you can follow our detailed roof maintenance checklist.
Learn to Use a Roof Rake Correctly
Another fantastic tool is the roof rake. Its job is simple: pull the snow off the lower part of your roof before it can melt and turn into an ice dam. By clearing just the first few feet of snow from the eaves, you take away the fuel that ice dams need to form and grow.
But there's a right way and a wrong way to do this. If you get too aggressive or use the wrong tool, you can easily scrape off the protective granules on your shingles, which is a one-way ticket to a leaking, deteriorating roof.
Pro Tip: Never, ever use a metal shovel or a garden rake on your roof. You will absolutely cause damage. Stick to a purpose-built roof rake—they have long, extendable handles and little wheels or bumpers on the blade to keep it from digging into your shingles.
Here's how to do it safely and effectively:
- Safety First: Plant your feet firmly on the ground. Never use a roof rake while standing on a ladder. The push-pull motion is a perfect way to lose your balance and take a nasty fall.
- Work Methodically: Stand back from the house and pull the snow straight down off the roof, not sideways. Work your way along the eaves in manageable sections.
- Don't Overdo It: You only need to clear the first 3 to 4 feet of snow from the edge of the roof. That’s the cold zone where the ice forms. Trying to clear the entire roof is unnecessary and can put you in an unsafe position.
This one-two punch of clean gutters and smart snow removal is a powerful way to manage your roof's exterior and stop ice dams before they even start.
When Heat Cables and Protective Barriers Make Sense
Let’s be clear: fixing the root causes of ice dams—poor insulation, air leaks, and shoddy ventilation—is always the best way to solve the problem for good. But I've been on enough roofs to know that's not always simple. Some homes have incredibly complex rooflines, chronic trouble spots, or structural quirks that make a complete fix a real headache.
When you're in that situation, you need a different game plan. That's where secondary lines of defense, like heat cables and special protective barriers, come into the picture.
Think of these as treating the symptoms instead of curing the disease. They don't stop heat from escaping your attic, but they do an excellent job of managing the ice that forms as a result, keeping water from ending up in your living room. They’re reactive tools, no doubt, but for some houses, they're an essential piece of the puzzle.
Using Heat Cables for Targeted Trouble Spots
You’ve probably seen them before—those zigzagging electrical wires fastened to the edge of a roof. Those are heat cables, sometimes called heat tape or de-icing cables. When you flip them on, they generate just enough low-level heat to melt channels through the ice.
This gives the trapped water a clear path off the roof and into the gutters, stopping it from backing up under your shingles. It’s a simple concept that works pretty well.
But it’s crucial to understand what they are and what they aren't. Heat cables are a bandage, not a cure. They will add to your electricity bill and only work when they're turned on. They do absolutely nothing about the escaping attic heat that’s causing the snow to melt in the first place.
If you have a persistent problem area and decide heat cables are the right move, proper installation is everything. Get it wrong, and they're just expensive roof decorations.
- Create a Zigzag Pattern: The cable needs to run in a zigzag pattern along the eaves, extending just past the exterior wall of your house. This simple pattern is key because it covers more surface area, melting broader channels for the water.
- Run Them Into Gutters and Downspouts: This is the mistake I see all the time. People stop the cable right at the roof's edge. You have to run it down into the gutters and a few feet into the downspouts. Otherwise, you just create a new ice dam in your gutters, and the problem starts all over again.
- Prioritize Safety: Heat cables and water are a risky mix without the right precautions. Always plug them into a GFCI-protected (Ground Fault Circuit Interrupter) outdoor outlet. This is a non-negotiable safety feature that will protect you from electrical shock.
Your Ultimate Failsafe: Ice and Water Barriers
While heat cables are an active, visible solution, there's a far better and more permanent protective measure: an ice and water barrier.
This is a self-adhering, rubberized asphalt membrane that a roofer installs directly onto the wood decking of your roof, right underneath the shingles. The catch? You can't just add it to your existing roof. It has to be done during a full roof replacement, which makes it a critical thing to plan for when it's time for a new roof.
The barrier is your last line of defense. Its job is simple: if an ice dam manages to form and shoves water back up under the shingles, this membrane stops it cold. It sticks directly to the wood decking and, just as importantly, forms a perfect, watertight seal around every single nail that goes through it.
An ice and water barrier is the ultimate insurance policy against ice dam leaks. It won't stop the dam from forming, but it makes it nearly impossible for the water to get inside and wreck your ceilings.
In many colder regions, including high-altitude spots in Arizona like Flagstaff, installing this kind of membrane along the eaves is now required by building codes. The standard is to have it extend from the roof's edge all the way up to a point at least 24 inches inside the home's heated exterior wall. For homes with a history of severe ice dams, any good roofer will recommend extending it even further up the roof or adding it to other vulnerable areas, like roof valleys.
It’s a one-time investment that provides powerful, passive protection for the entire life of your roof.
What to Do When an Ice Dam Has Already Formed
So, despite your best efforts, a massive ridge of ice has set up camp on the edge of your roof. Seeing that can definitely trigger some panic, but the first rule is to stay calm and, most importantly, stay safe. Whatever you do, don't make the problem worse.
This is absolutely not the time to channel your inner lumberjack. Grabbing an axe, hammer, or chisel to hack away at the ice is a surefire way to obliterate your shingles and shatter your gutters. You’ll end up with far more expensive damage than the ice dam was causing. Same goes for throwing rock salt up there; it will eat away at your metal flashing and gutters and can seriously degrade your shingles over time.
A Safe, Temporary DIY Solution
If you need a quick fix while you're waiting for a roofer, there's one trick you can try safely from the ground. This won't magically remove the entire ice dam, but it can carve out a path for the trapped water to escape, which relieves the immediate threat.
Grab a pair of old pantyhose or nylon stockings and fill one leg with a calcium chloride ice melt. I can't stress this enough: use calcium chloride, not regular rock salt (sodium chloride), because it's much less corrosive to your roofing materials.
Next, carefully toss the filled stocking onto the roof so it lies vertically across the ice dam, with the bottom end hanging over the edge. It will slowly melt a channel through the ice, giving all that pooled-up water a safe path to drain away.
Keep in mind: This is just a temporary patch. Think of it as first aid for your roof. The goal is simply to stop water from backing up under your shingles until you can get a professional to handle the real problem.
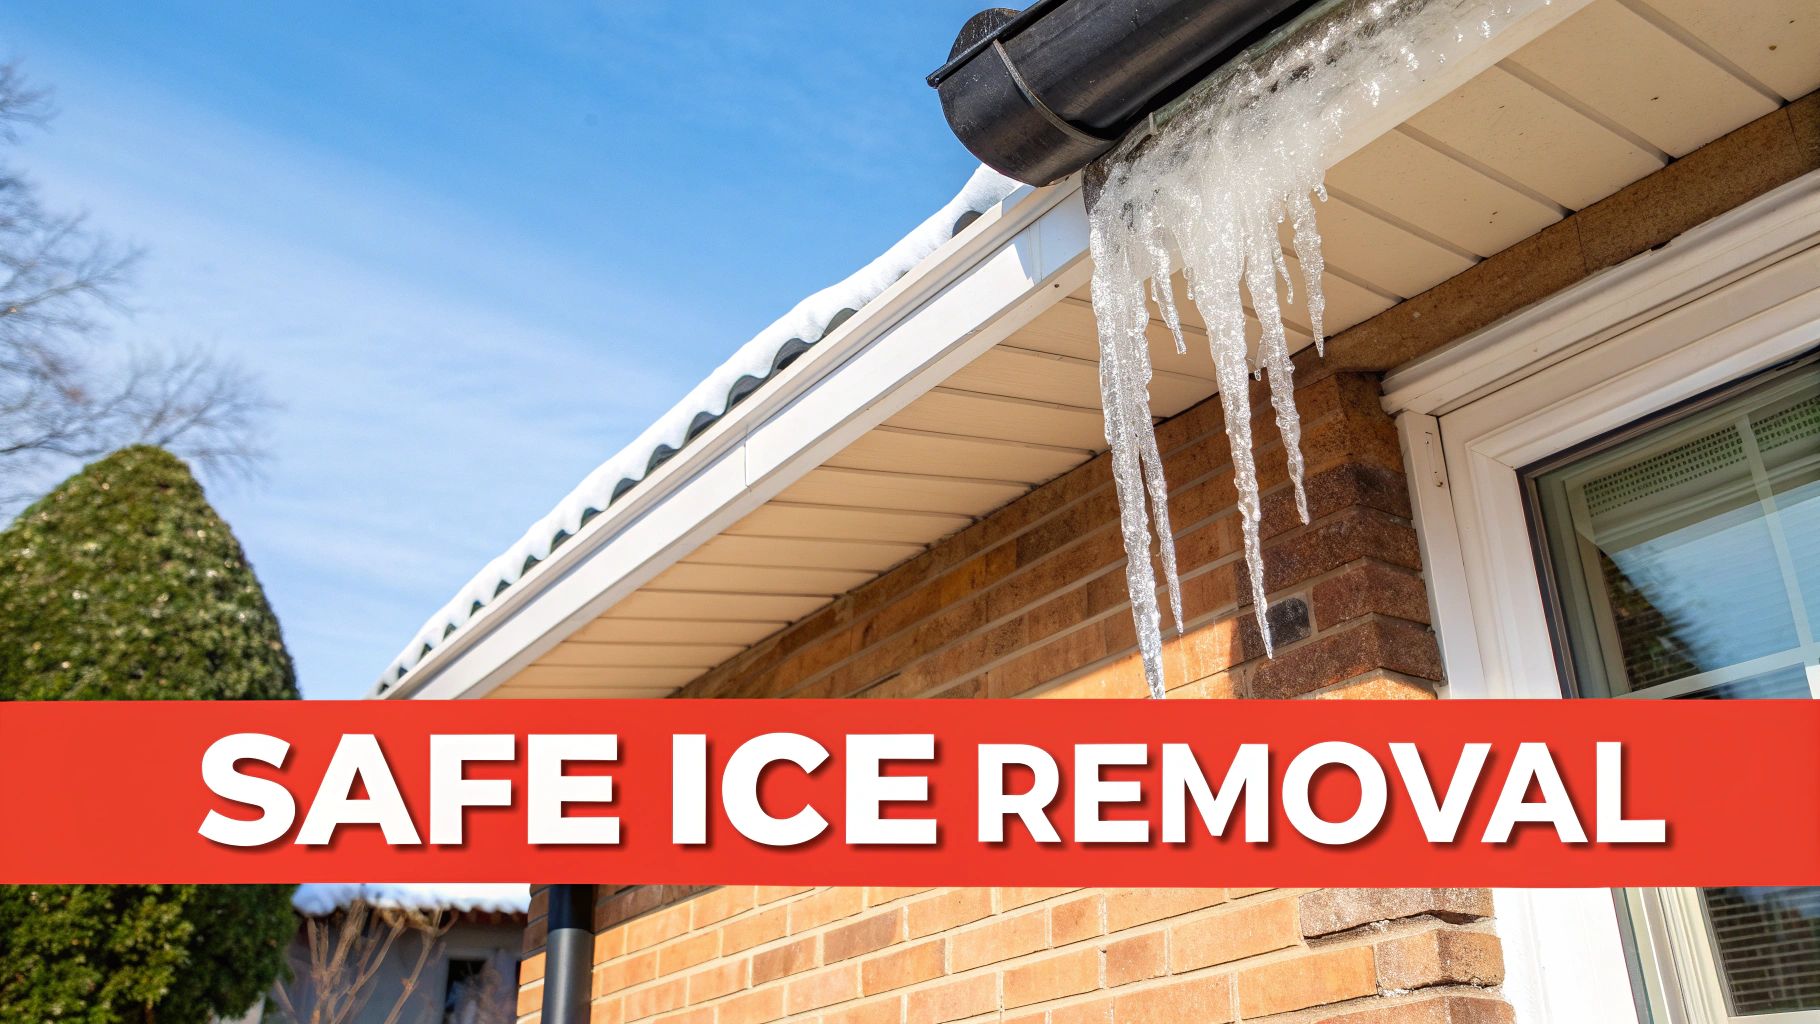
When to Call a Professional Roofer
If that ice dam is looking more like a glacier or you’re seeing water stains appear on your ceiling, don't wait. It’s time to call a professional roofer. Trying to tackle a massive ice dam yourself is incredibly dangerous—both for you and your roof.
A pro isn't going to show up with a hammer and chisel. They use specialized equipment, and the gold standard for safe removal is a commercial-grade steamer. This machine uses low-pressure, high-temperature steam to gently melt the ice away without any brute force. It's really the only method that can guarantee the ice is removed without damaging your roof in the process.
Assessing the Aftermath and Preventing a Recurrence
Once the ice is finally gone, the job isn’t quite done. Now you have to play detective and figure out how to prevent a round two.
- Check for Leaks: The very first thing to do is get into your attic and check the underside of the roof deck. Look for water stains, damp insulation, or any active drips. Catching a leak early is key. If you do find one, our essential guide to roof leak repair can walk you through the next steps.
- Identify the Cause: This is where you and your roofer need to pinpoint the root of the problem. Was it an insulation issue? Blocked soffit vents? A bathroom fan venting warm, moist air directly into the attic?
- Create a Long-Term Plan: With the cause identified, you can build a permanent solution. That might mean blowing in more insulation, installing baffles to improve airflow, or getting a handyman to seal up air leaks. This is how you stop the cycle and keep ice dams off your roof for good.
Frequently Asked Questions
What are the first signs of an ice dam?
The most obvious clues are large icicles hanging from your gutters and a thick ridge of ice building up along the eaves. Inside your home, the first sign of trouble is often a water stain appearing on a ceiling or wall near an exterior wall.
Is it safe to remove an ice dam myself?
It is not recommended. Using tools like axes, hammers, or chisels can severely damage your shingles and gutters. Getting on a ladder in icy conditions is also extremely dangerous. The safest and most effective method is professional steam removal, which melts the ice without damaging your roof.
How much does it cost to prevent ice dams?
The cost varies widely depending on your home's needs. Simple DIY air sealing with caulk and foam can cost less than $100. Professionally adding blown-in insulation to an attic typically costs between $1,500 and $3,500. While improving insulation and ventilation is an investment, it provides a permanent solution and can lower your energy bills year-round.
Will installing heat cables raise my electric bill?
Yes, heat cables use electricity and will increase your utility bill when they are turned on. They are a reactive solution for managing ice, not a preventative measure for stopping heat loss. Investing in insulation and air sealing is a more cost-effective long-term strategy.
Can I use a pressure washer to remove an ice dam?
Absolutely not. A pressure washer will strip the protective granules from your shingles, force water under them, and can even crack them in cold temperatures. This will cause severe damage and likely lead to expensive repairs. Always opt for professional, low-pressure steam removal.

