Curious about how to replace a roof? Our step-by-step guide will take you through everything from the initial inspection to the final cleanup. Understand each crucial step in the roof replacement process to ensure your home remains safe and sound.
Key Takeaways
- Replacing your roof is essential for safety, protection against weather, and enhancing home value.
- A thorough initial inspection is crucial for accurate budgeting and identifying hidden damages before replacement.
- Choosing a qualified roofing contractor and understanding warranty options are key to a successful roof replacement project.
Why Roof Replacement is Crucial
Roof replacement is not just about aesthetics; it’s a critical investment in your home’s safety and longevity. The benefits include:
- Enhanced protection against severe weather, significantly reducing the risk of leaks and structural issues.
- Acting as a barrier to water damage, safeguarding your home against environmental extremes.
- Improving your home’s curb appeal, making it more attractive to buyers.
- Increasing your home’s market value.
A new roof offers several benefits:
- Enhances energy efficiency by reflecting more sunlight and reducing heat absorption, leading to lower utility bills and helping you save money.
- Is viewed by insurance providers as less risky, potentially lowering insurance premiums.
- Reduces maintenance needs and provides peace of mind.
Roof replacement maximizes energy efficiency and long-term savings, making it a crucial home improvement project that enhances safety and supports property value. Whether planning to stay in your home or considering selling, a new roof is a wise investment.
Initial Roof Inspection and Accurate Estimates
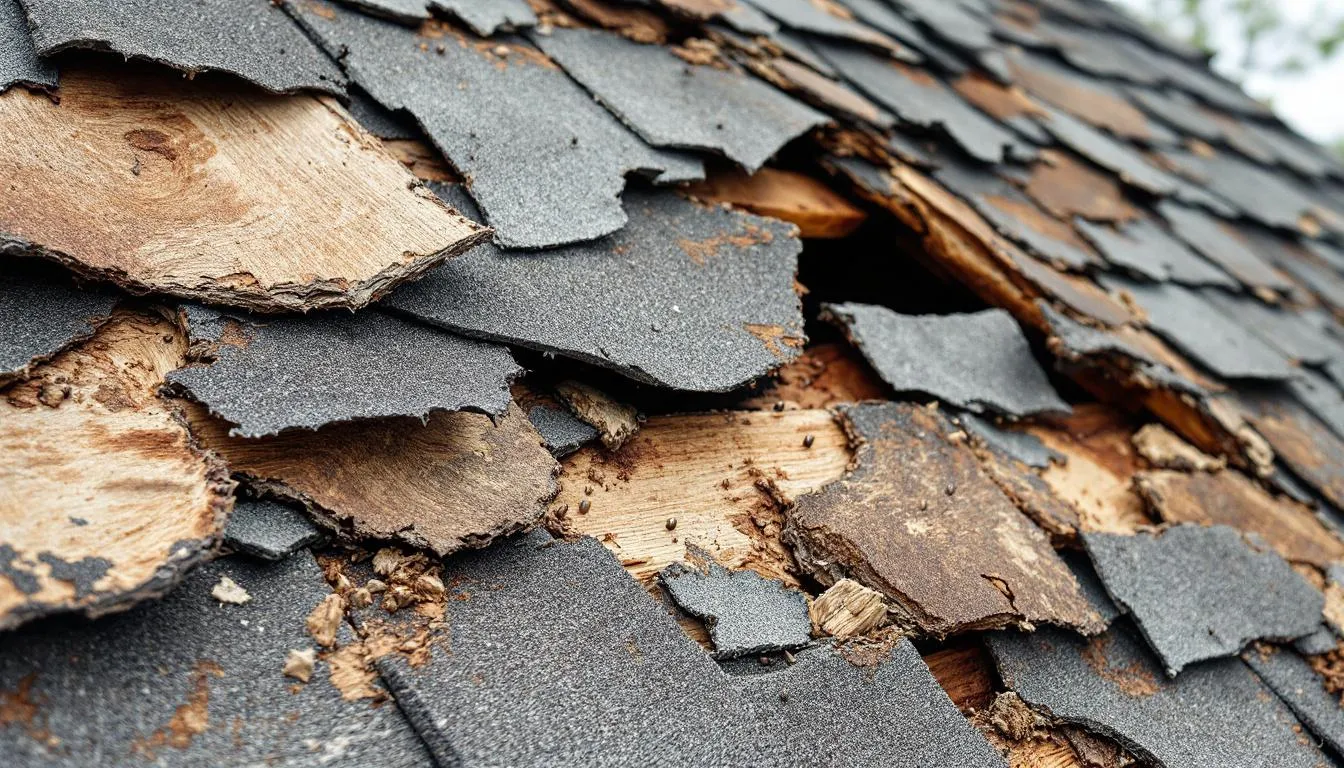
The initial roof inspection is the cornerstone of any roof replacement project. This crucial step helps identify issues that aren’t immediately visible, such as mold or rot, and provides an accurate estimate of the roof replacement costs. A comprehensive roof inspection can reveal whether your roof needs replacement due to factors like age, widespread leaks, or storm damage.
Roofing contractors will look for damages, including torn window screens, dented gutters, and a damaged roof. Homeowners should document existing damage before the roof replacement. Identifying problems early helps homeowners plan their budget more accurately for a roof replacement.
A thorough roof inspection not only helps in budgeting but also in preventing future repairs. Uncovering hidden damages early allows for timely repairs, ensuring your new roof lasts longer and performs better. This step is crucial for planning a successful roofing project.
Planning and Permits for Roof Replacement
Proper planning and securing necessary permits are vital in the roof replacement process. Licensed professionals ensure compliance with local disposal regulations and methods. Key points include:
- Old roofing materials like asphalt shingles can be recycled into road paving materials.
- Metal roofing can become new steel products.
- Donating reusable materials is a sustainable option that benefits others and keeps items out of landfills.
Homeowners typically need a permit for roof replacement, although requirements vary by location. Key points about roof replacement permits include:
- Permit costs range from $10 to several hundred dollars, depending on project size and location.
- Permitting fees, ranging from $75 to $250, should be included in the budget.
- A roof replacement permit ensures compliance with building codes.
- It also allows for necessary inspections.
Failure to secure a permit can result in fines or the need to undo unauthorized work, complicating future home sales. Professional inspections by a building inspector verify compliance with building codes, ensuring safety and quality. Proper planning and permitting avoid unnecessary complications and ensure a smooth roofing project.
Budgeting for Your Roof Replacement Project
Budgeting for roof replacement involves considering factors like roof size, materials, labor, and location. Homeowners can expect to pay between $4,700 and $10,000 for a basic roof replacement on a 1,000-square-foot house. Around 40% to 50% of the budget goes towards materials, while labor costs can account for up to 60%.
Geographical location can significantly influence material prices and labor rates:
- Areas with higher living costs may see higher roof replacement expenses.
- Structural repairs can greatly increase the overall cost of roof replacement.
- Cleaning up and disposing of old roofing materials can add costs ranging from $50 to $500.
Understanding these cost factors helps homeowners plan their budget accurately and avoid unexpected expenses. Proper budgeting ensures coverage for all aspects of the roofing project, from materials and labor to permits and cleanup, ensuring a smooth and successful replacement.
Removing Old Roofing Materials
Tear off the old roof shingles is the first physical step in the replacement process. This involves removing existing materials in sections, starting from the furthest corner towards the dump trailer. A roofing shovel is the preferred tool, effectively removing old materials like asphalt shingles.
To protect your property, consider the following measures:
- Cover flowers and shrubbery, or ensure they are properly protected.
- Attach tarps and lean wooden boards against walls to protect from falling debris.
- Cover the attic and pool.
- Move items off the patio.
- Keep vehicles on paved surfaces for added protection.
Debris management is essential for a clean and safe worksite. The process includes:
- The crew picks up debris and ensures it goes to designated areas instead of falling on landscaping.
- Gutters should be cleaned after removing sections of the old roof.
- A roll-off dumpster bin is typically used for proper disposal of old materials.
This meticulous process ensures the site is ready for installing new roofing materials.
Inspecting and Preparing Roof Decking
Once old roofing materials are removed, inspecting the roof’s structural integrity, including decking and framing, ensures it can support a new roof. Inspect the roof decking for any signs of rot or damage. Gaps greater than 1/8 inch in plank decking must be replaced to comply with installation standards.
Replacing damaged or rotting decking before installing new materials ensures a stable base. Damaged wood is replaced with new plywood sheathing or oriented strand board to maintain roof structure integrity.
Proper roof deck preparation is crucial; it should be smooth and free from gaps for a flat finish. This step ensures new roofing materials are installed on a solid and secure foundation, prolonging the roof’s life.
Installing Drip Edge and Underlayment
Installing the drip edge and underlayment is the next step in the roof installation process. The drip edge:
- Prevents water from running under shingles and seeping into the roof decking.
- Prevents wood rot by directing water away from the roof’s edge and stopping it from seeping under shingles.
- Should be made of corrosion-resistant materials.
- Should extend at least 2 inches onto the roof sheathing.
Fasten the drip edge to the roof deck with roofing nails spaced 8 to 10 inches apart. In some cases, self-adhering underlayment may have the drip edge installed over it at the eaves. A properly installed drip edge enhances the roof’s appearance by providing a clean edge for shingles.
Underlayment acts as a water-resistant barrier, ensuring a watertight seal. It is typically installed over the ice and water protector, adding an extra layer of protection. Synthetic underlayment is commonly used alongside aluminum and PVC materials for metal drip edge in construction and roofing.
This step protects the roof structure against water infiltration, setting the stage for installing roofing shingles.
Applying Leak Barriers in Vulnerable Areas
Leak barriers create a watertight seal that prevents moisture infiltration, especially in critical spots like valleys and around penetrations. Self-adhering leak barriers are generally easier to install than those requiring mechanical fasteners. Proper installation of leak barriers involves overlapping each layer to enhance water resistance.
Ice and water protection membranes are added after the drip edge to prevent ice dams in colder climates. High-quality leak barriers prevent leaks in areas with heavy rain, snow, or ice dams. The right type of leak barrier depends on the roof’s design and specific climate conditions.
This step protects your roof against potential roof leaks, especially in vulnerable areas.
Installing New Shingles and Roofing Components
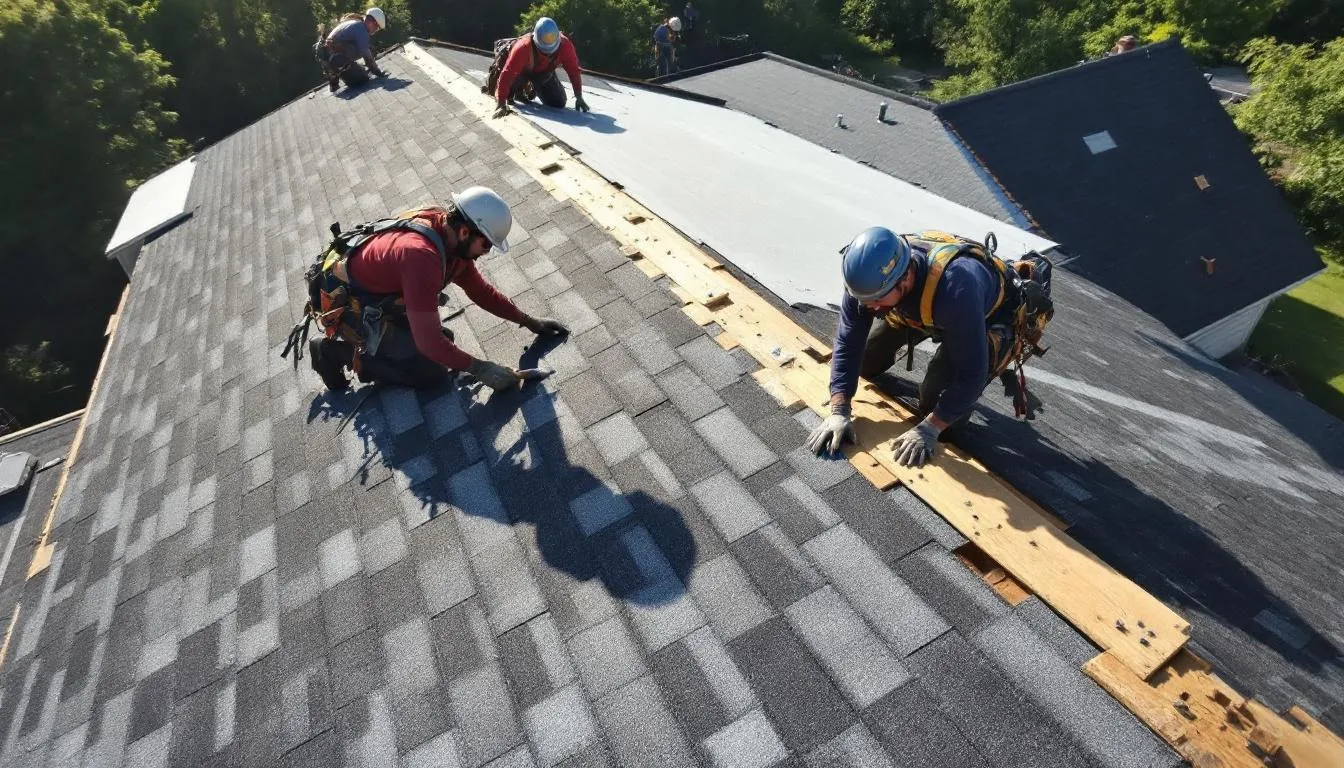
Installing new shingles and roofing components is the most visible part of roof replacement. Components of a new roof installation include:
- Roofing paper
- Shingles
- Flashing
- Vents
- For more information and insights on commercial roofing, visit the Commercial Roofing Insights & Solutions | Arizona Roofers Blog.
Apply shingles or roof tiles at the ends near the eaves for proper alignment and coverage. Follow with starter shingles to create a seal and prevent water infiltration.
Flashing methods depend on the level of protection required for different roof areas. Nails secure metal flashing in valleys, and sealing with caulk further prevents leaks. Start shingle installation with starter shingles, followed by rows from the bottom to the ridge.
New vents are added during installation to ensure adequate ventilation. High-wind resistance techniques include correct nailing of components. Proper nail placement during shingle installation maintains wind resistance and warranty coverage. This step ensures that your roof is not only aesthetically pleasing but also highly functional and durable, including the use of roof vents and ridge vents.
Adding Ridge Cap Shingles
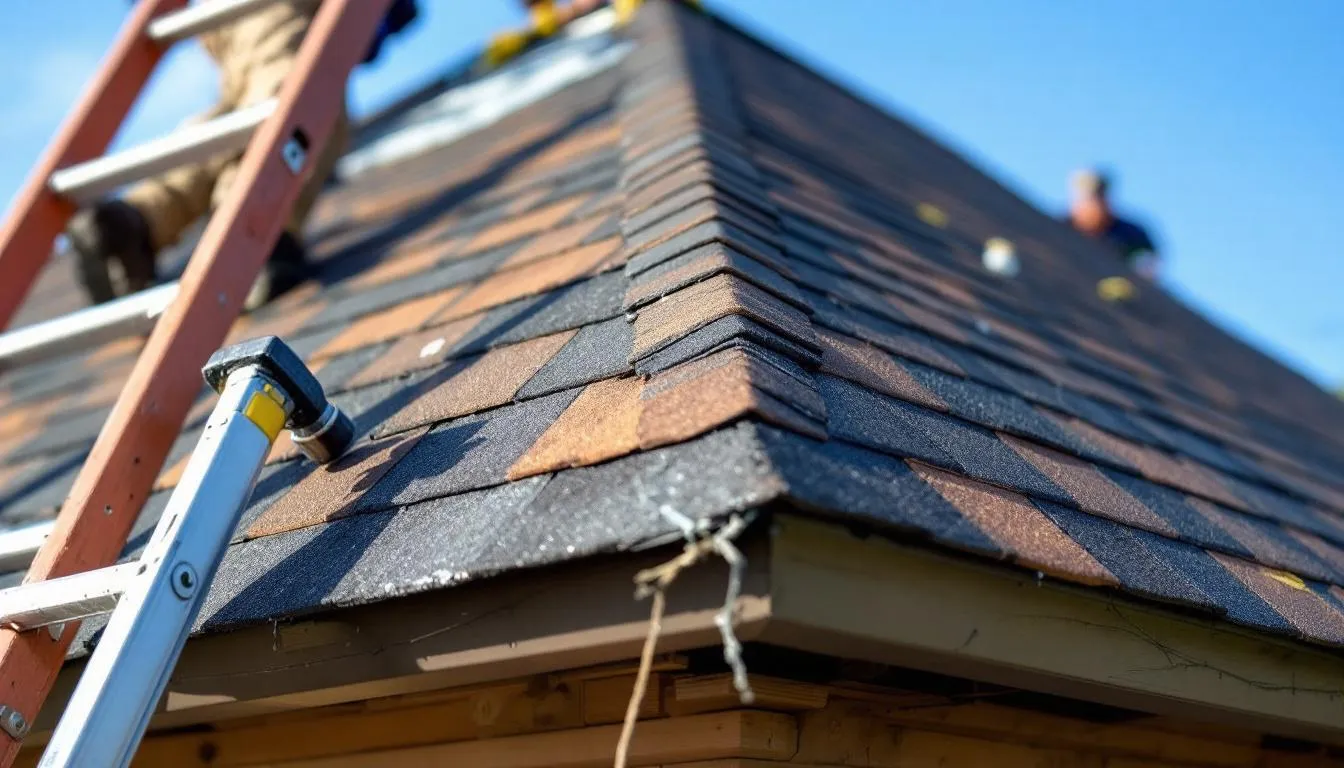
The final touch in the shingle installation process is adding ridge cap shingles. These are installed at the peak of the roof to:
- Effectively shed water down both slopes
- Cover the roof ridge where two planes meet
- Provide a watertight seal
- Prevent water and debris entry
Capping the roof ridge is important as it prevents water and debris from entering and provides a watertight seal. Ridge cap shingles should be installed starting from one end and overlapping each shingle, nailing securely. Overlapping cap shingles is essential to cover the nails of the previous cap and prevent water intrusion.
Specially designed shingles or cap tiles are used to cap the roof ridge caps, enhancing the overall durability of the roof compared to using cut standard shingles. This step ensures that your roof has a finished look and extra protection at the roof’s peak.
Final Cleanup and Inspection
After the installation is complete, thorough cleanup of debris is essential. A quality roofing contractor makes cleanliness a priority and ensures that the property remains safe. During cleanup, the crew:
- Blows off the roof, gutters, and downspouts
- Rolls up tarps
- Cleans the yard
- Checks landscaping
- Uses a magnet for nails
The final inspection involves checking for leaks, ensuring the correct installation of shingles, and verifying proper flashing. A comprehensive final inspection checks for compliance with project specifications and safety standards. Typically, the final inspection takes place the day after installation.
During the final inspection, missed debris, stray nails, or loose nails should also be checked. A post-project walk-through with the homeowner is essential to review completed tasks and address any concerns. This step ensures that everything is in order and that the homeowner is satisfied with the completed project.
Understanding Roof Replacement Warranties
Understanding the different types of warranties available for roof replacements is crucial. There are three primary types of roofing warranties:
- Standard manufacturer’s warranty: usually covers defects in materials but not installation errors.
- Workmanship warranty from the contractor: provided by the contractor and can cover installation errors, potentially for a lifetime.
- Extended manufacturer warranty.
Laminated shingles usually carry a lifetime warranty or a maximum of 40 to 50 years. Extended warranties may cover additional components and offer extended non-prorated coverage.
Certifications from major roofing material manufacturers indicate a contractor’s training and ability to offer enhanced warranty options. Regular inspections and maintenance help stay ahead of potential issues and keep the warranty valid.
Registration of the warranty is crucial as it may be a requirement for a claim to be honored. This step ensures that you are fully aware of what is covered and can make informed decisions regarding your roof replacement.
How Long Does a Roof Replacement Take?
The duration of a roof replacement project can vary significantly based on several factors. Typically, a roof replacement project takes around 1 to 3 days to complete. Skilled contractors can sometimes complete a roof replacement in as little as one day. However, the size of the roof significantly influences the duration; smaller roofs can often be completed in a day, while larger ones may take several days.
The choice of roofing material also impacts installation time. For example, asphalt shingles allow for quicker completion compared to heavier materials like slate or tile, while an asphalt shingle roof can provide a cost-effective option. Additionally, considering various roof materials and roof material can further influence your decision.
The complexity of the roof design, such as multiple angles or steep pitches, can extend the timeline due to specialized installation techniques. Weather conditions like rain or snow can disrupt work schedules and cause project delays.
Additionally, the existing condition of the roof, including multiple layers of shingles or significant structural damage, can prolong the replacement process. The experience and efficiency of the roofing crew also play a crucial role in determining how quickly the project is completed.
Choosing the Right Roofing Contractor

Choosing the right roofing contractor is a critical step in ensuring a successful roof replacement. Here are important factors to consider:
- Hire an experienced roofing contractor due to the risks and complexity involved in roof replacement.
- Ensure the contractor is licensed, insured, and certified to guarantee protection during the project.
- Select a local contractor to benefit from their familiarity with regional climate conditions, building codes, and permits, which can lead to better service.
Clear and timely communication is a sign of professionalism in a roofing contractor, reflecting their commitment to customer satisfaction. It’s wise to obtain multiple written estimates to compare the scope of work, materials, and costs before deciding on a contractor.
A comprehensive written contract is necessary to avoid ambiguities regarding project details, including materials and payment terms. By doing your due diligence, you can find a reputable contractor who will deliver quality work and ensure your roofing project is a success.
Summary
In summary, roof replacement is a vital investment that enhances your home’s safety, energy efficiency, and curb appeal. By following the steps outlined in this guide—from the initial inspection to the final cleanup and inspection—you can ensure a smooth and successful roof replacement project. Remember to budget appropriately, secure the necessary permits, and choose a reputable contractor to achieve the best results. With the right approach, your new roof will provide lasting protection and peace of mind.